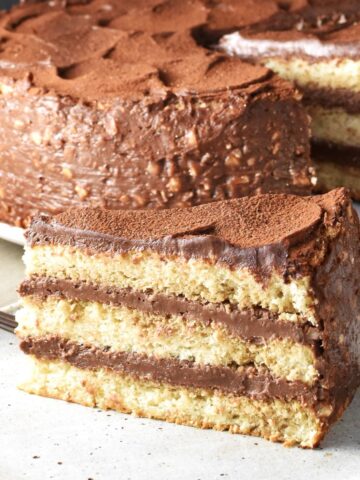
This baked Chocolate Ricotta Cheesecake is deliciously creamy, light and moderately sweet. It's a healthier chocolate cheesecake with just the right amount of chocolate flavour, easy to make, perfect for any occasion.

Even the most indulgent desserts can be made a little healthier and this Chocolate Ricotta Cheesecake is a good example. The recipe contains a mixture of naturally low in fat ricotta cheese, tangy cream cheese and some sour cream to balance out the mellow sweetness of the ricotta. There is no double/heavy cream and it contains a moderate amount of sugar so it's not overly sweet.
Ingredients
- Ricotta cheese.
- Cream cheese.
- Superfine/caster sugar.
- Dark chocolate.
- Cocoa/cacao powder.
- Vanilla extract.
- Eggs.
- Sour cream.
- Graham crumbs/digestive biscuits, cocoa and melted butter for the base.
What type of ricotta cheese to use in chocolate ricotta cheesecake
I used full fat (approx. 12-13% fat per 100 g of product) soft ricotta cheese in this chocolate cheesecake recipe. I do not recommend using reduced fat ricotta as this may produce a less creamy cheesecake.
When you open your ricotta there might be a little water inside. Remove excess moisture and weigh the cheese before making the recipe.
Note
The ricotta I am using (in the UK) may be creamier and less watery than ricotta available in the US/Canada. I have not tested this recipe using the North American equivalent (if your ricotta contains a lot of water leave it in a strainer for up to 4 hours to drain thoroughly before making the recipe).

What chocolate to use in ricotta cheesecake
I recommend using good quality dark chocolate with approx. 65-70% cocoa solids. Although this cheesecake is not overly chocolatey you will taste the dark chocolate in it. If you want your chocolate cheesecake a little less 'dark' use a combination of dark and milk chocolate.
In addition to the chocolate (which contributes to the velvety texture of this cheesecake) I also used a little cocoa powder (if you use cacao your cheesecake will have a lighter colour).
How to melt the chocolate
This is quick and easy to do but you must ensure you are using a clean, dry bowl and spatula and no moisture gets inside the bowl as the chocolate melts.
Break up the chocolate into same sized pieces and place in a heat proof glass bowl. Place over a pan of gently simmering shallow water ensuring it does not touch the bowl. Stir the chocolate as it's melting and remove the bowl from the pan when the chocolate has melted almost completely. It will finish melting away from the heat.
Alternatively heat in a microwave until it starts melting then stir until completely smooth.
As you prepare the cheesecake batter the chocolate will have had time to cool.
Equipment you'll need
- Large bowl, small bowl, spoon and spatula
- Saucepan and glass bowl for melting the chocolate
- Free-standing mixer or hand mixer
- Rolling pin or food processor (optional)
- 20 cm (8 inch) spring-form pan and parchment paper
How to prepare the spring-form pan for baked chocolate cheesecake
You may have your favourite way of doing this but I'll share mine just in case you haven't used a spring-form pan before.
Start by placing a sheet of baking paper over the bottom of the pan (the sheet can be square as it will get trimmed later, but ensure it's larger than the bottom of the pan). You can lightly grease the pan before placing the paper on top to make sure it stays in place.
Put the pan ring on and close the latch to secure it. Trim the paper all the way around so it doesn't stick out too much. After you've baked the cheesecake base lightly coat the inside of the ring with melted butter (using a pastry brush) before pouring in the filling.
How to make baked chocolate cheesecake: step-by-step
Preheat the oven to 375 F/190 C/gas mark 5. Line the bottom of your pan with parchment and lock the sides. Set aside.
1.Prepare crust ingredients: Place the biscuits in a food processor and pulse until they have the texture of fine crumbs (or use ready-made graham crumbs). Alternatively, place the biscuits in a plastic bag and crush with a rolling pin.
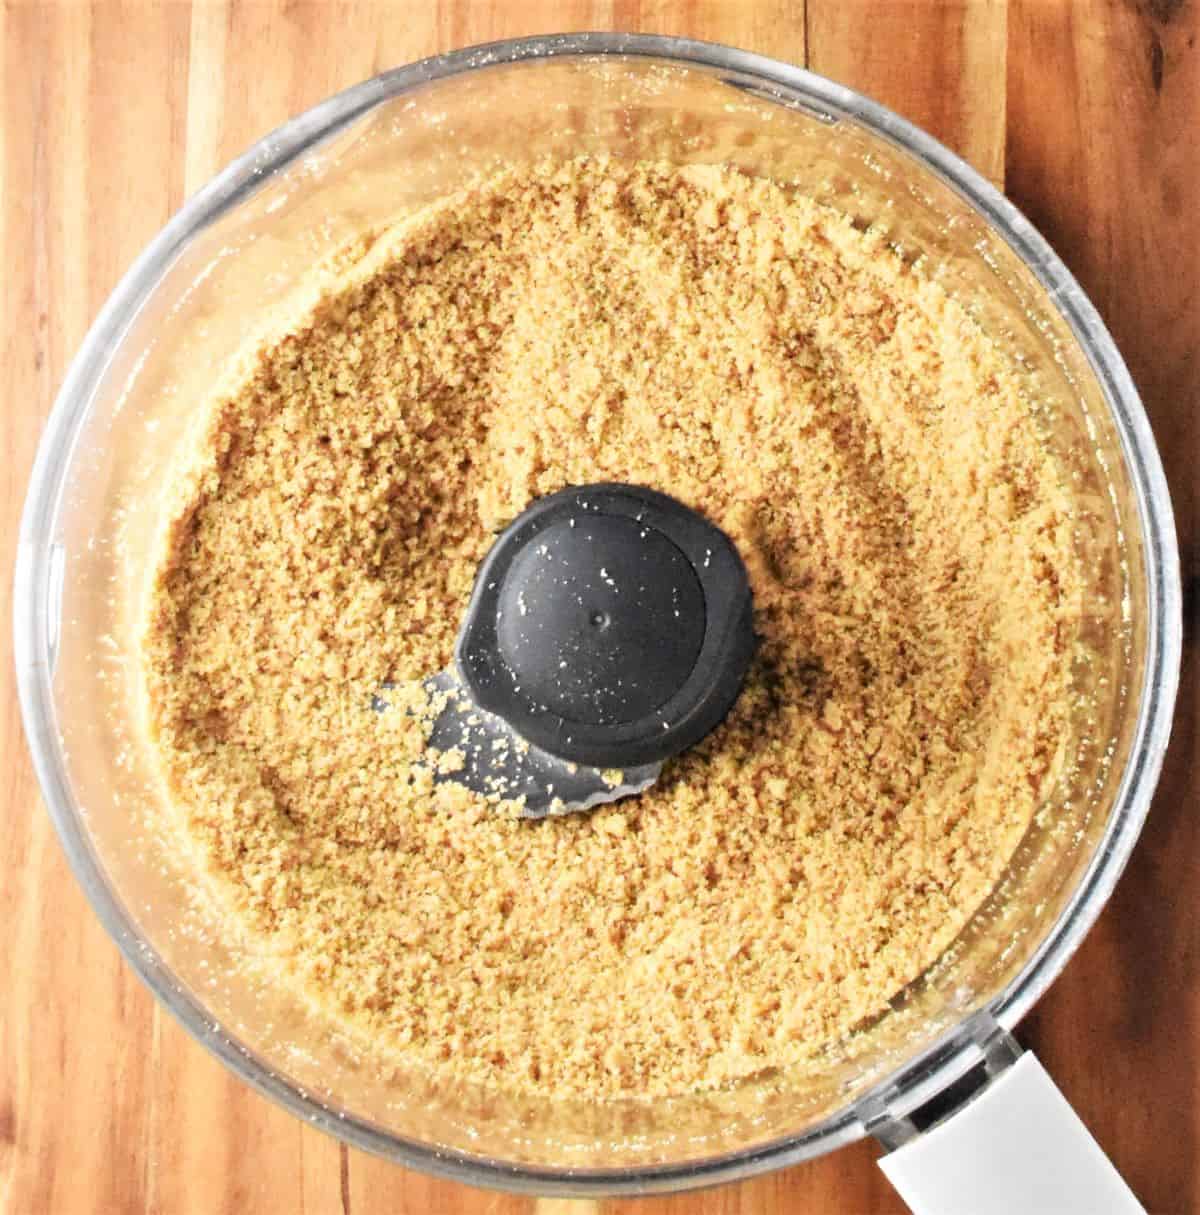
2. Combine crust ingredients: To a bowl add the crumb mixture, melted butter and 1 tablespoon of cocoa. Stir until thoroughly combined.
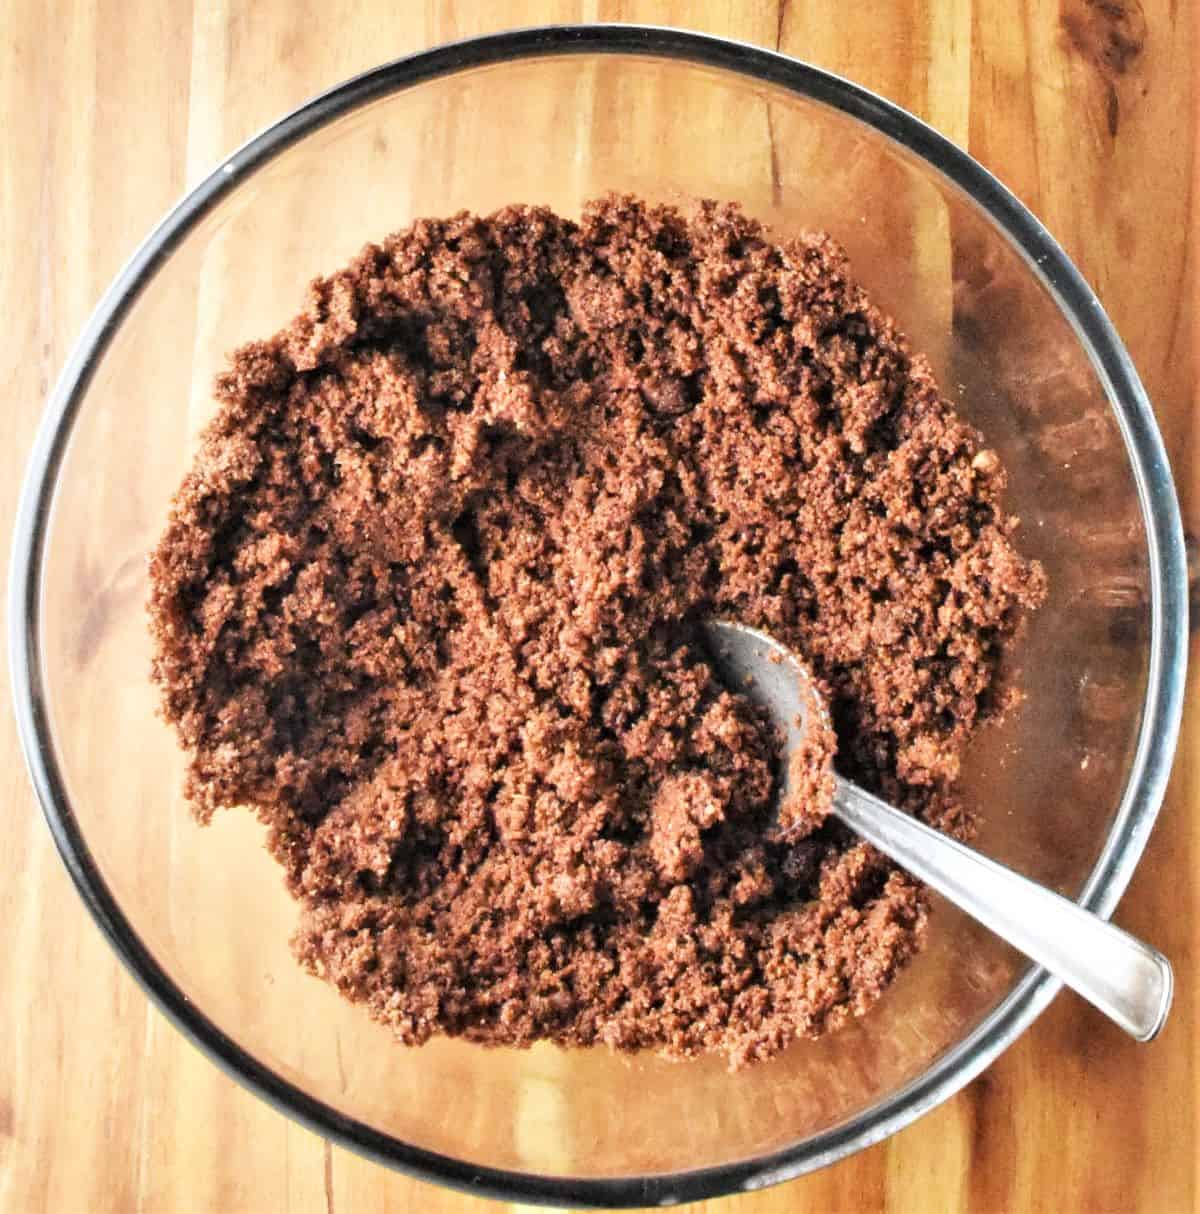
3. Make cheesecake crust: Cover the bottom of your pan with the crumb mixture pressing down a little (you can smooth out the top using the bottom of a glass).
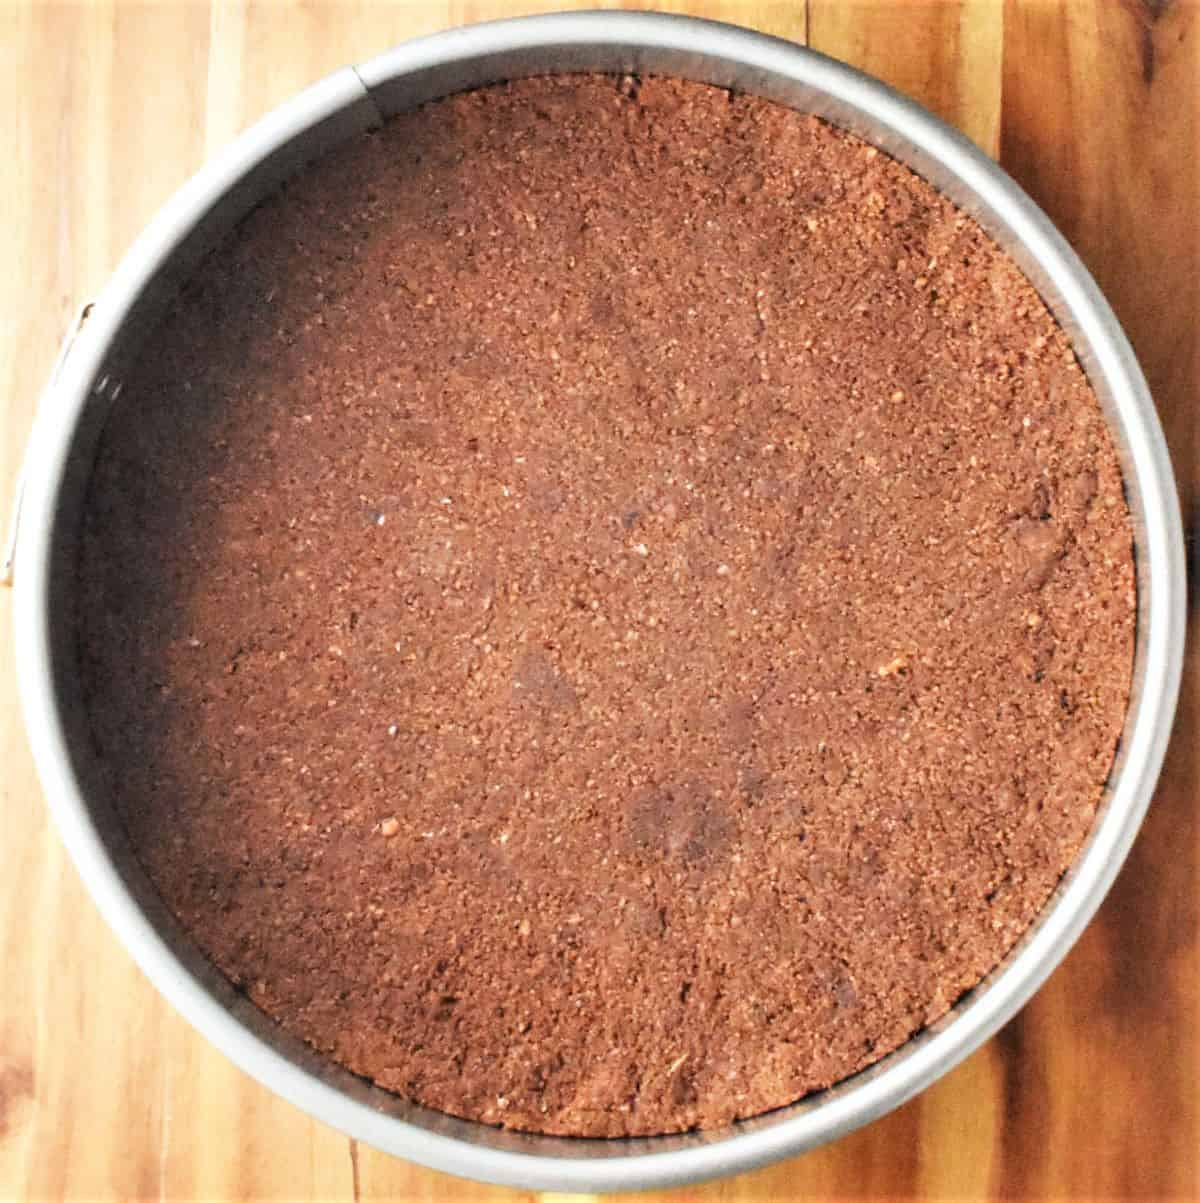
4. Bake crust: Bake in the centre of the oven for 15 minutes. Remove from the oven and set aside to cool. Increase the heat to 400 F/ 200 C/ gas mark 6. In the meantime prepare the chocolate cheesecake filling.
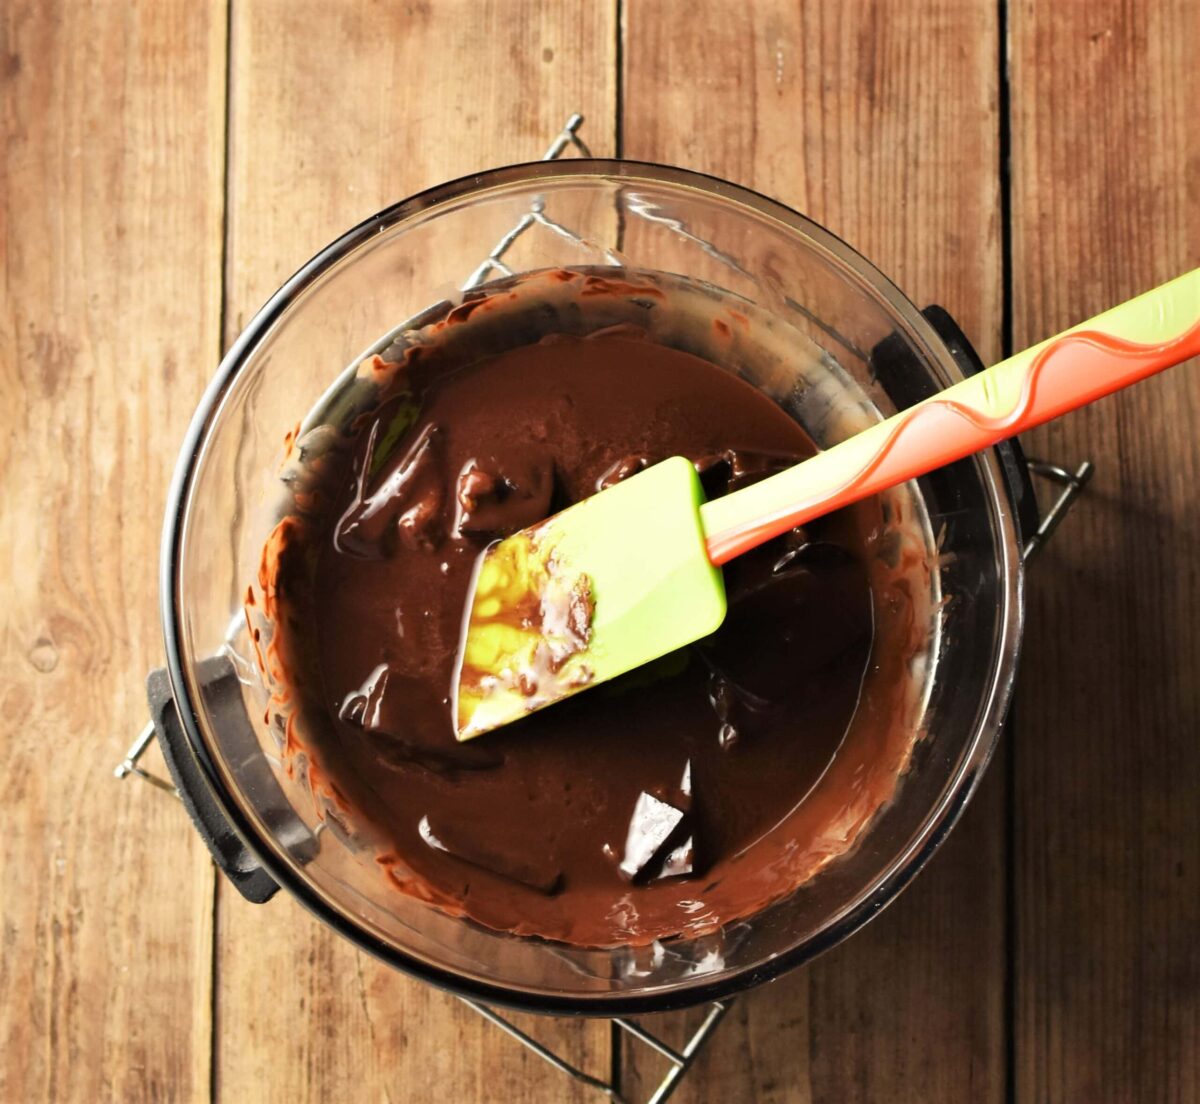
5. Melt chocolate: add pieces of chocolate to a glass bowl and place over a pot of gently simmering water, stirring occasionally. Remove the bowl from the pot when almost all the chocolate has melted (it will finish melting as you stir). Alternatively melt the chocolate in the microwave. Set aside while you prepare the rest of the ingredients.
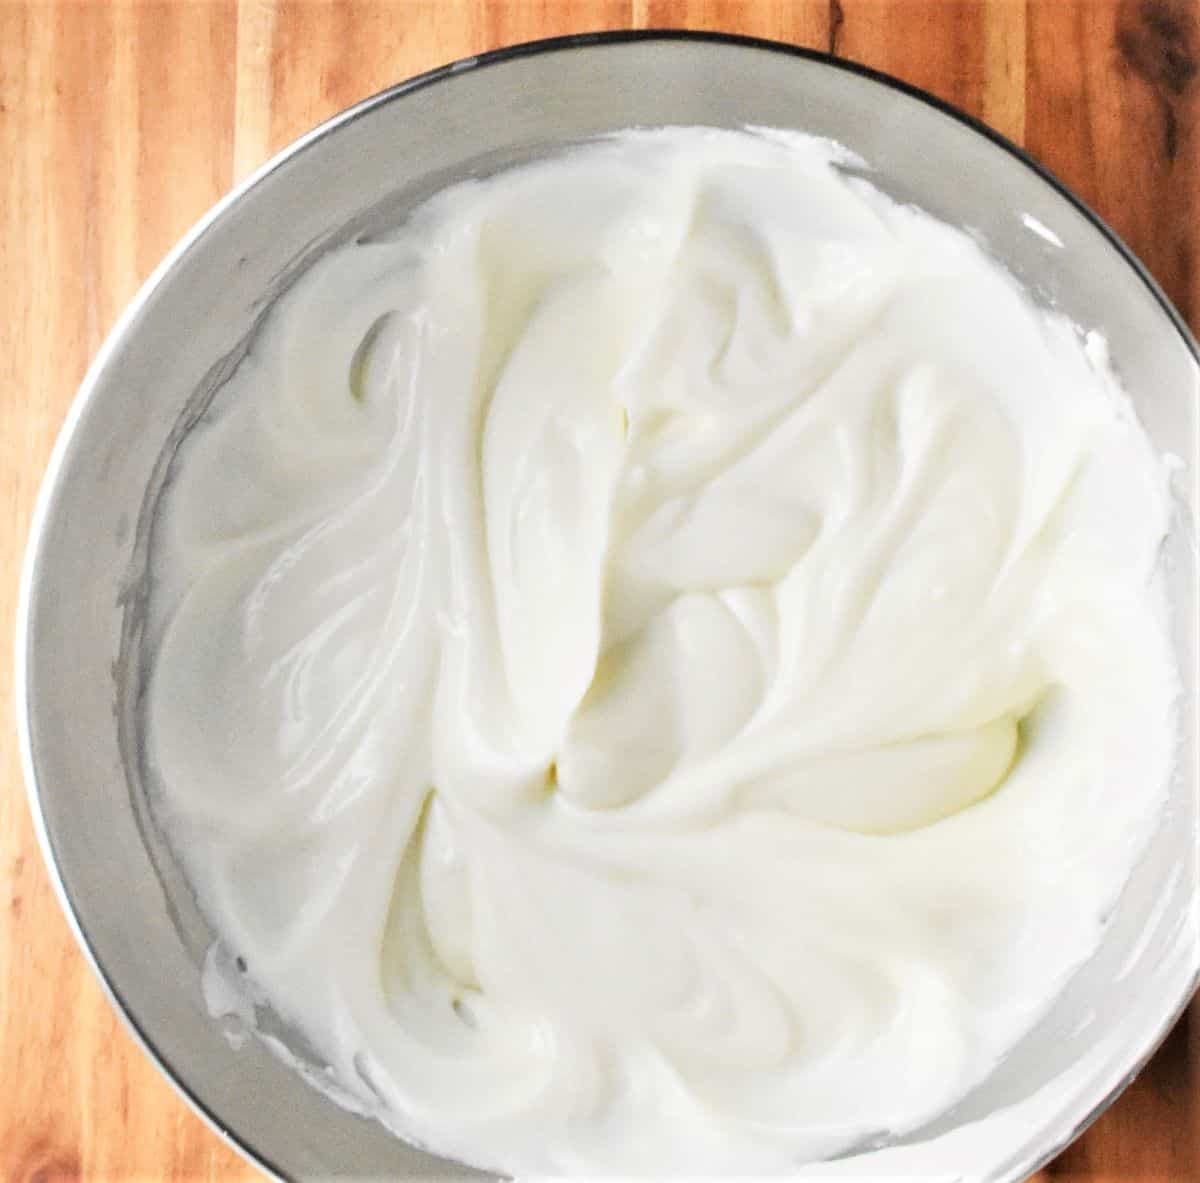
6. Beat cheese: Combine the ricotta with the cream cheese and beat (using the paddle attachment) on med-low speed gradually adding in the sugar until the mixture is smooth and creamy (1-2 minutes). Scrape the sides and bottom of the bowl as needed.
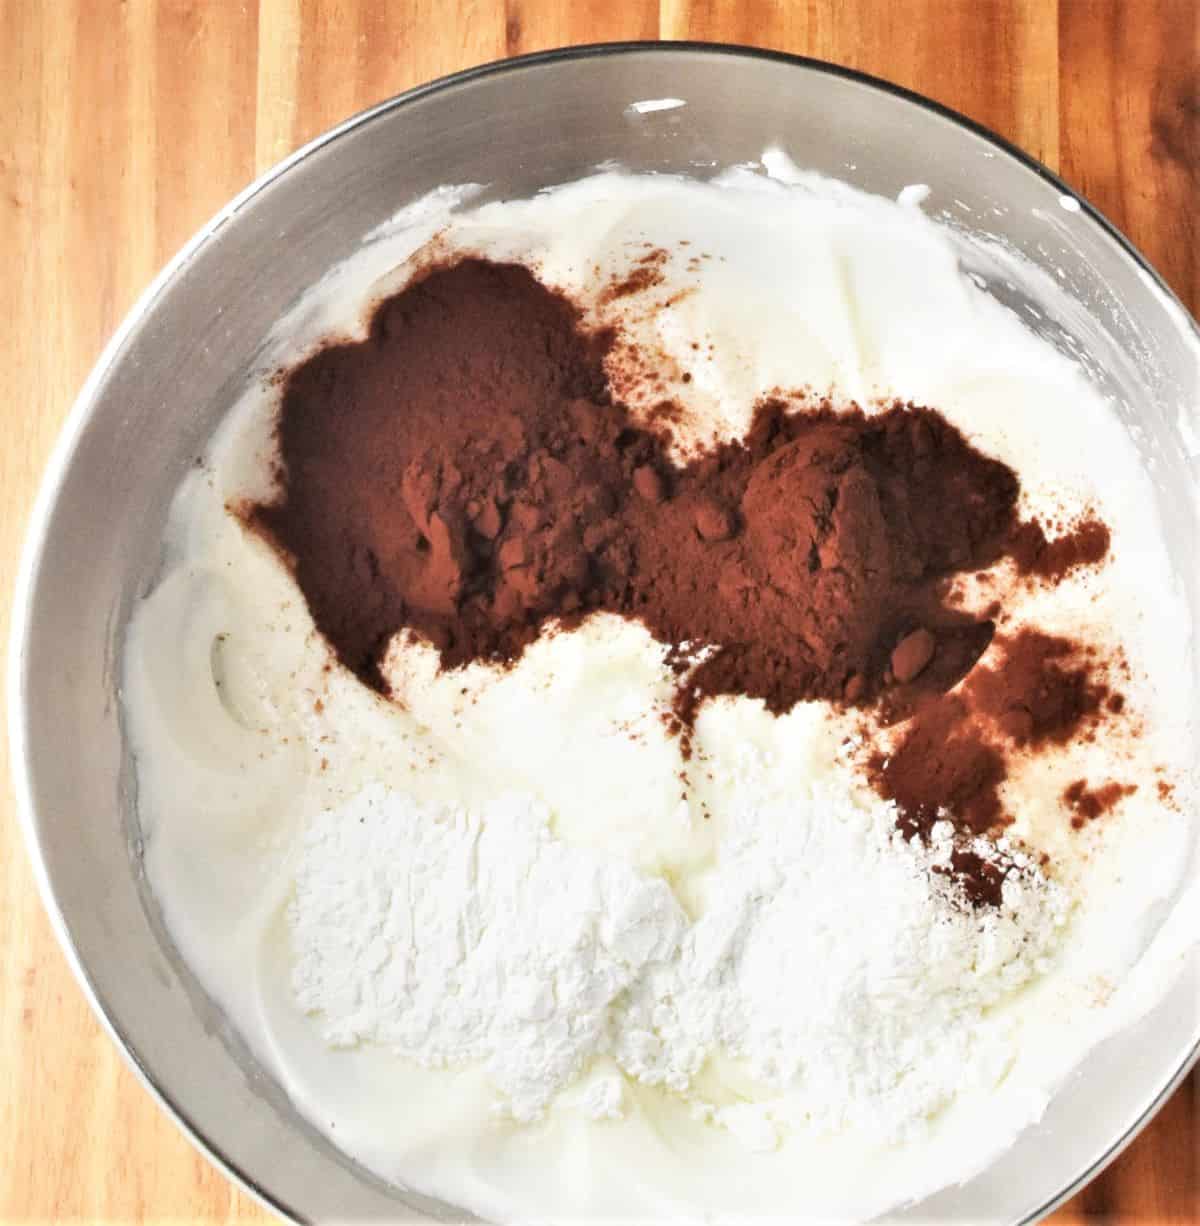
7. Add cocoa: Add the cornflour, cocoa and vanilla extract and beat only until just combined.
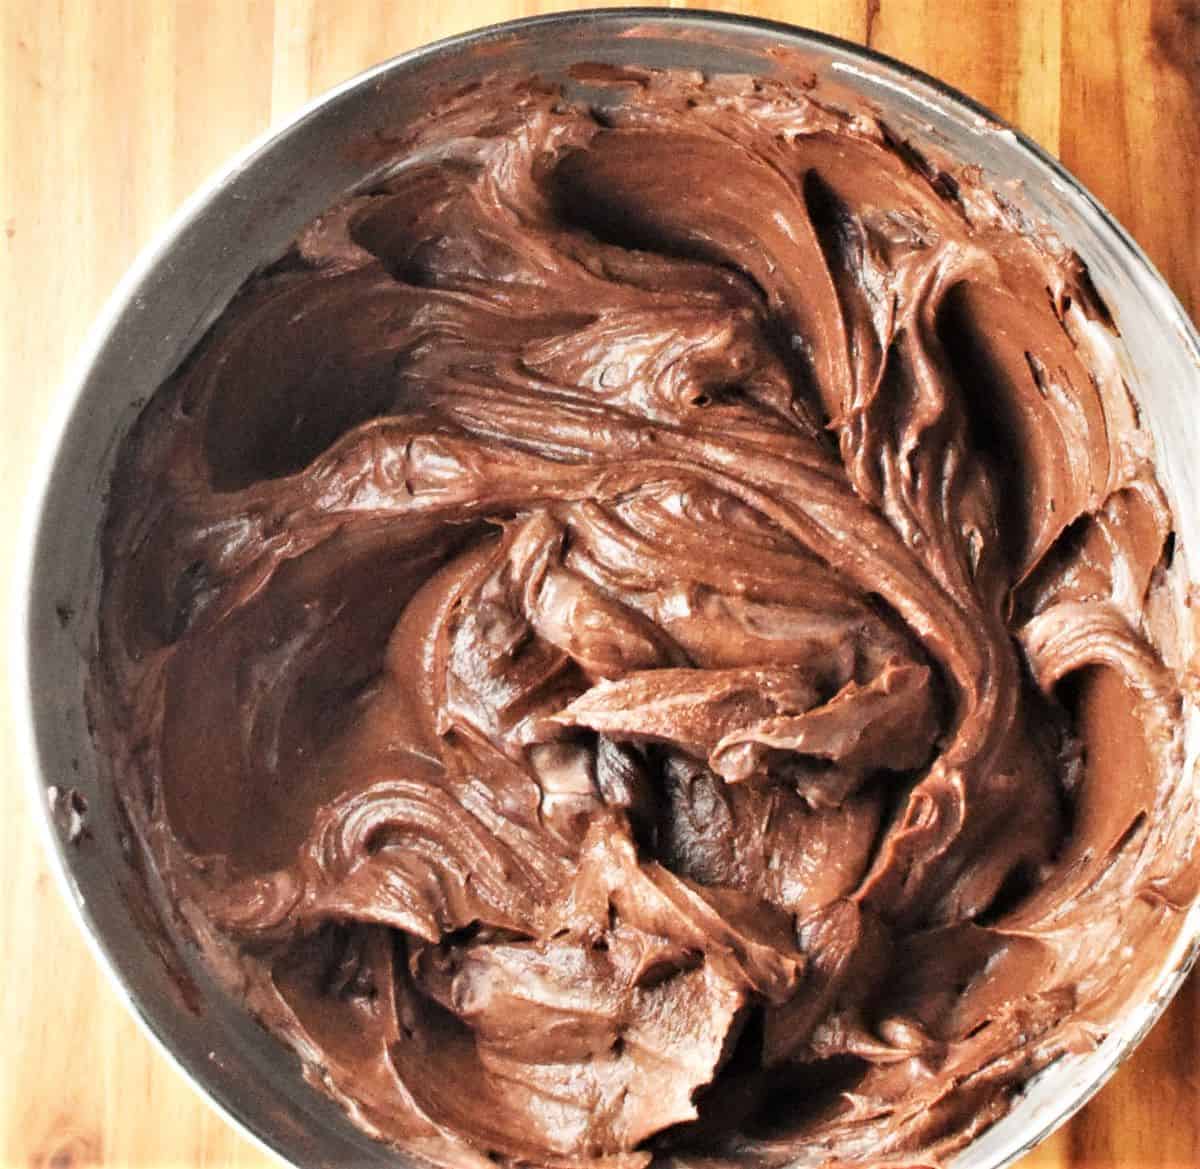
8. Add chocolate: Pour in the melted chocolate (make sure it's cooled) and continue beating just to combine.
9. Add eggs: Add the eggs one by one beating on low speed just until combined (do NOT overbeat the mixture at this point).
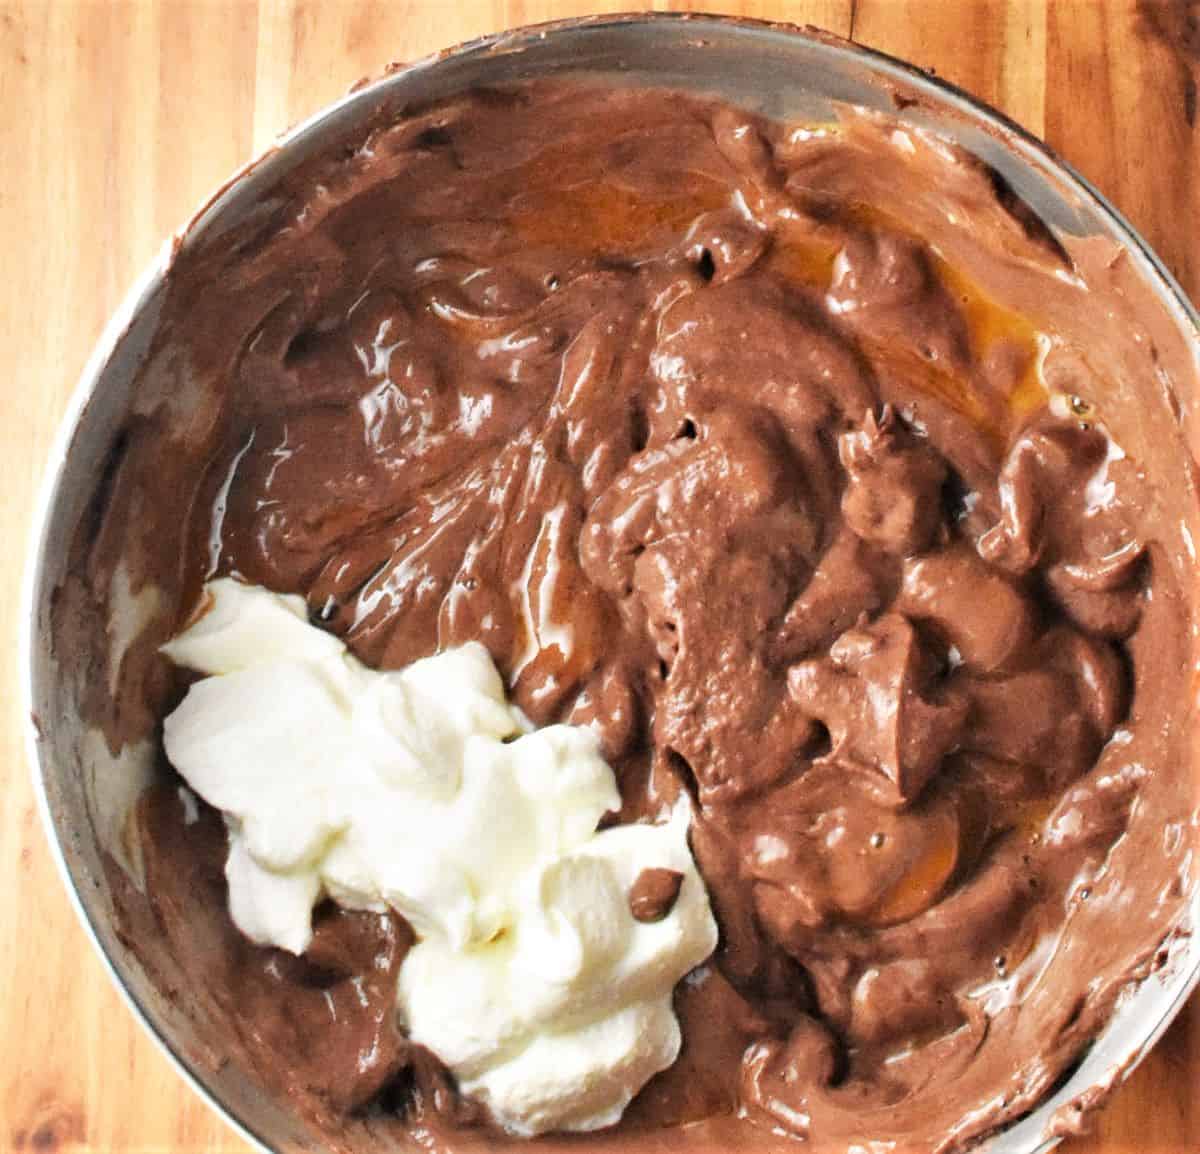
10. Add sour cream: Add the sour cream just until combined (as above).
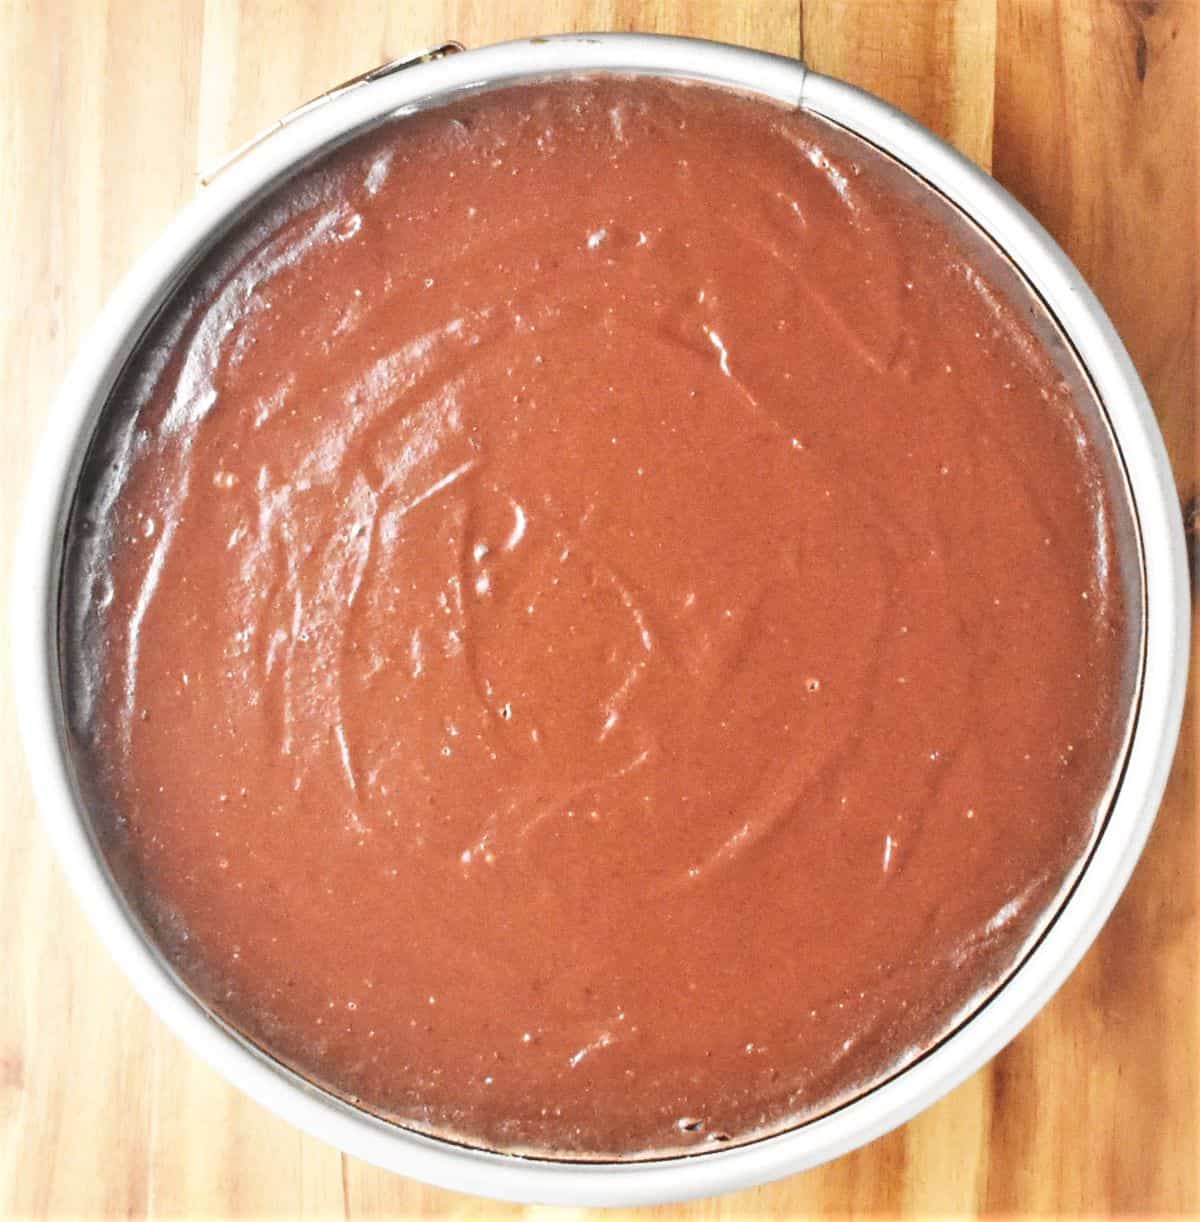
11. Bake cheesecake: Brush the inside of the pan ring (ensure it's cooled completely) with a little melted butter and pour in the cheesecake filling. Tap gently against the counter to remove any air bubbles, smooth out the top and place in the centre of the preheated oven. Bake for 10 minutes then lower the temperature to 245-250 F/120 C. (If, like me, you are using a gas oven set the temperature to halfway between 'S' and 0 ensuring your oven doesn't switch off completely) Continue baking for 45 minutes then switch the oven off and leave the cheesecake inside for an hour (do NOT open the oven door before that).

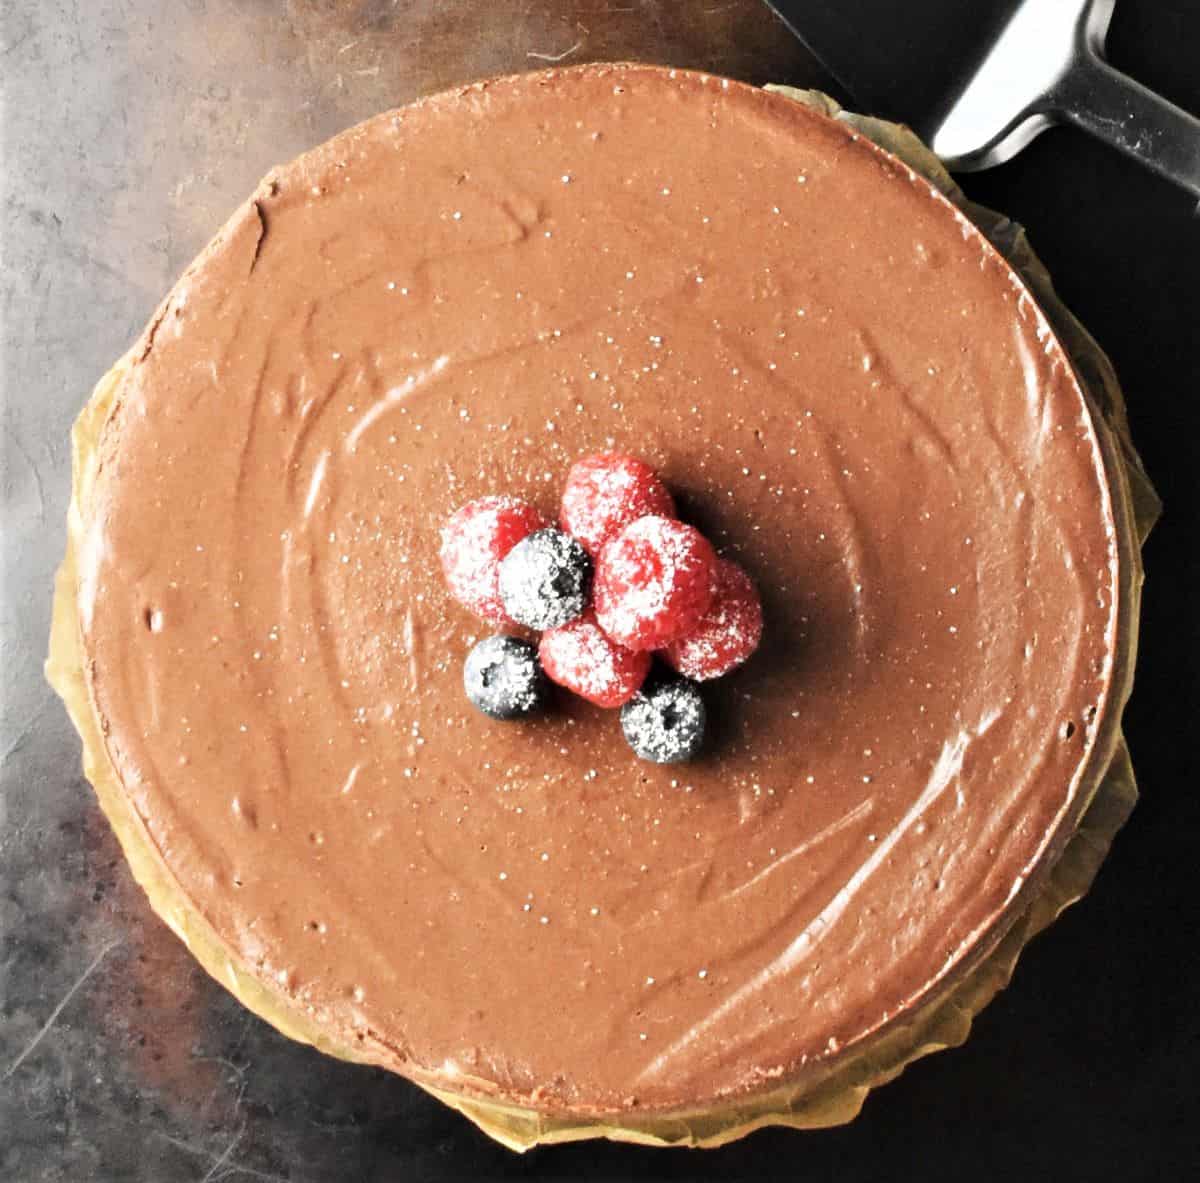
12. Cool cheesecake: Open the oven door a little, wait for about 15 minutes then remove the cheesecake and leave to cool completely. It will still be a little wobbly but that's ok. Once cooled cover and refrigerate it (without removing the pan ring) for at least 6 hours before serving.
Serving
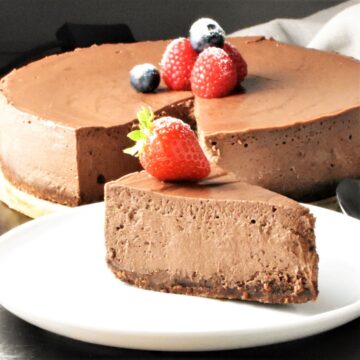
When you are ready to serve your ricotta chocolate cheesecake run a thin spatula around it before carefully removing the pan ring. Decorate with chocolate shavings, fresh berries, whipped cream or fruit compote and enjoy!
How to prevent cracks in cheesecake
In my experience the single most important factor determining whether or not the top of your cheesecake will stay intact is temperature. Start with a high temperature then lower it right down so the cheesecake begins to gradually cool while at the same time also cooking. After you've switched the oven off the cheesecake will continue cooking but also cooling.
I made this cheesecake using identical ingredients and method but baked it at a slightly higher temperature and it developed a crack every time. It also cracked when baked at a higher temperature using slightly different amounts and method.
Having said that, it is also important not to overbeat the ingredients and inject too much air into your cheesecake.
As for using a water bath, it didn't seem to have any effect so I wouldn't bother with it. Just ensure you bake your cheesecake as per Instructions.
Top tips
- Make sure your ingredients are at room temperature.
- Scrape the sides and bottom of the bowl often as you combine the ingredients to ensure they are evenly distributed throughout the filling mixture.
- Bake the cheesecake in a preheated oven and do NOT open the oven door while it's baking and for an hour afterwards.
- When melting the chocolate remove it from the saucepan when it's almost melted. It will melt completely as you stir it.
- Wait for the melted chocolate to cool before adding into the cheesecake batter.
- Keep refrigerated, covered, for up to 3 days. This ricotta cheesecake will set as it cools and after about 2 days will become slightly denser, though it'll still be creamy and delicious.
- Best served at room temperature.
- Freeze for up to 3 months. Remove any toppings, if present, and place the cheesecake in the freezer (without the pan ring) for 3 hours. Remove the bottom of the pan, if present, and place the cheesecake in a large container, or double-wrap in plastic or foil before returning to the freezer.
You might also like
- Traditional Baked Polish Cheesecake (Sernik)
- Healthy Coffee Cheesecake
- Black Forest Cheesecake Tart
- Kahlua Cheesecake Pots (No Bake)
- Mini Chocolate Cheesecake Pots (Gluten Free)
Keep in touch!
If you make this healthier chocolate cheesecake I'd love to know how it turned out for you. Let me know in the comments below, thanks!
Follow me on Facebook, Instagram and Twitter for regular recipe updates! Or you could subscribe to this blog and receive all my latest recipes right into your mailbox!
Recipe
Chocolate Ricotta Cheesecake (Baked)
Ingredients
For the crust
- 1½ cups (170 g) graham cracker crumbs or digestive biscuits
- 4⅓ tablespoons (60 g) butter melted, plus a little for greasing the pan
- 1 tablespoon cocoa powder
For the filling
- 2 cups (450 g) ricotta cheese strained, room temperature, see *Notes
- ¾ cup (170 g) full fat cream cheese room temperature
- ½ cup+1tbsp (120 g) superfine/caster sugar
- 6.35 ounces (180 g) dark chocolate broken into similar sized pieces, or use 1 cup chocolate chips
- 2¼ tablespoons cocoa powder
- 2 tablespoons cornstarch/cornflour
- 1½ teaspoons vanilla extract
- 3 large eggs room temperature
- 6 tablespoons sour cream
Instructions
Cheesecake crust
- Preheat the oven to 375 F/190 C/gas mark 5. Line the bottom of your pan with parchment and lock the sides. Set aside.
- Prepare crust ingredients: Place the biscuits in a food processor and pulse until they have the texture of fine crumbs (or use ready-made graham crumbs). Alternatively, place the biscuits in a plastic bag and crush with a rolling pin.
- Combine crust ingredients: To a bowl add the crumb mixture, melted butter and 1 tablespoon of cocoa. Stir until thoroughly combined.
- Make cheesecake base: Cover the bottom of your pan with the crumb mixture pressing down a little (you can smooth out the top using the bottom of a glass).
- Bake base: Bake in the centre of the oven for 15 minutes. Remove from the oven and set aside to cool. Increase the heat to 400 F/ 200 C/190 C fan/ gas mark 6. In the meantime prepare the chocolate cheesecake filling.
Cheesecake filling
- Melt chocolate: add pieces of chocolate to a glass bowl and place over a pot of gently simmering water, stirring occasionally. Remove the bowl from the pot when almost all the chocolate has melted (it will finish melting as you stir). Alternatively melt the chocolate in the microwave. Set aside while you prepare the rest of the ingredients.
- Beat cheese: Combine the ricotta with the cream cheese and beat (using the paddle attachment) on med-low speed gradually adding in the sugar until the mixture is smooth and creamy (1-2 minutes). Scrape the sides and bottom of the bowl often.
- Add cocoa: Add the cornflour, cocoa and vanilla extract and beat only until just combined.
- Add chocolate: Pour in the melted chocolate (make sure it's cooled) and continue beating just to combine.
- Add eggs: Add the eggs one by one beating on low speed just until combined (do NOT overbeat the mixture at this point).
- Add sour cream: Add the sour cream just until combined (as above).
Assemble
- Bake cheesecake: Brush the inside of the pan ring (ensure it's cooled completely) with a little melted butter and pour in the cheesecake filling. Tap gently against the counter to remove any air bubbles, smooth out the top and place in the centre of the preheated oven. Bake for 10 minutes then lower the temperature to 245-250 F/120 C/110 C fan. (If, like me, you are using a gas oven set the temperature to halfway between 'S' and 0 ensuring your oven doesn't switch off completely) Continue baking for 45 minutes then switch the oven off and leave the cheesecake inside for an hour (but do NOT open the oven door).
- Cool cheesecake: Open the oven door a little, wait for about 15 minutes then remove the cheesecake and leave to cool completely. It will still be a little wobbly but that's ok. Once cooled cover and refrigerate it (without removing the pan ring) for at least 6 hours before serving.
- Serve: Run a thin spatula around the cheesecake before carefully removing the pan ring. Decorate with chocolate shavings, fresh berries, whipped cream or fruit compote and enjoy!
Notes
- *Remove excess moisture from the ricotta before using. If it's very watery place it in a strainer for a few hours (you may need to do this if using ricotta in the US).
- Ensure your ingredients are at room temperature.
- Scrape the sides and bottom of the bowl often as you combine the ingredients to ensure they are evenly distributed throughout the filling mixture.
- Bake the cheesecake in a preheated oven and do NOT open the oven door while it's baking and for an hour afterwards.
- When melting the chocolate remove it from the saucepan when it's almost melted. It will melt completely as you stir it.
- Wait for the melted chocolate to cool before adding into the cheesecake batter.
- Keep refrigerated, covered, for up to 3 days. This ricotta cheesecake will set as it cools and after about 2 days will become slightly denser, though it'll still be creamy and delicious.
- Best served at room temperature.
- Freeze for up to 3 months. Remove any toppings, if present, and place the cheesecake in the freezer (without the pan ring) for 3 hours. Remove the bottom of the pan, if present, and place the cheesecake in a large container, or double-wrap in plastic or foil before returning to the freezer.
Nutrition
*Nutritional information is automatically generated and should be considered as an estimate.
**A note about baking: If using a fan-assisted oven refer to your appliance's instructions and adjust the temperature accordingly.
[adthrive-in-post-video-player video-id="XAj1EYiN" upload-date="Mon Mar 16 2020 00:00:00 GMT+0000 (Coordinated Universal Time)" name="Chocolate Ricotta Cheesecake" description="This baked chocolate ricotta cheesecake is low in fat and sugar, light and fluffy and super easy to make."]
Susan says
Mine was a flop. I think it needs more sugar and some melted butter.
Monika says
🙁
Cynthia Anson says
My bad Monika...just saw the pan size listed under equipment.
Monika says
😉
Cynthia Anson says
Hello Monika....what size pan are we using for this cheesecake?
Leslie says
Hello, I have semi-sweet chocolate instead of dark. Should I reduse the amount of sugar in the cake?
Monika says
No, I think it will be fine.
Beryl says
Made this cheesecake which went down well with friends. Mine was quite dense as only had quite small eggs so added 3. Think that was the problem!! Def will make again
Monika says
It may have been the eggs. But make sure also to stick to the recommended amounts, not overstir the batter and bake the cheesecake at a low temperature.And if your ricotta is watery strain it well. This should help:)
Amy says
This sounds amazing - however I bookmarked a different version (it looks as though this has been updated) that did not have the crust or sour cream. My husband loves it and the fact that it is lower cal. Is there anyway I could get that version ?
Monika says
Hi Amy, yes this is a new, better version, of the cheesecake. I added a crust and tweaked the filling mixture ingredients to include sour cream, less eggs and flour. The cheesecake is still not overly sweet, but it's creamier than the previous version. And not as calorific as most cheesecake recipes! I hope you try it:)
Becky says
Mmmm, delicious recipe, just love cheesecake.
Angie says
This is fantastic. So decadent but light at the same time, YUM!
Monika says
🙂
Jo says
I love everything about this cheesecake! The texture is so creamy and all that chocolate!
Monika says
Thank you!