Homemade pierogies feature a creamy, delicious cheddar-potato filling encased in soft dough. These classic pierogies are delicious, easy to make, perfect as a family meal or party food idea. Step-by-step instructions included.
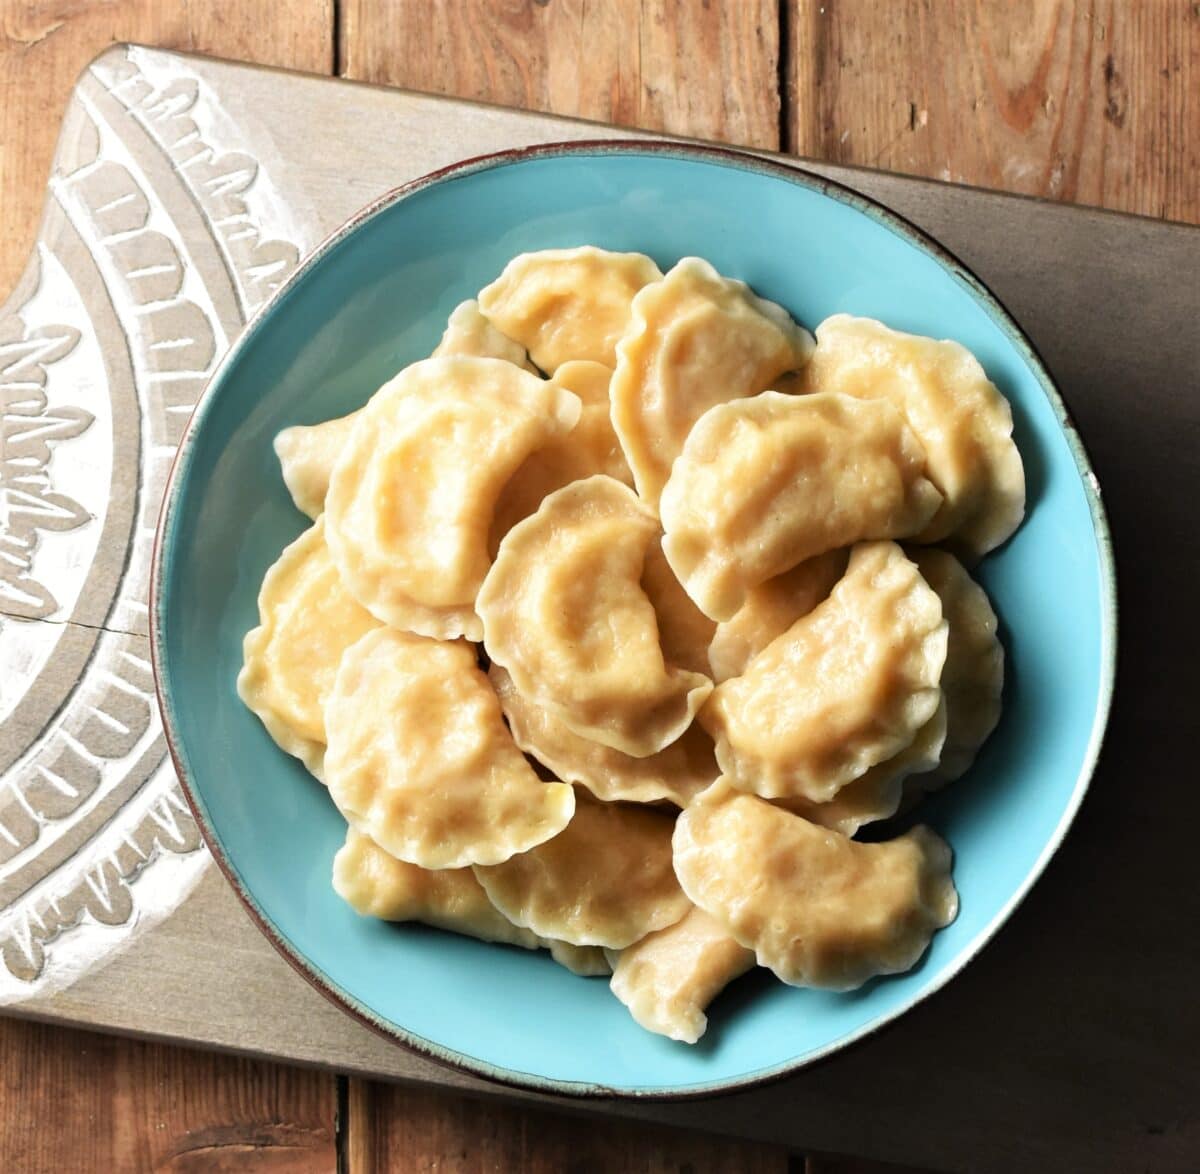
Making homemade pierogies is easier than you think! Using simple pierogi dough, real cheese and creamy potato mash this is the most fantastic comfort food I know, irresistibly delicious and loved by adults and children alike.
These North American pierogies (or perogies, as they are also sometimes spelled) are similar to traditional Polish pierogi ruskie. Both are made with potatoes and cheese, but while the former use cheddar the latter use traditional Polish curd cheese called 'twaróg' (a type of farmer's cheese).
Making potato and cheese pierogies involves preparing the dough and the filling, then forming the pierogies and boiling them. It's a little labour intensive but the method is simple and easy to follow.
Homemade pierogies ingredients and substitutions
Pierogies filling ingredients

- Cheddar: I recommend using either strong or extra strong cheddar.
- Potatoes: use all-rounders, such as Russet potatoes or Maris Piper (UK).
- Cream cheese.
- Onion granules.
- Salt and pepper: be generous.
Pierogies dough ingredients
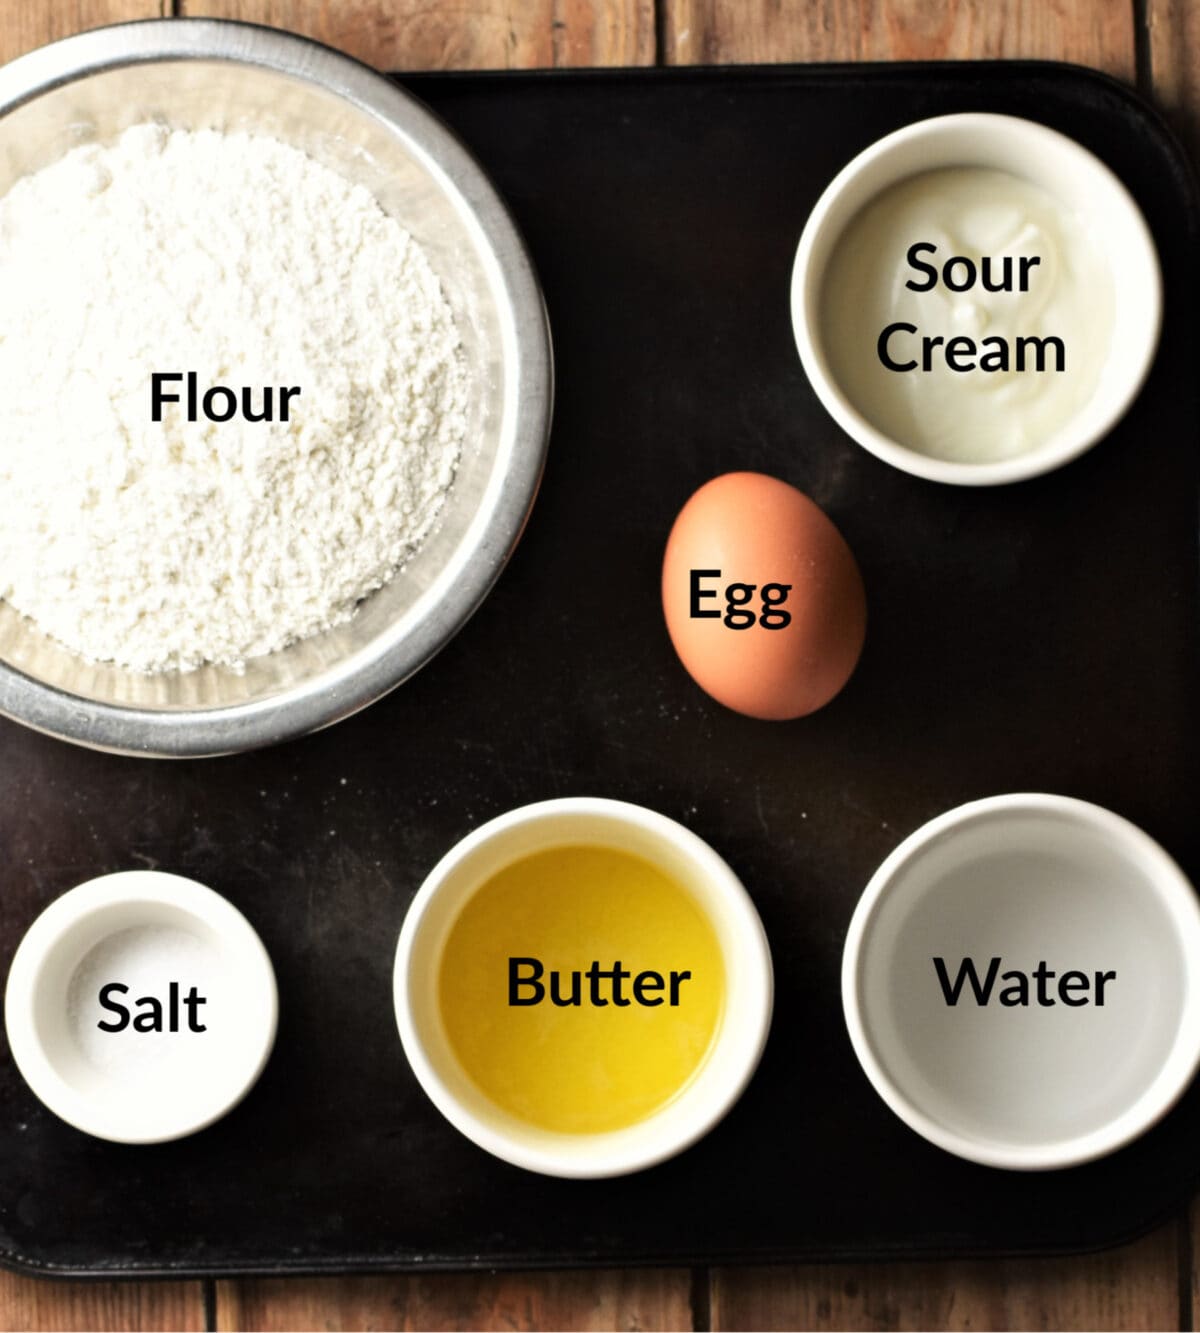
- Flour.
- Water: Make sure it's a little warm, not cold.
- Egg.
- Sour cream: you can use cream cheese instead.
- Butter.
- Salt.
How to make homemade pierogies with cheddar: step-by-step
Make the filling
1.Prepare potatoes: Boil the potatoes in salted water until soft. Drain well then mash while still hot until smooth. Set aside to cool completely.
- TIP: Start making the dough (see below) while you are waiting for the potatoes to cool.
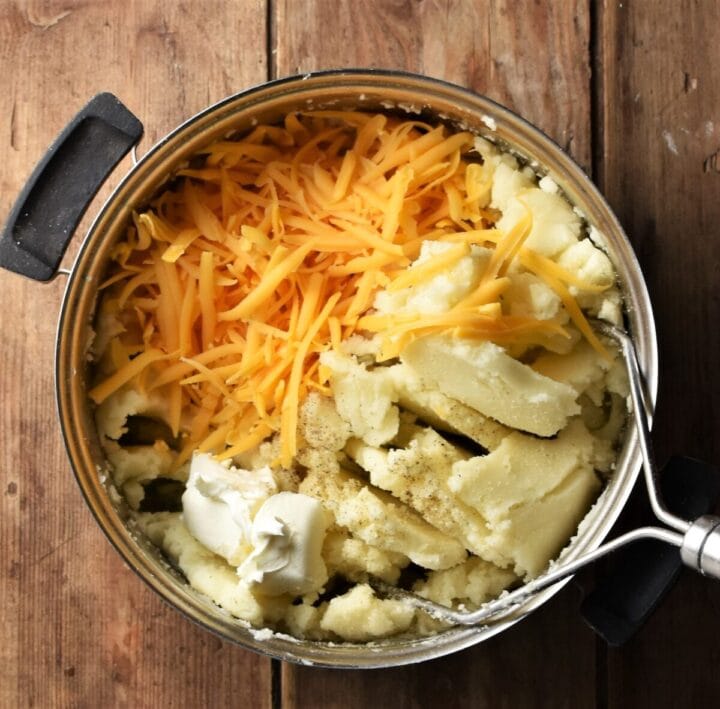
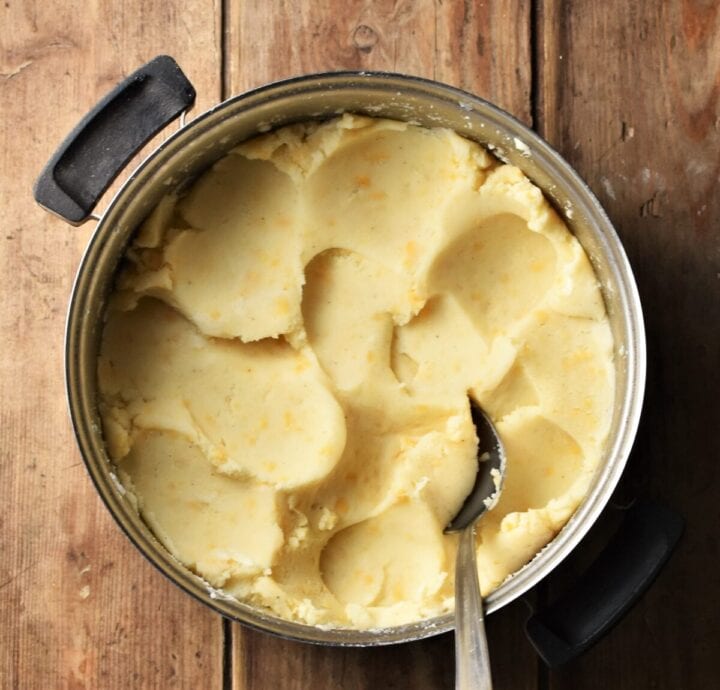
2. Combine ingredients: Combine the mashed potato with the grated cheddar, cream cheese, onion granules and season to taste. Mash until smooth and creamy and the ingredients have been thoroughly incorporated. Adjust the seasoning if needed.
Make the dough
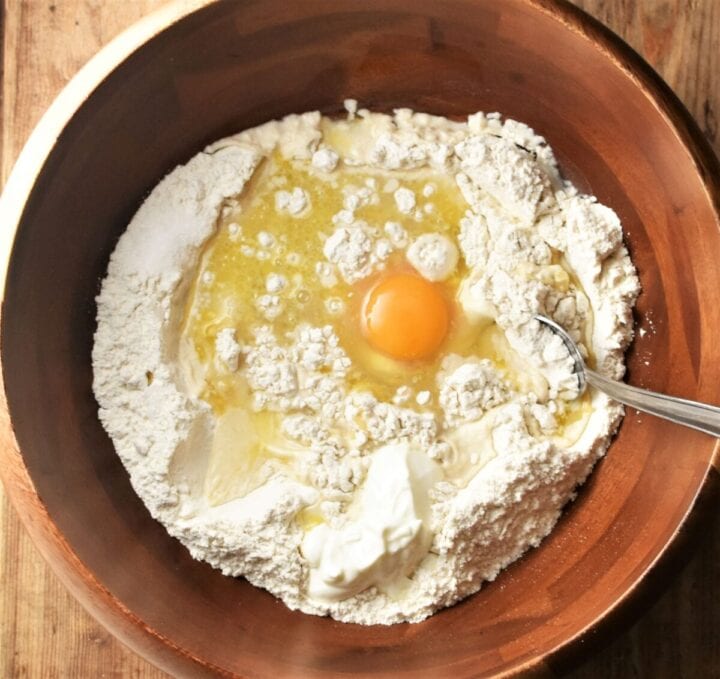
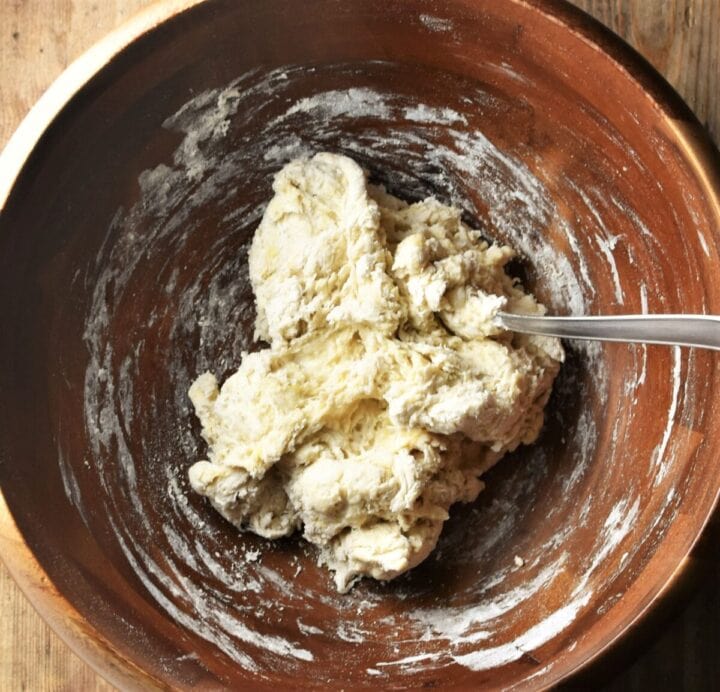
1.Combine ingredients: To a large bowl add the flour, egg, sour cream, butter, water and salt. Stir with a spoon until the mixture starts forming a dough.
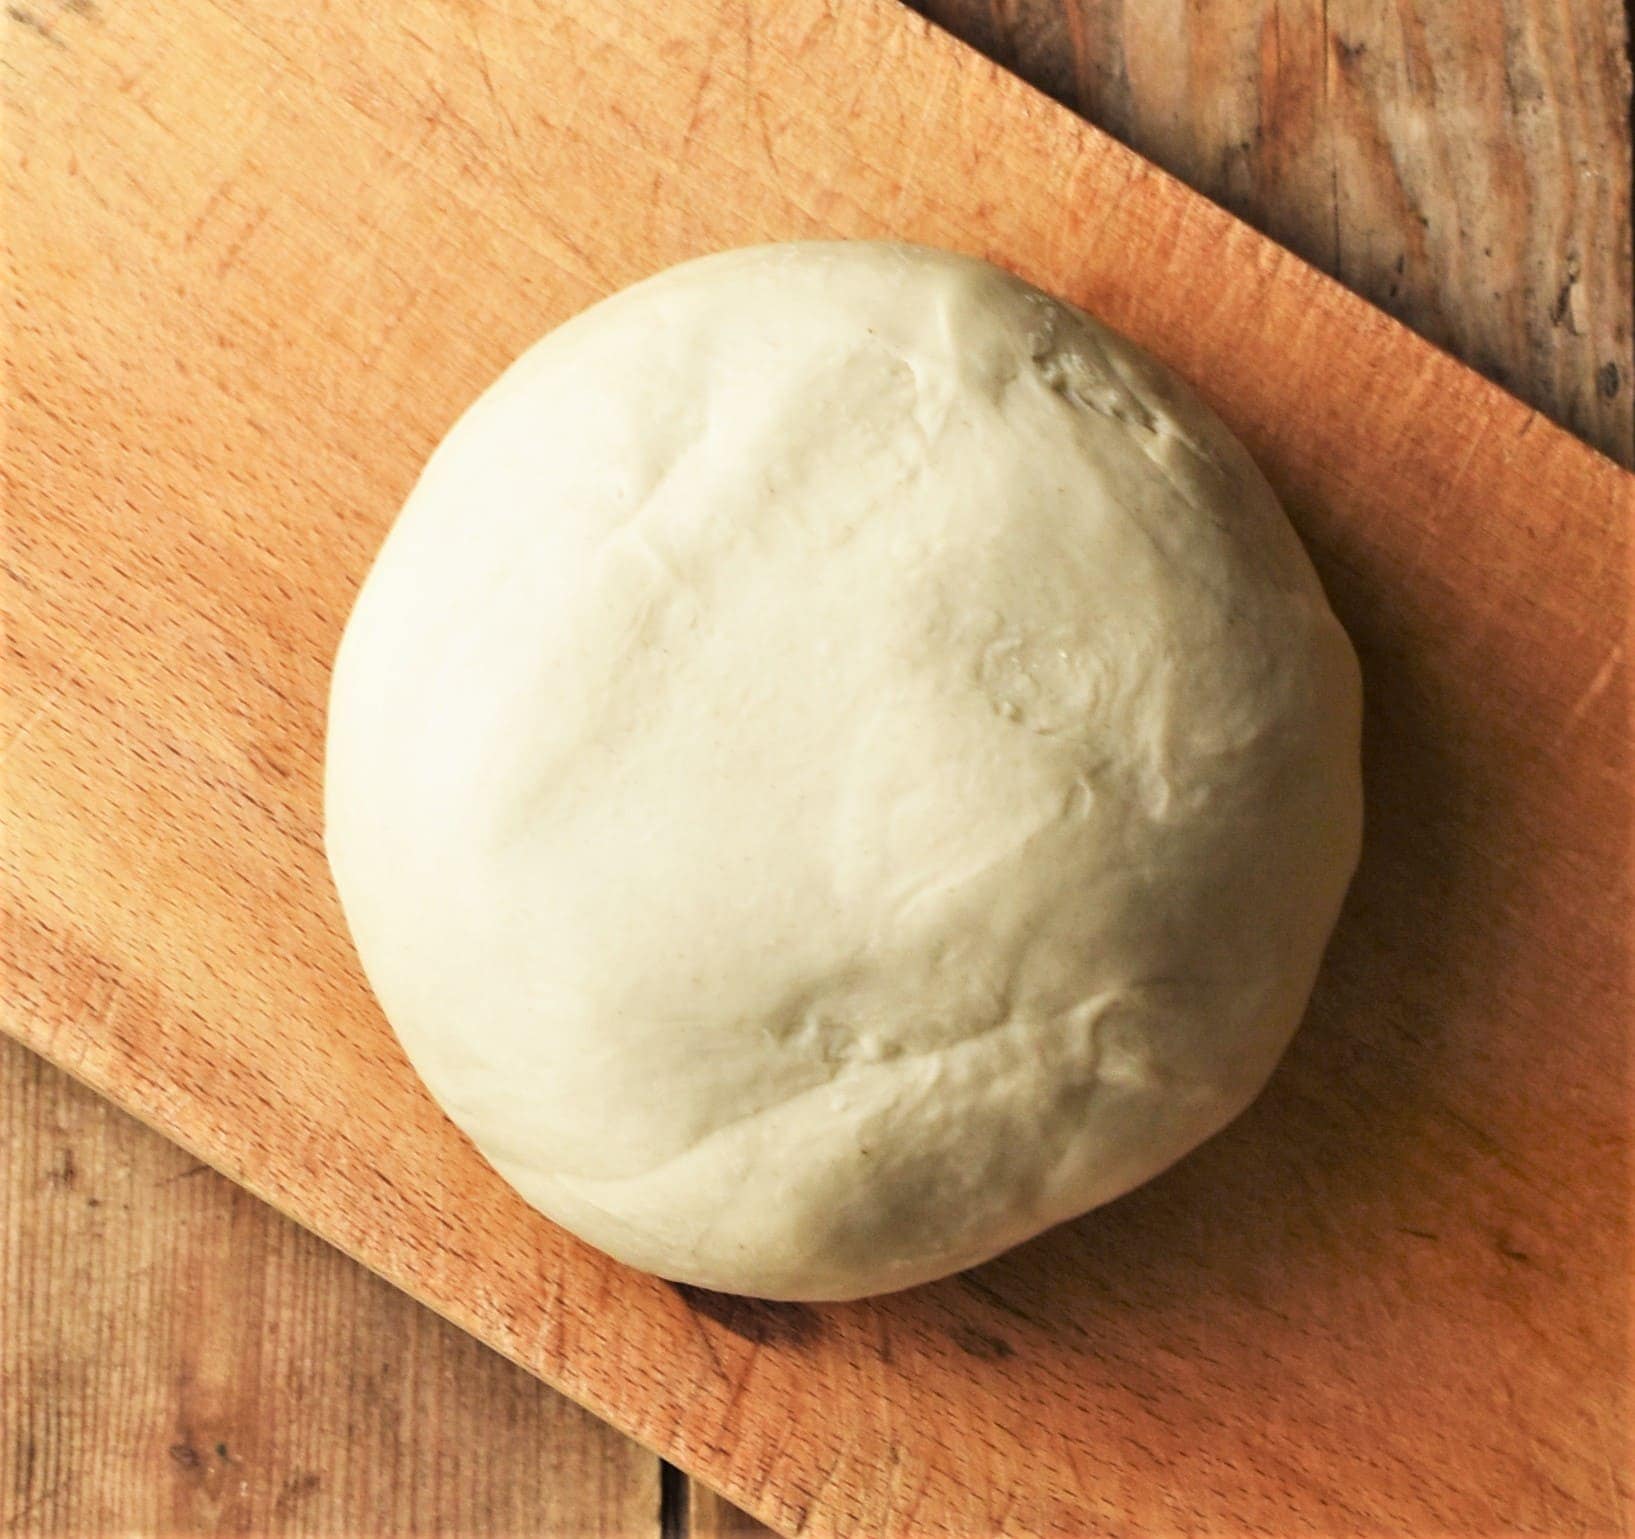
2. Knead dough: Turn the dough onto a lightly floured surface (use no more than 1-2 teaspoons of flour) and knead for 6 more minutes until smooth and soft. Cover with a bowl or cloth (so it doesn't dry out) and leave to rest for 20 minutes.
Once your dough has rested and you've made the filling make the dumplings.
Make pierogies
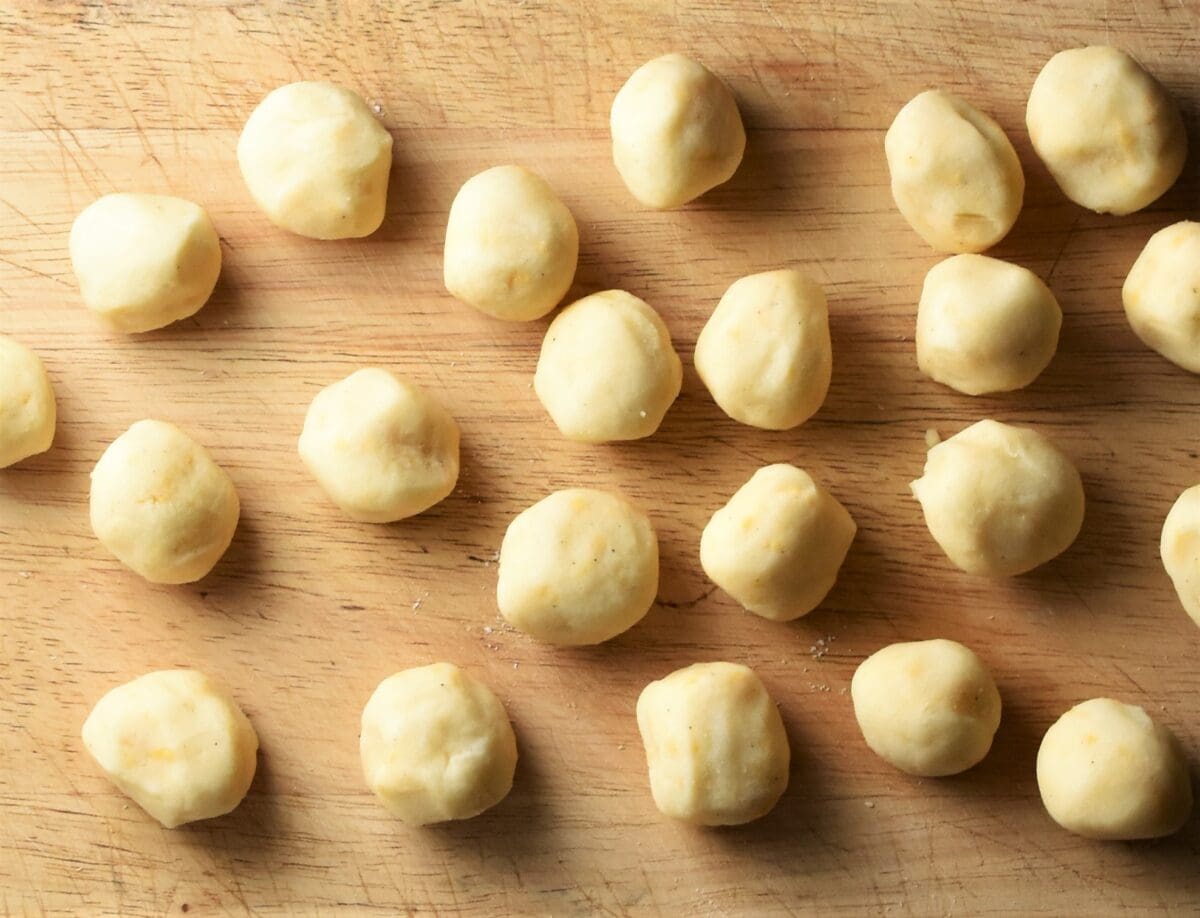
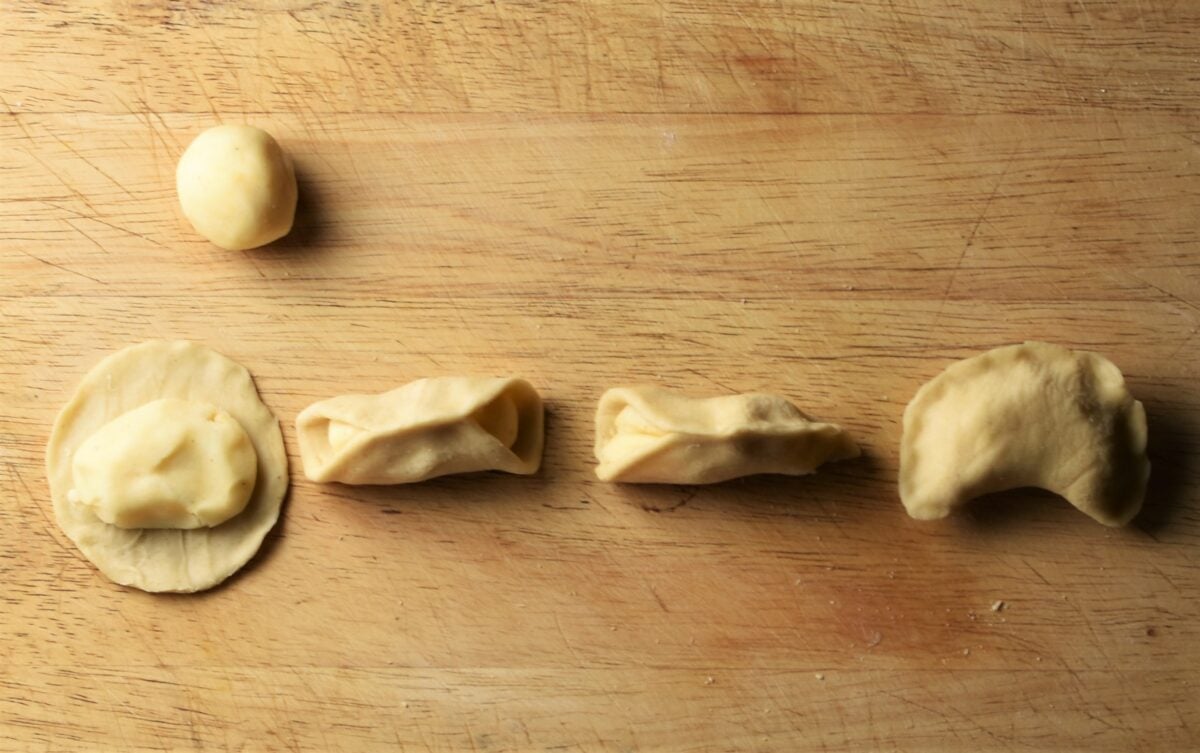
1. Prepare filling balls: Start by making small filling balls (the size of a walnut or larger if you want to make larger perogies). Make a batch of these and set aside.
- TIP: At this point fill a large pot with salted water, cover and bring to the boil.
2. Roll out dough: Divide the dough into 3-4 parts and roll out one part until approx. 2-3 mm thick. Cut out round shapes using a cookie cutter or a rim of a glass (6.5 cm/2.5 inch or larger). Gather up leftover dough, combine with the rest of the dough and keep covered.
3. Form pierogies: Place a filling ball in the middle of the dough round and flatten a little. Ensure the filling doesn't cover the edges. Pick up the dough round and using your fingertips squeeze gently to form a crescent and bring the edges together. Press the edges together pushing the dough away from the edges using your pinky and removing any air bubbles. Go over the edge twice with your fingertips. Repeat this with each dumpling. Keep the pierogies covered with a cloth on top of a floured surface.
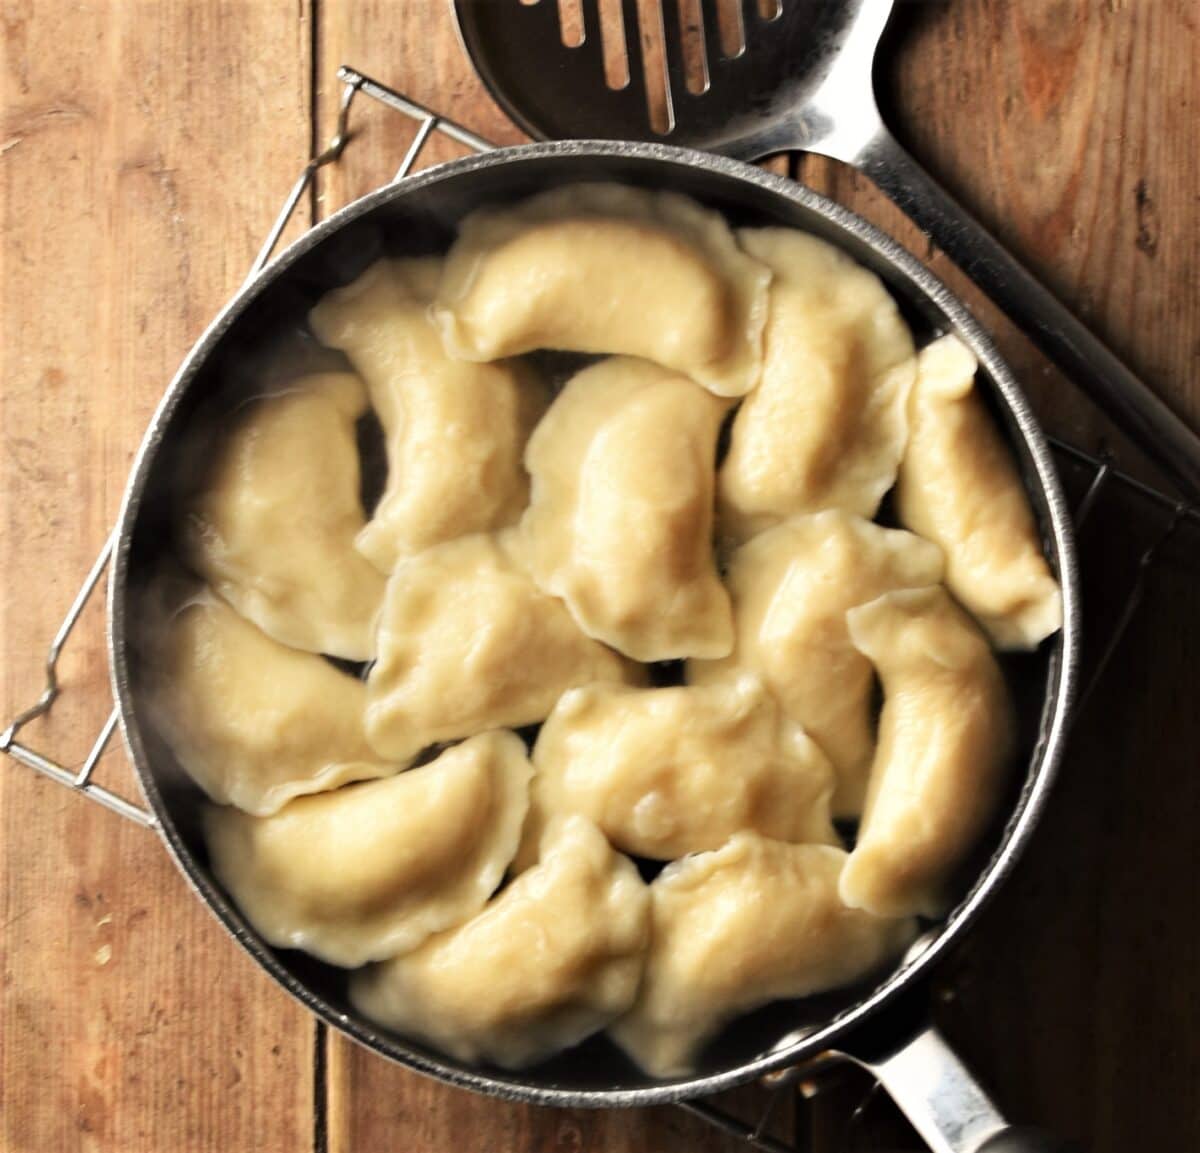
4. Boil pierogies: When the water starts to boil carefully place the pierogies one by one in the pot and stir gently using a wooden spoon so they don't stick to the bottom or one another (do not overcrowd the pot). Increase the heat and stir again. Once they all come up to the top lower the heat and let the pierogies simmer gently for 4 minutes.
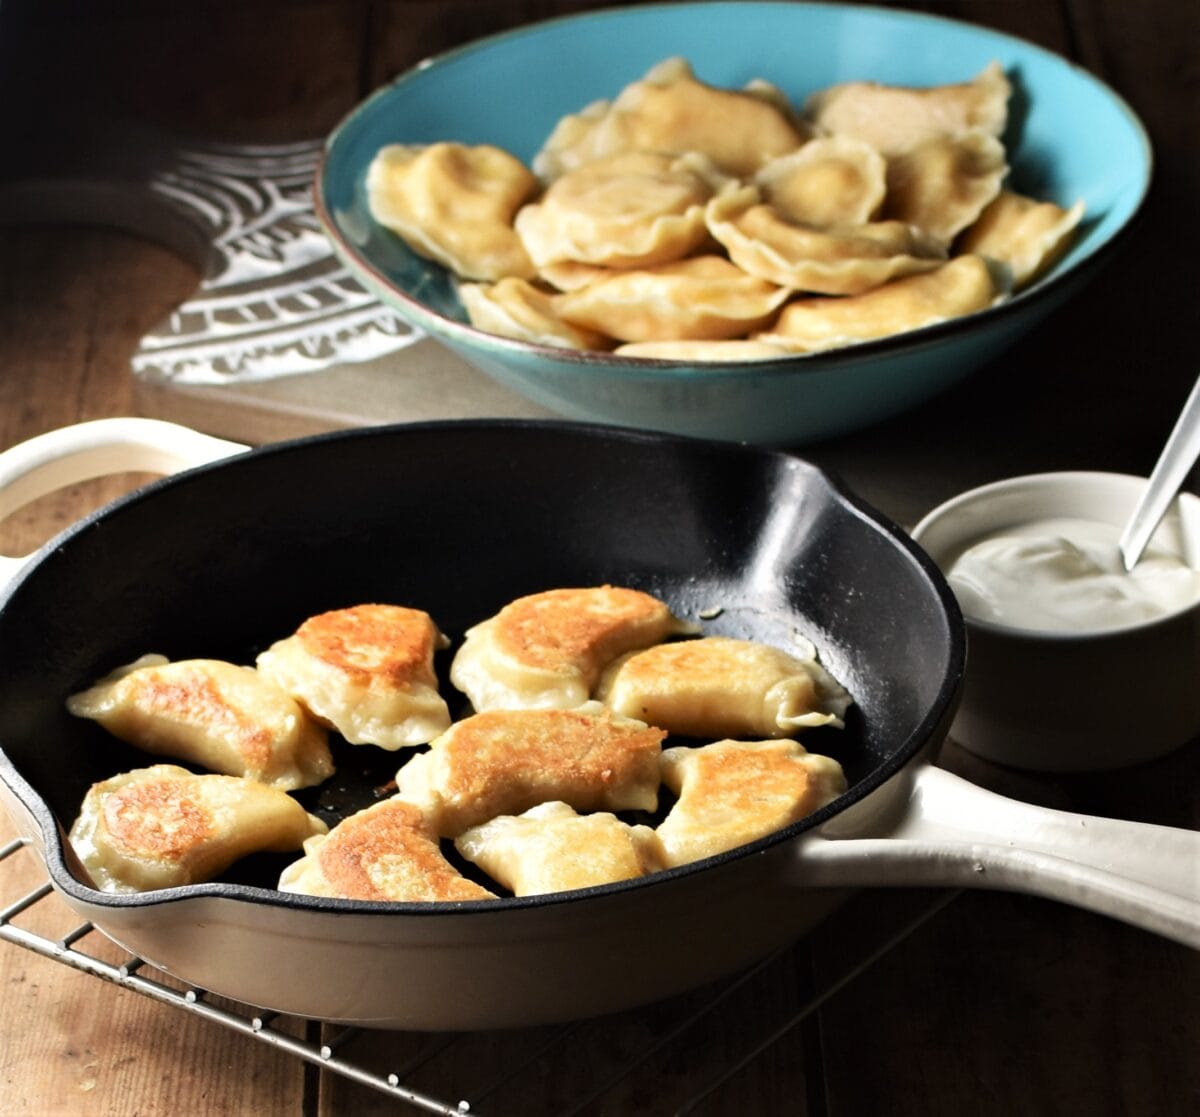
5. Coat with butter: Remove from the heat, lift your cheddar pierogies out of the pot using a slotted spoon and place on top of a plate in a single layer. Drizzle with a little melted butter to ensure the dumplings do not stick together. You should get approx. 65 small pierogies. Enjoy!

Serving suggestions
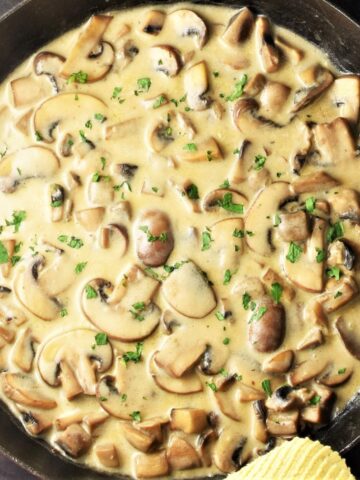
Homemade cheddar pierogies are delicious served hot with a little butter, sour cream, fried onion or bacon, and fresh chives. You can also serve them with my easy sour cream sauce!
Can I fry pierogies without boiling them first
I do not recommend frying uncooked homemade pierogies. The dough in this recipe produces deliciously soft pierogies but only if you boil them first. Also frying raw pierogies would require quite a lot of butter or oil to make sure they are thoroughly cooked. This is not a shortcut I recommend.
Top tips
- Potatoes: use Russets or Maris Piper (UK).
- Cheese: I used coloured mature cheddar but you can use extra mature for a more intense flavour if you prefer.
- Dough: Keep it covered to prevent it from drying.
- Pierogies size: This depends on personal preference. I like to make small perogies but you can make larger ones. But remember - the bigger the pierogies the less of them you'll have. You should get approx. 65 small perogies.
- How much filling to use in each dumpling: Generally the more the better but use however much you feel comfortable with. After all you need to be able to fully encase the filling in the dough (however, as the dough is quite stretchy you can probably use more filling than you think).
- Seasoning: Because you are working with only a handful of simple ingredients it is important to enhance their flavour with a good amount of salt and pepper. You don't want bland tasting pierogies.
- Make ahead: You can make the dough in advance, cover with cling film and refrigerate overnight. You can also make the filling ahead, cover, refrigerate and use the following day.
- Boiling pierogies: Cook the perogies in batches using the same water. Top up with a little more fresh water and salt after every batch (optional).
- Storing: If you make them ahead coat thoroughly with butter or oil and place in a large bowl. Keep leftover homemade perogies refrigerated, covered, for up to 3 days. Reheat either in a microwave, in the oven (covered) or in a frying pan.
- Freezing: To freeze raw perogies arrange them in a single layer on top of a floured tray and freeze for 4 hours. Remove from the freezer and either place in a freezer bag or place portions of pierogi on top of small trays and cover with plastic wrap. Freeze for up to 3 months. Cook from frozen (they will take a little longer to cook).
- You can use the pierogies dough in this recipe to make any pierogi recipe.
Related recipes
- Polish Sauerkraut Pierogi (Kapusta) Dumplings
- Polish Meat Dumplings (Pierogi z Miesem)
- Blueberry Pierogi Dumplings (z Jagodami)
- Polish Christmas Eve Porcini Dumplings (Uszka)
Check out my tips for making fantastic pierogi every time! See also my collection of authentic Polish recipes.
Keep in touch!
I tried to make my instructions as detailed as possible but if you've still got questions get in touch! Always happy to help. If you make these homemade pierogies I'd love to know how they turned out for you. Let me know in the comments below, thanks!
Follow me on Facebook, Instagram and Twitter for regular recipe updates! Or you could subscribe to this blog and receive all my latest recipes right into your mailbox!
Recipe

Homemade Pierogies with Cheddar and Potatoes
Equipment
- Potato masher
- Rolling Pin
- Large pot
- Slotted Spoon
Ingredients
Pierogies Dough
- 3 cups (380 g) all-purpose/plain flour plus 1-2 teaspoons for dusting
- 1 large egg room temperature
- ½ cup+2tsp (130 ml) water tepid
- 1½ tablespoons butter melted
- 2 tablespoons sour cream or cream cheese, room temperature
- ½ teaspoon fine sea salt
Pierogies Filling
- 1½ pounds (700 g) potatoes
- 1 cup (120 g) mature cheddar cheese heaped, coarsely grated
- 2 tablespoons cream cheese
- ½ teaspoon onion granules
- Fine sea salt and pepper to taste
Instructions
Make the filling
- Prepare potatoes: Peel and boil the potatoes in salted water until soft. Drain well then mash while still hot until smooth. Set aside to cool completely. TIP: Start making the dough (see below) while you are waiting for the potatoes to cool.
- Combine ingredients: Combine the mashed potato with the grated cheddar, cream cheese, onion granules and season to taste. Mash until smooth and creamy and the ingredients have been thoroughly incorporated. Adjust the seasoning if needed.
Make the dough
- Combine ingredients: To a large bowl add the flour, egg, sour cream, butter, water and salt. Stir with a spoon until the mixture starts forming a dough.
- Knead dough: Turn the dough onto a lightly floured surface (use no more than 1-2 teaspoons of flour) and knead for about 6 minutes until smooth and soft. Cover with a bowl or cloth (so it doesn't dry out) and leave to rest for 20 minutes.Once your dough has rested and you've made the filling make the dumplings.
Make pierogies
- Prepare filling balls: Start by making small filling balls (the size of a walnut or larger if you want to make larger pierogies). Make a batch of these and set aside. TIP: At this point fill a large pot with salted water, cover and bring to the boil.
- Roll out dough: Divide the dough into 3-4 parts and roll out one part until approx. 2-3 mm thick. Cut out round shapes using a cookie cutter or a rim of a glass (6.5 cm/2.5 inch or larger). Gather up leftover dough, combine with the rest of the dough and keep covered.
- Form pierogies: Place a filling ball in the middle of the dough round and flatten a little. Ensure the filling doesn't cover the edges. Pick up the dough round and using your fingertips squeeze gently to form a crescent and bring the edges together. Press the edges together pushing the dough away from the edges using your pinky and removing any air bubbles. Go over the edge twice with your fingertips. Repeat this with each dumpling. Keep the pierogies covered with a cloth on top of a floured surface.
- Boil pierogies: When the water starts to boil carefully place the pierogies one by one in the pot and stir gently using a wooden spoon so they don't stick to the bottom or one another (do not overcrowd the pot). Increase the heat and stir again. Once they all come up to the top lower the heat and let the pierogies simmer gently for 4 minutes.
- Coat with butter: Remove from the heat, lift your cheddar pierogies out of the pot using a slotted spoon and place on top of a plate in a single layer. Drizzle with a little melted butter to ensure the dumplings do not stick together. You should get approx. 65 small pierogies. Enjoy!
Notes
- Potatoes: use Russets or Maris Piper (UK).
- Cheese: I used coloured mature cheddar but you can use extra mature for a more intense flavour if you prefer.
- Dough: Keep it covered to keep it from drying.
- Pierogies size: This depends on personal preference. I like to make small perogies but you can make yours larger if you like. But remember - the bigger the perogies the less of them you'll be able to make. You should get approx. 65 small pierogies.
- How much filling to use in each dumpling: Generally the more the better but use however much you feel comfortable with. After all you need to be able to fully encase the filling in the dough (however, as the dough is quite stretchy you can probably use more filling than you think).
- Be generous with the seasoning. Because you are working with only a handful of simple ingredients it is important to bring out their flavour with a good amount of salt and pepper. You don't want bland tasting perogies.
- Make ahead: You can make the dough in advance, cover with cling film and refrigerate overnight. You can also make the filling ahead, cover, refrigerate and use the following day.
- Cook the perogies in batches using the same water. Top up with more fresh water and salt after every batch.
- Serving: Enjoy hot with a little butter (if straight from the pot), sour cream, fried onions or fried bacon.
- Storing: If you make them ahead coat thoroughly with butter or oil and place in a large bowl/casserole dish. Keep leftover perogies refrigerated, covered, for up to 3 days. Reheat either in a microwave or in the oven (covered).
- To freeze raw perogies place in a single layer on top of a floured tray and freeze for 4 hours. Remove from the freezer and either place in a freezer bag or place portions of pierogi on top of small trays and cover with plastic wrap. Freeze for up to 3 months. Cook from frozen (they will take a little longer to cook).
- You can use this dough to make any pierogi recipe.
- Preparation time includes the time needed to prepare the potatoes.
Nutrition
*Nutritional information is automatically generated and should be considered as an estimate.
**A note about baking: If using a fan-assisted oven refer to your appliance's instructions and adjust the temperature accordingly.


Helen Kennedy says
A sharp crumbly cheese such as Caerphilly or Wensleydale also works well in pierogi, it was what my mother used in the 1960s when she couldn't get twarog.
Laurie says
I’m making these for the first time. I’ve looked at many recipes and picked yours because of the details so far so good. Very easy to follow. I’m sure they will be delicious
Monika says
I'd love to know how they turned out!
Brandi says
Does sour cream/cream cheese mean both or either or??
Monika says
It's 'either or'. Sorry if that wasn't clear.
Cindy says
It sounds like an excellent recipe and I am excited to try it.
Monika says
Great! Let me know how it turns out for you:)
Sid says
These were delicious 😜
Monika says
Thank you!
JBS says
these were really really yummy
Monika says
thanks!