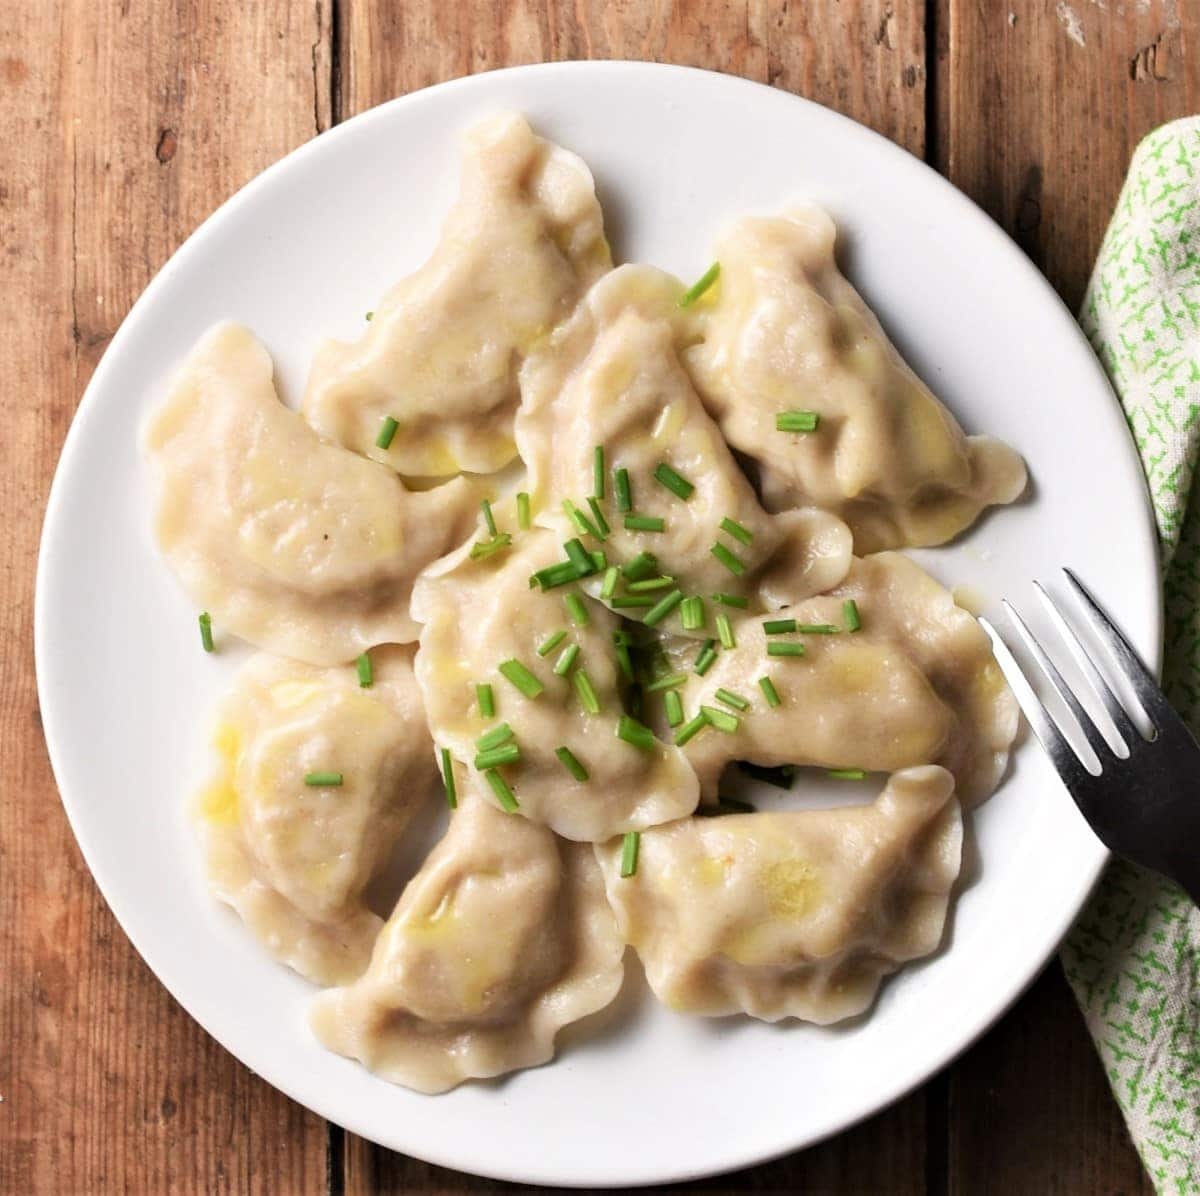
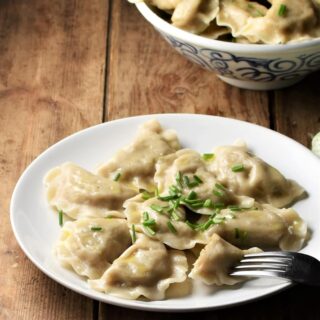
Meat pierogi are a classic Polish dish, hearty and simple, loved by children and adults alike. The filling I used in this recipe consists of ground meat and a handful of pantry ingredients. I used my foolproof pierogi dough recipe which guarantees great results every time.
See also koldunai meat dumplings as well as my other pierogi recipes!
Pierogi in Poland are something of an institution. Everyone loves them and there are no limits as to the kinds of fillings you can use. Traditionally Polish pierogi with meat would only be made using meat from leftover soup (Polish people are very resourceful), which happened frequently as most Polish soups used to be meat based. It would be either pork, chicken or beef, or a combination of the 3.
Although this is a great way of getting the most out of your ingredients soups these days are often meatless. I, for one, tend to make vegetarian or vegan soups (with the exception of my chicken rosol soup)!). So for this recipe I created an easy meat filling from scratch.
Meat pierogi ingredients
Meat pierogi filling
My meat pierogi recipe is made from scratch and does not require using leftover meat. It's easy to prepare the filling simply using ground meat. My choice of meat often tends to be turkey but you can use other types of meat (even chicken).
The dough
I always use the same tried and tested dough recipe no matter what type of pierogi I am making. This dough can be made with either butter or oil (with equally great results) so use whichever you prefer (I used oil this time).
The pierogi dough consists of 4 ingredients including: flour, water, butter (or oil) and salt.
Step-by-step recipe instructions
Start by preparing the filling.
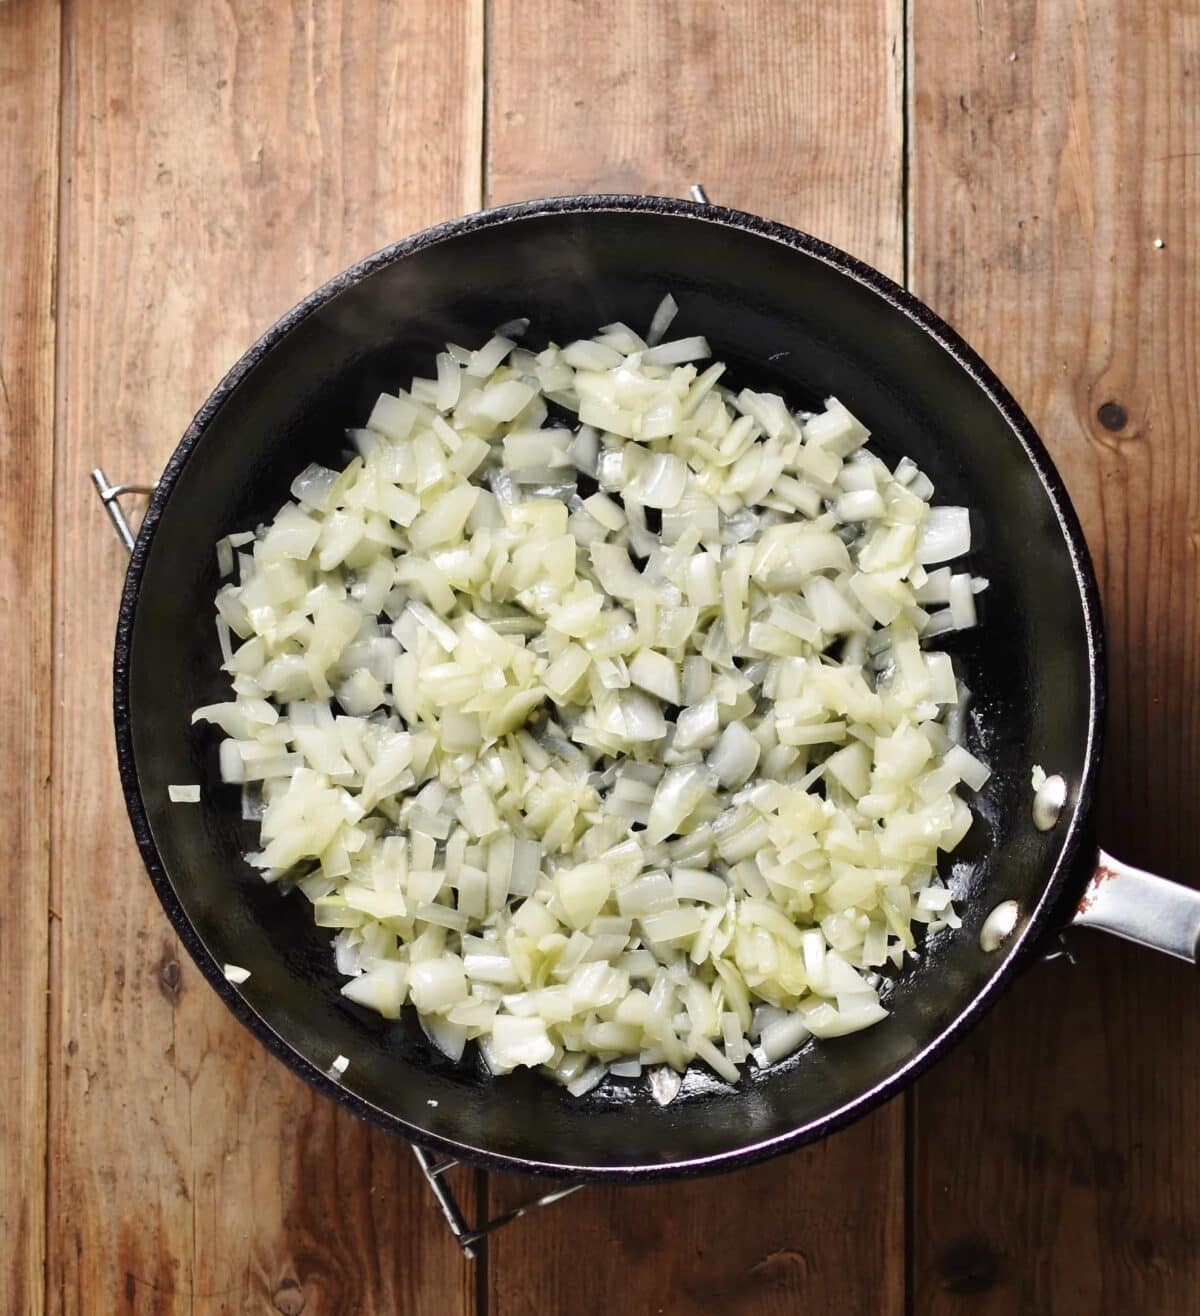
1. In a large frying pan heat up 1.5 tablespoons of oil and gently fry the onion for 3-4 minutes until golden.
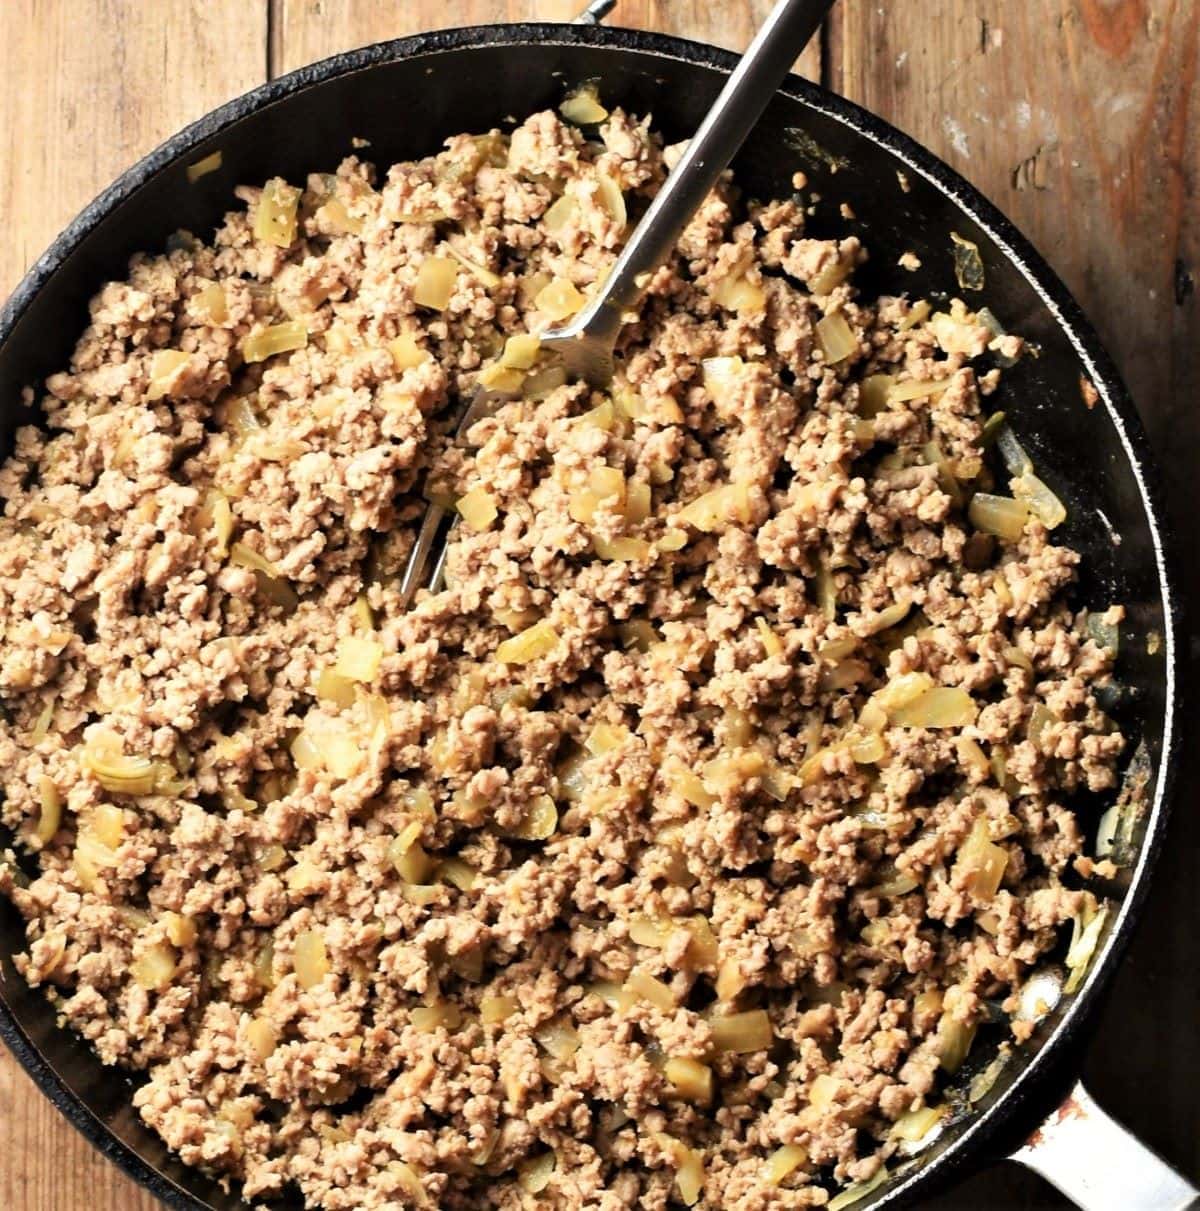
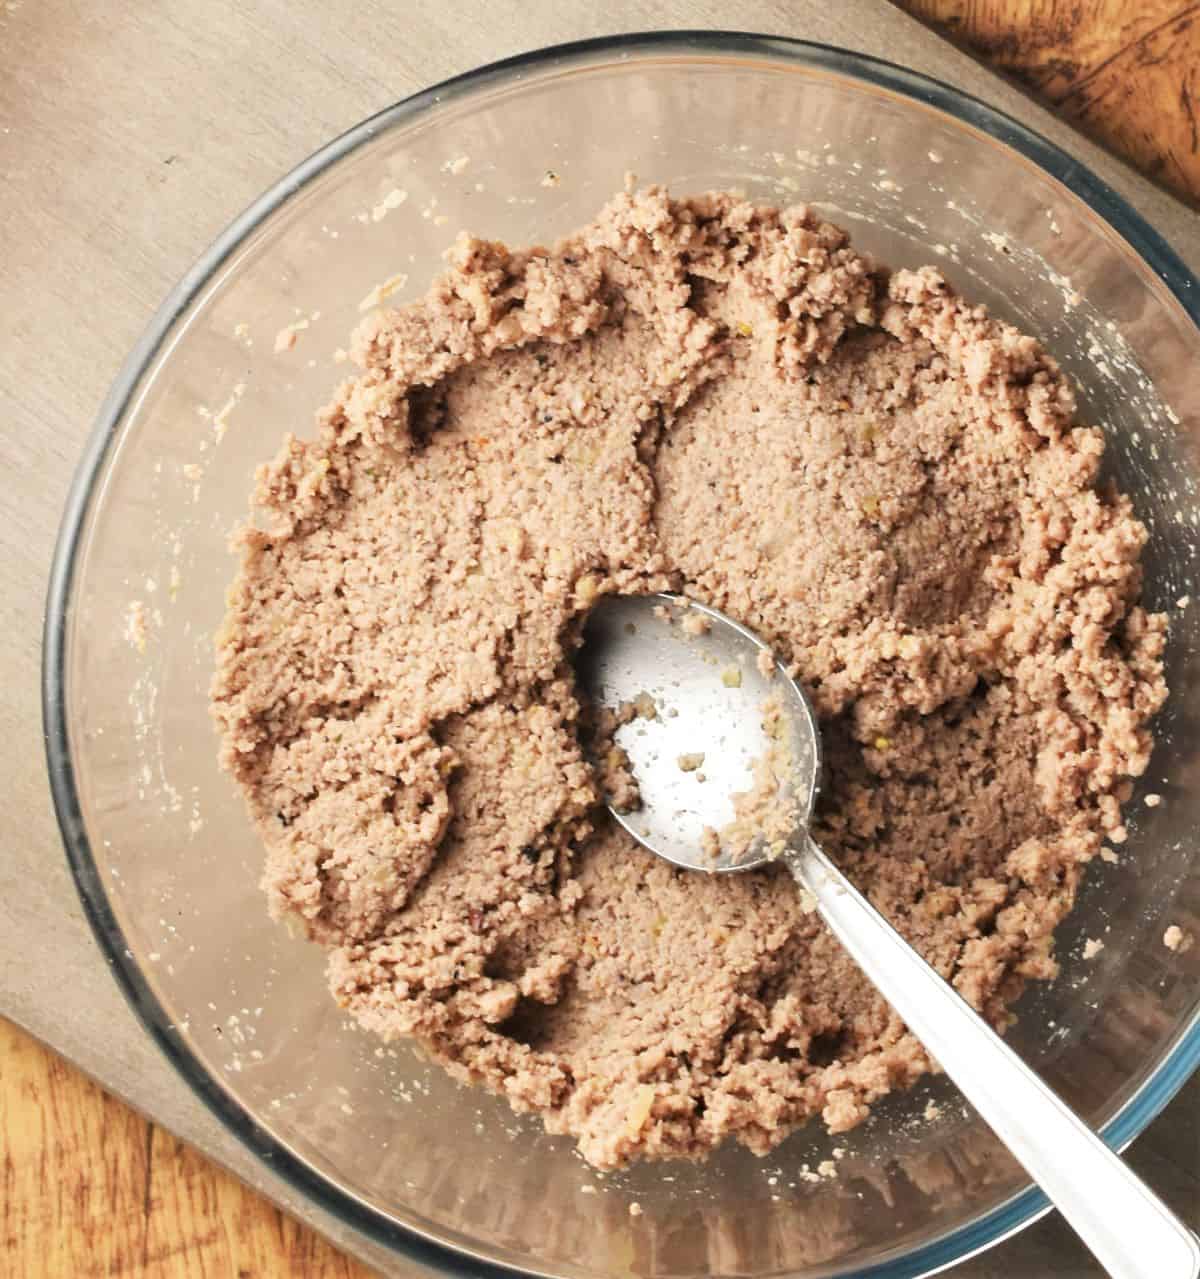
2. Add the meat, water, stock cube, onion granules, Worcestershire sauce and lots of pepper. Cook for several minutes until most of the moisture has evaporated (stir often breaking up the meat).
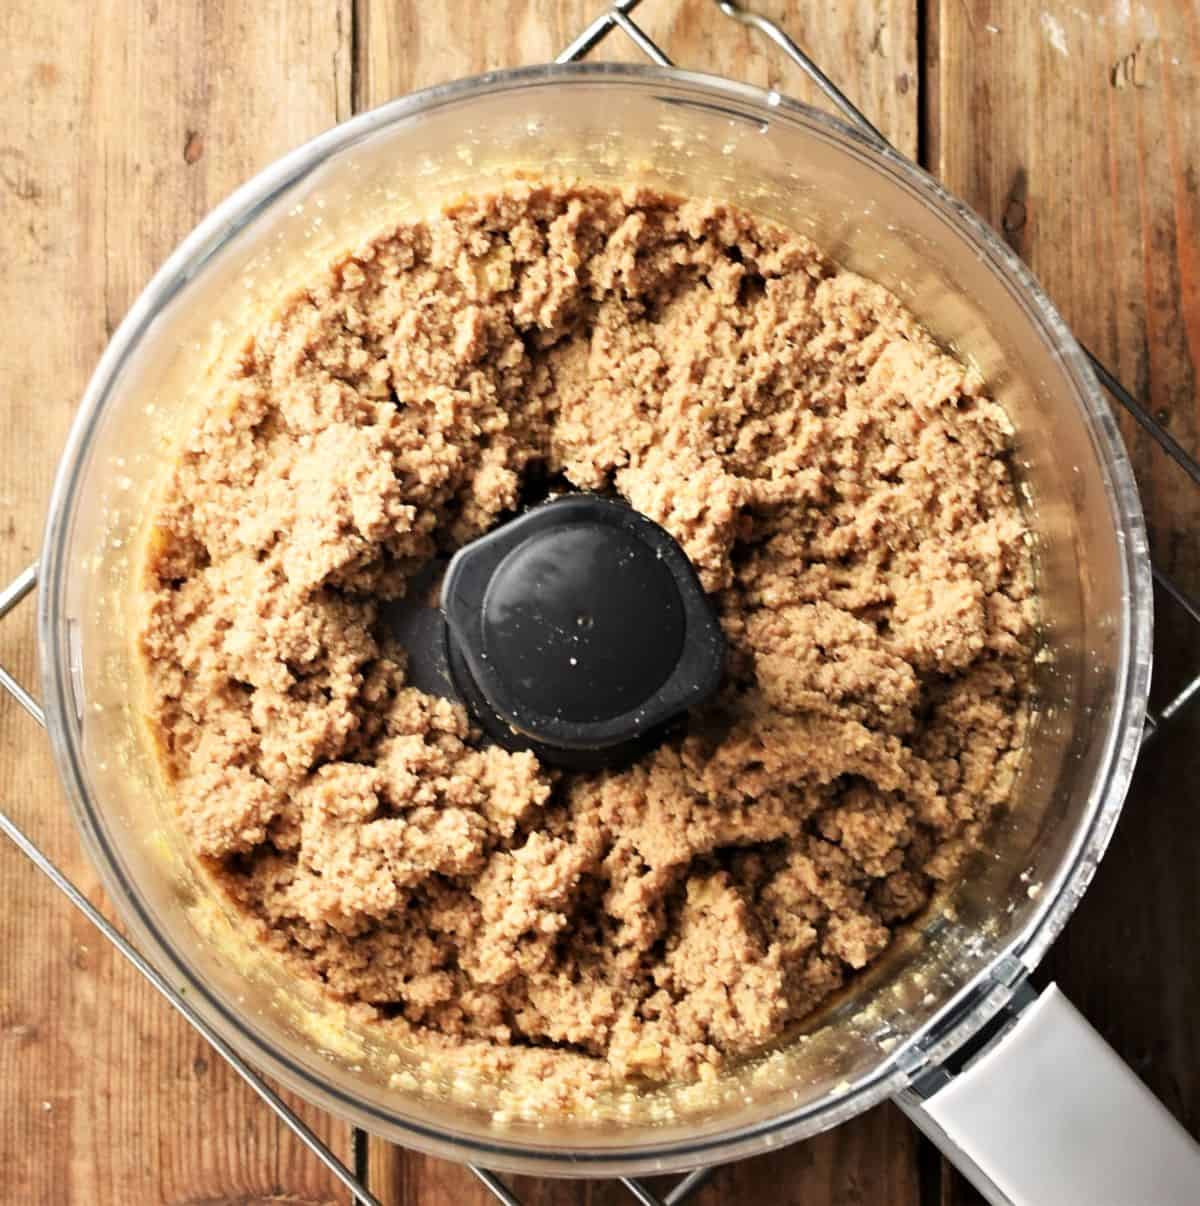
3. Place the mixture in a food processor and pulse until it starts coming together and there are no large lumps left.
4. Adjust the seasoning if needed, set aside and make the pierogi dough.
Top tip
If the filling mixture seems too moist stir in 1-1.5 tablespoons of breadcrumbs.
5. Make the dough. Place the flour on top of your work surface (or in a large bowl as in the photo below), add the oil/butter, salt and then gradually add the water combining the ingredients using a large knife to prevent the water escaping.
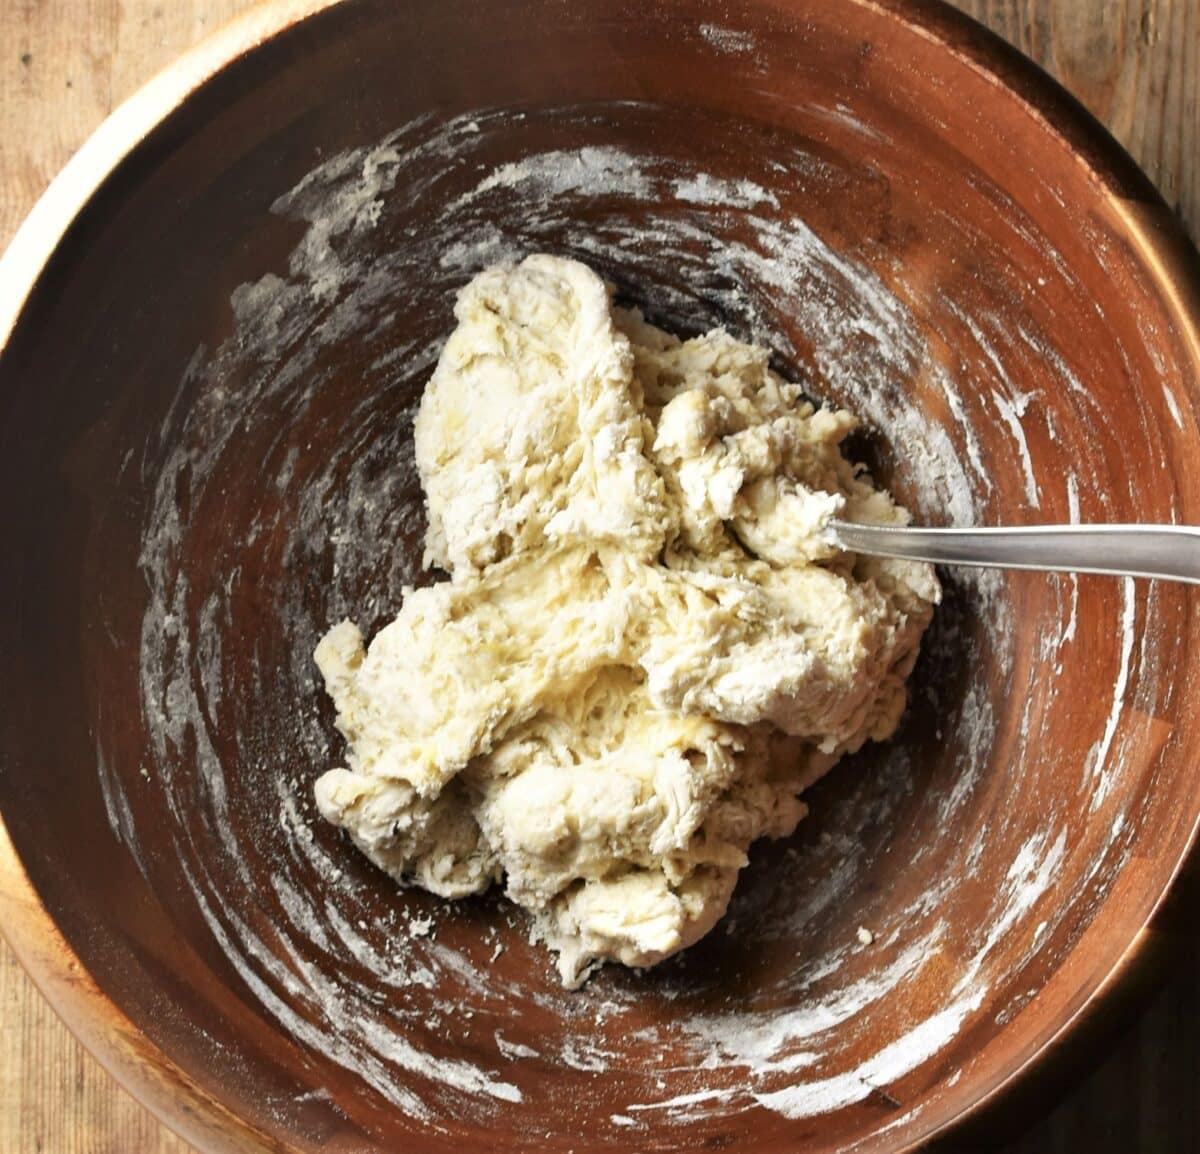
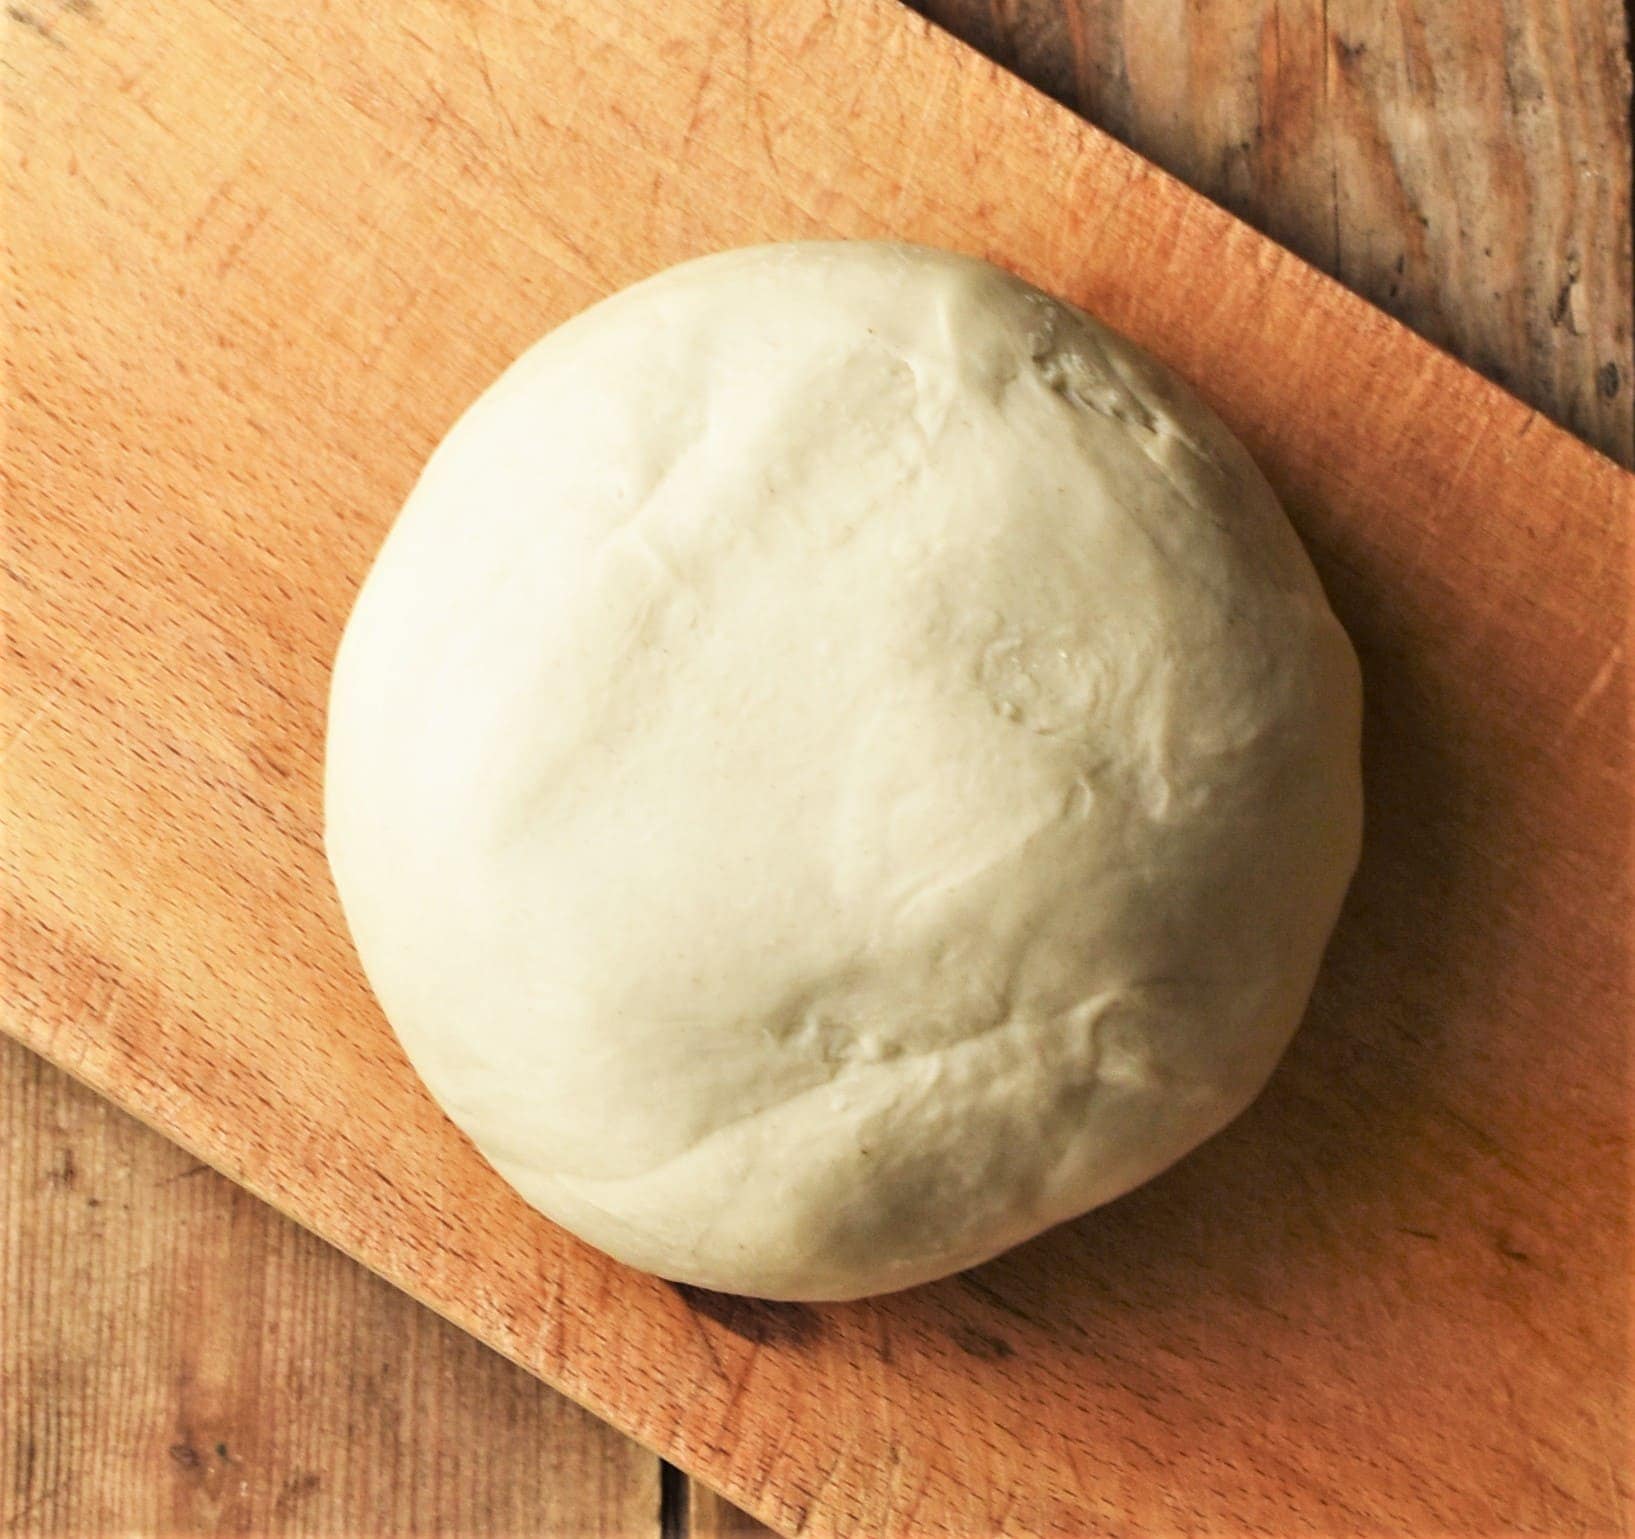
6. When all the water has been added and the dough comes together continue kneading for 6 more minutes until smooth and soft (this is best done on top of a flat surface). Set aside for 20 minutes and cover with cling film or a bowl.
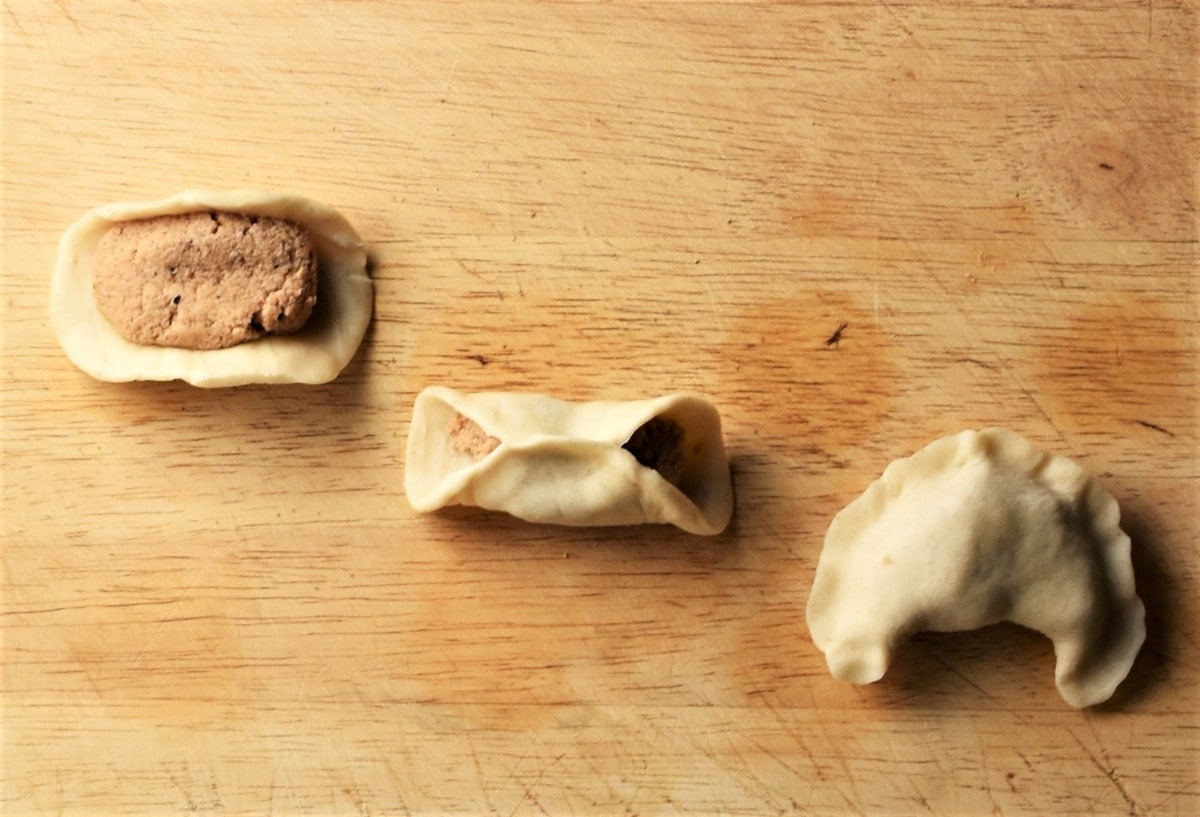
7. Divide the dough into 2 parts (easier to work with), cover one and roll out the other as thinly as possible. Using the rim of a glass (approx. 7 cm/3'' in diameter) or cookie cutter, cut out round shapes. Place a small amount of the filling mixture in the middle of each round, bring the sides together and stick them well using tips of your fingers.
In the meantime fill a large pot with salted water, cover and bring to boil then follow the Instructions below boiling the pierogi.
Serving suggestions
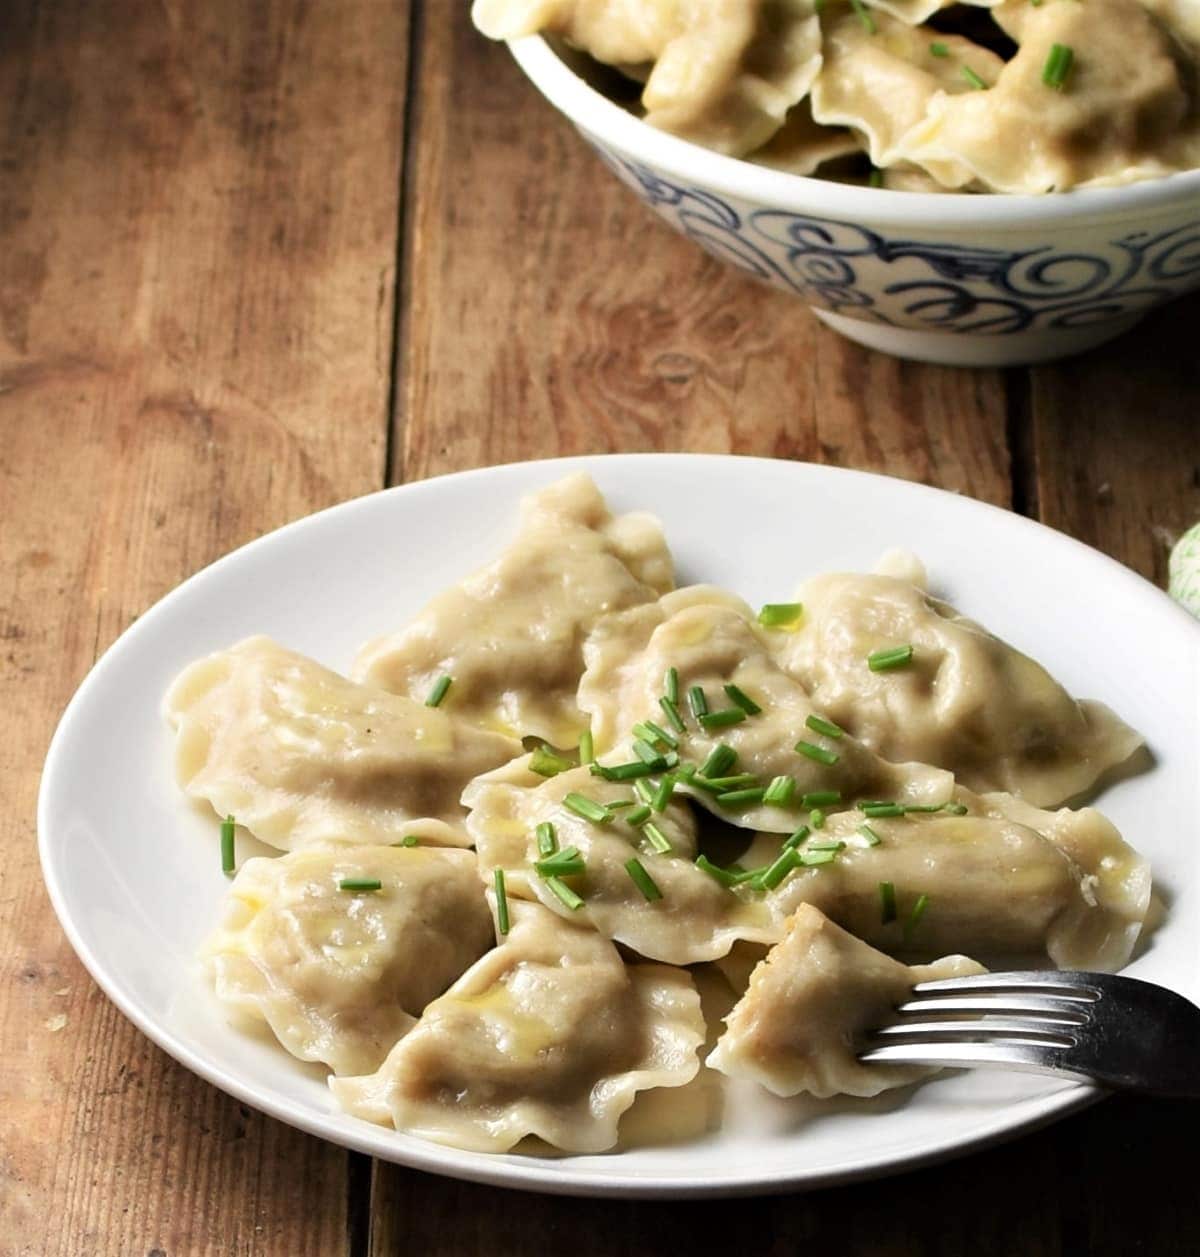
Pierogi with meat can be enjoyed straight from the pot, with a knob of butter, sour cream and/or freshly chopped chives or dill. Alternatively fry the cooked pierogi with a little oil or butter until lightly browned on both sides.
Other ingredients you may want to use
This pierogi filling is simple and made with few ingredients, but you can use extra ingredients if you like. Adding a little fried, chopped bacon or sausage, a sprinkle of dried marjoram or parsley are all good optional ingredient ideas.
Top tips
- If you would like to use meat leftovers fry the onions as per Instructions then place in the food processor along with the chopped meat, add Worcestershire sauce and pepper and pulse until the mixture starts coming together. If it's too dry add a drop of water or milk to loosen it.
- The filling might occasionally stick to your fingers as you are making the dumplings. It is a good idea to wipe your fingertips (paper towel works well) from time to time. The pierogi will look neater and will be easier to make.
- Try to roll out the dough as thinly as possible (approx. 2 mm thick). Don't worry, it won't tear easily.
- Best served immediately.
- If you make meat pierogi ahead coat them thoroughly with butter or oil and place in a large bowl. Keep leftover pierogi refrigerated, covered, for up to 3 days. Reheat either in a microwave or in the oven (covered).
- To freeze raw pierogi place in a single layer on top of a floured tray and freeze for 4 hours. Remove from the freezer and either place in a freezer bag or place portions of pierogi on top of small trays and cover with plastic wrap. Freeze for up to 3 months. Cook from frozen (they will take a little longer to cook).
- Yields approx. 40 medium/small pierogi.
Related recipes
- Polish Sauerkraut Dumplings (Pierogi z Kapusta)
- Homemade Perogies with Cheddar and Potatoes
- Polish Christmas Eve Porcini Dumplings (Uszka)
- Blueberry Pierogi Dumplings ('z Jagodami')
Check out also these other Polish recipes!
Keep in touch!
If you make this Polish meat pierogi recipe I'd love to know how it turned out for you. Let me know in the comments below, thanks:)
Follow me on Facebook, Instagram and Twitter for regular recipe updates! Or you could subscribe to this blog and receive all my latest recipes right into your mailbox!
Recipe
Easy Polish Meat Pierogi
Ingredients
For the Filling
- 1 pound (450 g) ground turkey/pork 7-12% fat
- 1 medium onion finely chopped
- 1½ tablespoons vegetable oil
- 1 teaspoon Worcestershire sauce
- ½ stock cube vegetable, chicken or beef
- ⅓ cup (80 ml) water
- ¼ teaspoon onion granules
- Fine sea salt, if required, and pepper to taste
For the dough
- 2 cups (250 g) all purpose/plain flour 8.82oz
- ½ cup+2tsp (130 ml) very warm water
- 2 tablespoons vegetable oil or 1 tbsp butter
- ⅓ teaspoon fine sea salt
Instructions
- Start by preparing the filling. In a large pan heat up the oil and gently fry the onion for 3-4 minutes until golden.
- Add the meat, water, stock cube, onion granules, Worcestershire sauce and lots of pepper. Cook for several minutes until most of the moisture has evaporated (stir often breaking up the meat). Remove from the heat and set aside to cool a little (10-15 minutes).
- Place the mixture in a food processor and pulse until it starts coming together and there are no large lumps left. Adjust the seasoning if needed, set aside while you make the pierogi dough. If the filling seems too moist stir 1-1½ tablespoons of breadcrumbs.
- To make the dough tip the flour onto your work surface, add the salt, make a well in the middle and add the oil. Start combining using a large knife, gradually adding the water into the middle and gathering up the mixture with the knife to prevent the water from escaping. (You can also do this in a large bowl and use a spoon). When all the water has been added and the dough comes together continue kneading for 6 more minutes until smooth and soft (this is best done on top of a flat surface). If the dough sticks to your hands add a bit of flour (max. 1 tsp) and knead in. Cover with a bowl or wrap in cling film and set aside for 20 minutes.
- Divide the dough into 2 parts (easier to work with) and roll out one part (keeping the other covered) on top of a very lightly floured surface as thinly as possible, 2-3 mm in thickness (don't worry, the dough is quite resilient and won't tear easily). Using a glass with a diameter of about 7 cm/3'', or cookie cutter, cut out round shapes (gather up the excess dough and add to the other dough part).
- Place a small amount of the filling (about a teaspoon) in the middle of the round dough shape (if the dough is sticking to the work surface use a knife to help it come off but take care not to tear it). With tips of your fingers stick the edges of the dumpling together, using your pinky to gently push the filling away from the edges and remove any air bubbles - go over the edge twice for each dumpling (your fingertips should be dry so it's a good idea to keep a sheet of paper towel near you to wipe them if they get sticky).
- Place the dumplings on a lightly floured surface and cover with a dry cloth.
- Fill a large pot with salted water, cover and bring to the boil. Continue making the dumplings as you are waiting for the water to boil. When the water starts boiling carefully place the dumplings in the pot one by one (not more than 15 per batch) and quickly but carefully stir with a wooden spoon. When all the dumplings come up to the surface cook them gently for about 4 more minutes, switch off the heat and using a slotted spoon transfer them onto a large plate. Drizzle with a little olive oil and serve! Yields approx. 40 pierogi.
Notes
- If you would like to make pierogi use meat leftovers fry the onions as per Instructions then place in the food processor along with the chopped meat, add Worcestershire sauce and pepper and pulse until the mixture starts coming together. If it's too dry add a drop of water or milk to loosen it.
- The filling might occasionally stick to your fingers as you are making the dumplings. It is a good idea to wipe your fingertips (paper towel works well) from time to time. The pierogi will look neater and will be easier to make.
- Try to roll out the dough as thinly as possible (approx. 2 mm thick). Don't worry, it won't tear easily.
- Best served immediately.
- If you make them ahead coat thoroughly with butter or oil and place in a large bowl. Keep leftover pierogi refrigerated, covered, for up to 3 days. Reheat either in a microwave or in the oven (covered).
- To freeze raw pierogi place in a single layer on top of a floured tray and freeze for 4 hours. Remove from the freezer and either place in a freezer bag or place portions of pierogi on top of small trays and cover with plastic wrap. Freeze for up to 3 months. Cook from frozen (they will take a little longer to cook).
- Yields approx. 40 medium/small pierogi.
Nutrition
*Nutritional information is automatically generated and should be considered as an estimate.
**A note about baking: If using a fan-assisted oven refer to your appliance's instructions and adjust the temperature accordingly.
Elliott says
I made this, easy to follow and very tasty - i ended up using a perogi press and got 25 from the dough (mine may have been thicker than 2mm!)
All in all would definitely make again
Monika says
Thanks for letting me know Elliot! Glad you liked the recipe.