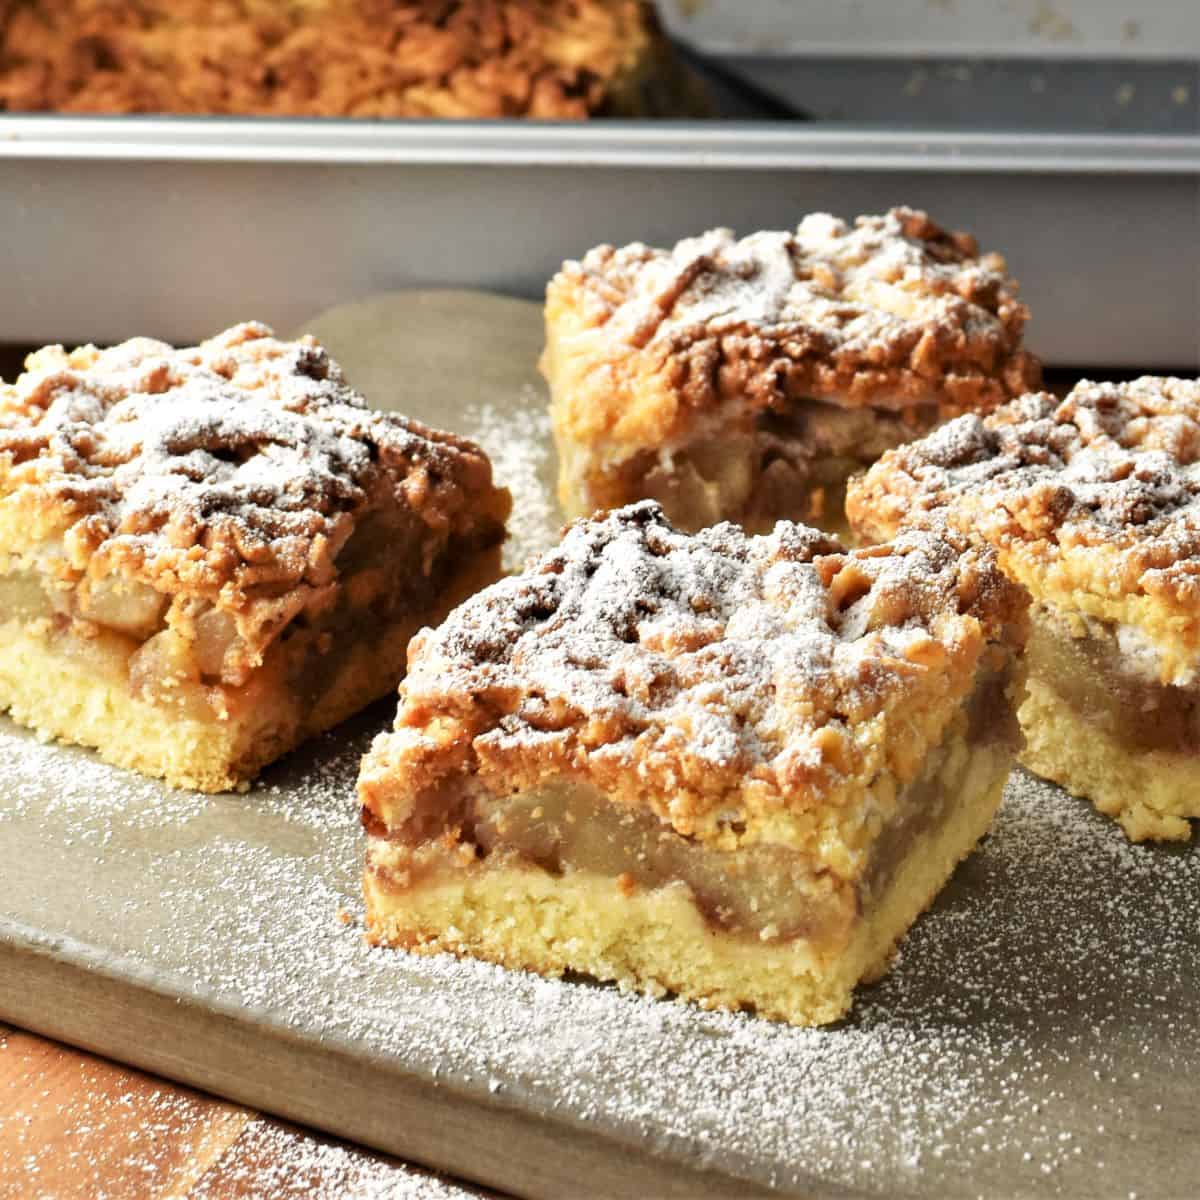
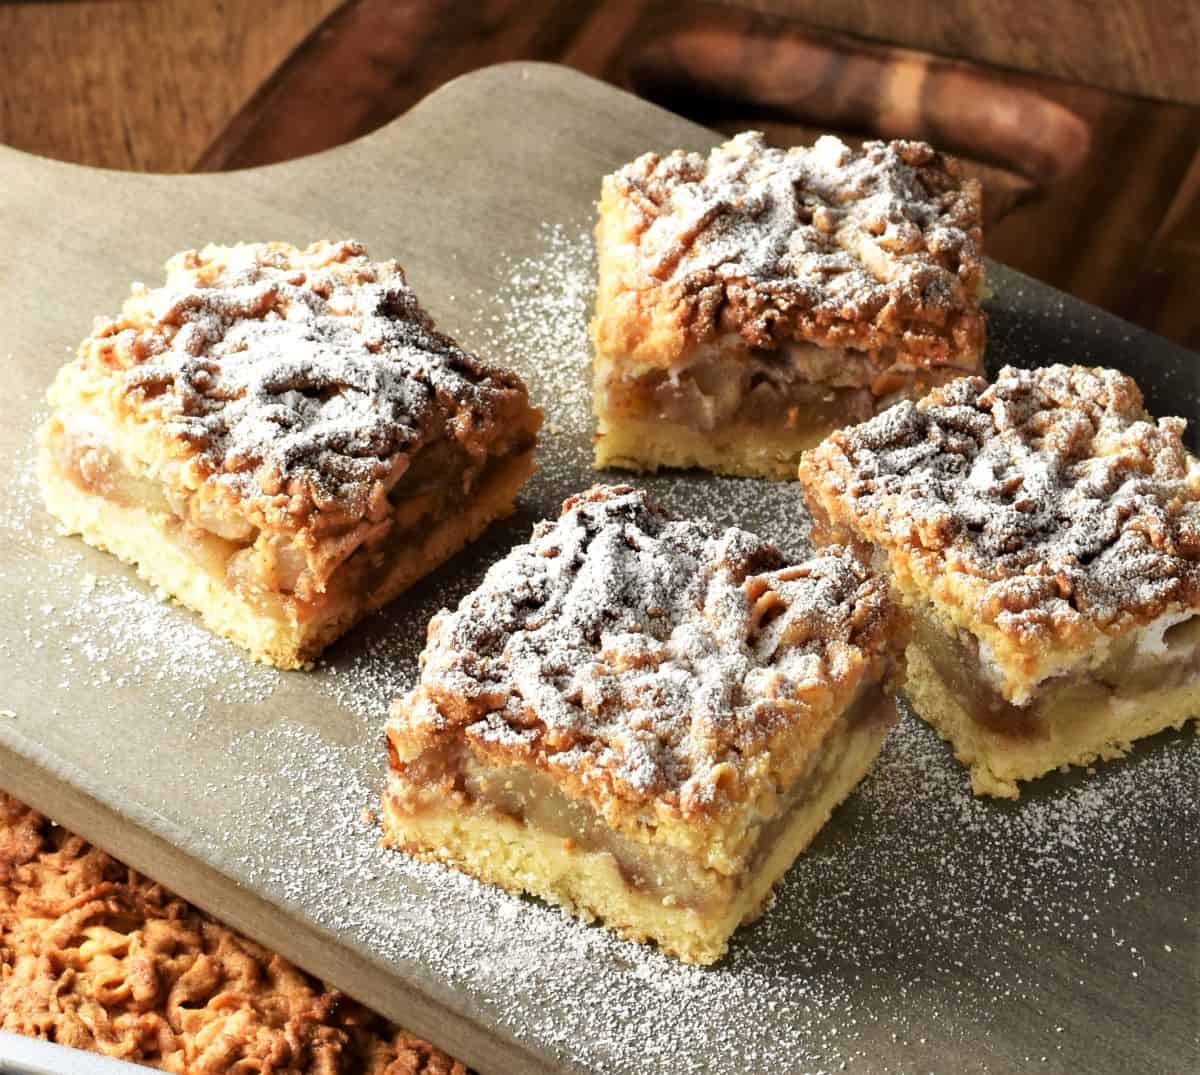
This Polish apple cake is packed full of delicious, juicy apples and comes with a crispy crumb topping. It is simple to make, not overly sweet and a delicious way to celebrate seasonal fruit.
See also easy Polish plum cake!
This Polish apple cake is a hugely popular Polish dessert and there are countless ways of making it. Polish szarlotka can be made with either cooked or raw apples, with or without a layer of meringue sandwiched between the apples and the crumb topping. It can even include different fruits, such as pears or peaches.
The one consistent feature in all szarlotka recipes seems to be the pastry, which is always some type of shortcrust pastry. This is also what makes szarlotka different from Polish 'jablecznik' apple cake, which can be made using different types of pastry, even yeast based.
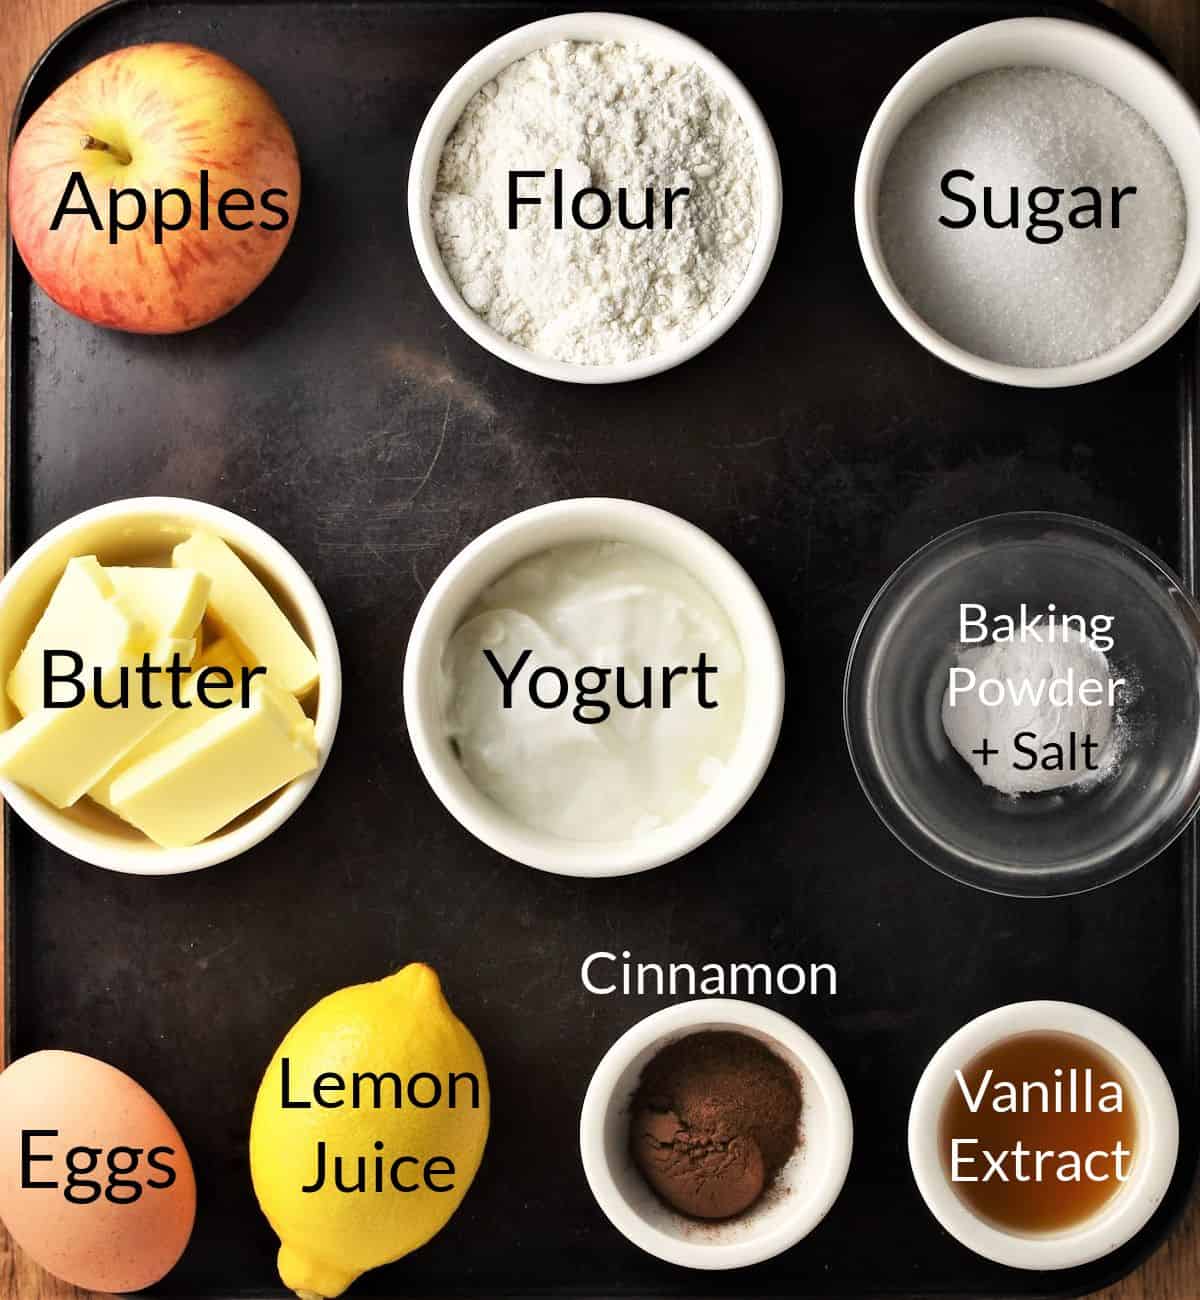
Polish apple cake ingredients
For the filling
- Apples: I used Braeburn apples (see below for alternatives).
- Lemon juice: prevents the apples turning brown and adds citrussy notes.
- Cinnamon: this apple crumb cake has just a hint of cinnamon, but you can increase the amount if you like.
- Sugar: If your apples are very sour you may want to add more sugar than the recommended amount.
For the dough
- Flour.
- Baking powder.
- Fine sea salt.
- Sugar.
- Vanilla extract: in Poland this would normally be replaced with vanilla sugar, which is a common baking ingredient (it's essentially vanilla flavoured fine sugar).
- Eggs: use the yolks in the dough and reserve the whites to make a meringue layer (see Instructions).
- Butter.
- Yogurt: use any thick yogurt, including Skyr, alternatively low-fat sour cream.
What apples to use
The most popular Polish apple varieties used to make szarlotka recipes include 'reneta' and 'antonowka', but many other varieties can also be used. I chose Braeburn apples for their sweet and tangy flavour and also because they hold their shape in cooking (this is important!). Granny Smith or Honeycrisp apples would also work well (Golden Delicious or MacIntosh, on the other hand, would not as they break down easily in cooking).
Bramley apples are also a good option, but keep in mind they are very sour which means you'd need to increase the amount of sugar in the filling mixture (and omit the lemon juice!). Consider perhaps using a combination of Bramley and a sweet apple variety.
Step-by-step recipe instructions
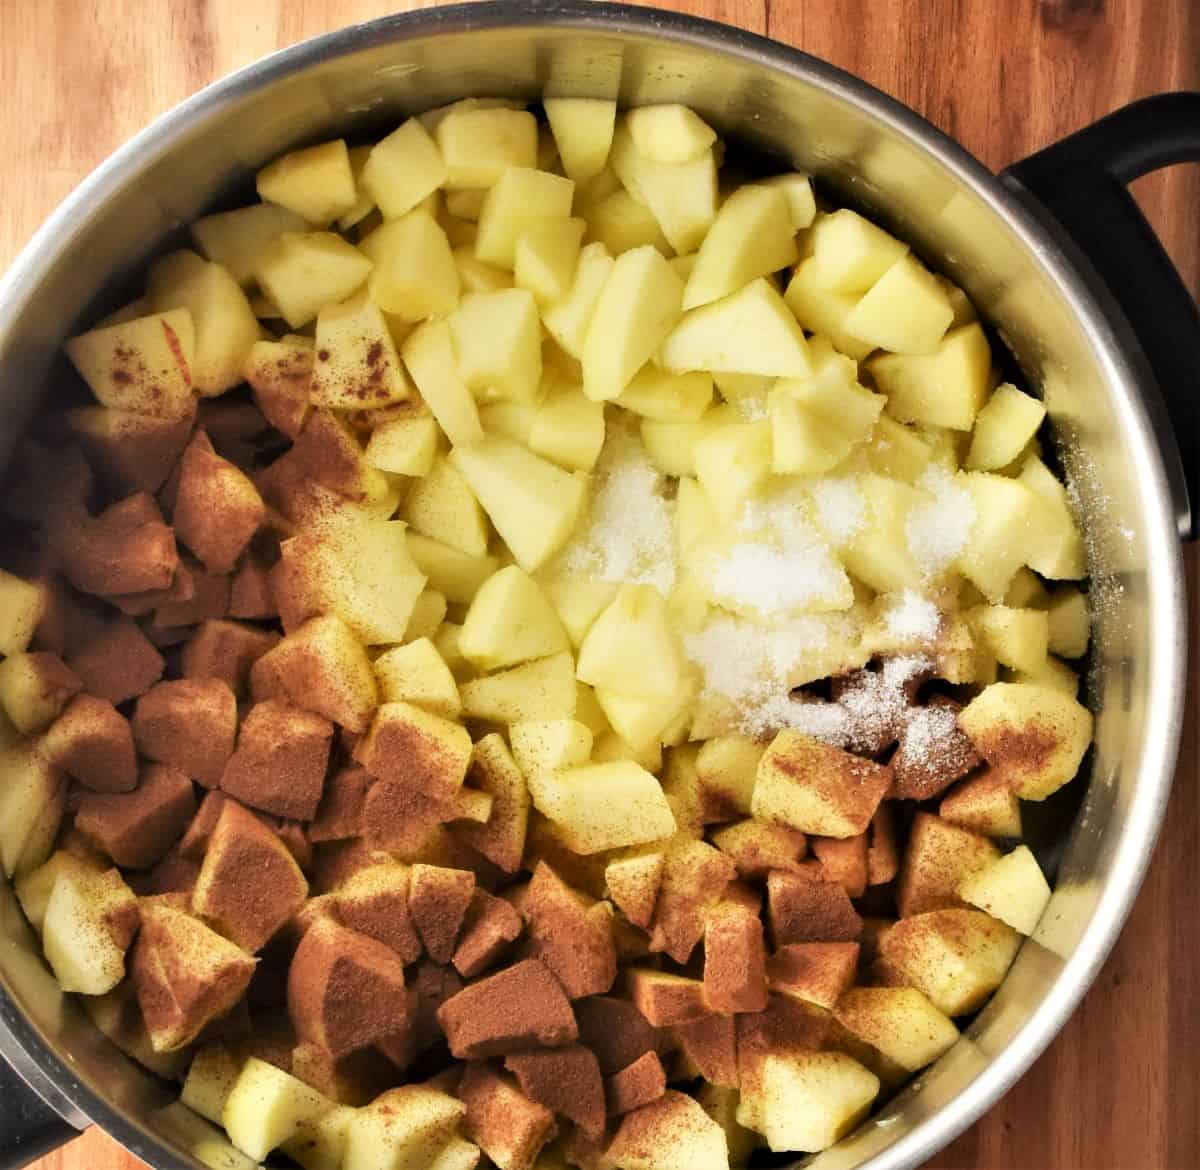
1.Start by preparing the apples. Core, peel and cube the apples and place in a large pot along with the lemon juice, cinnamon and 2.5 tablespoons of sugar. Stir thoroughly, cover and cook the apples over a medium heat for about 10 minutes or until they have released their juices and softened a little. Stir the mixture gently occasionally.
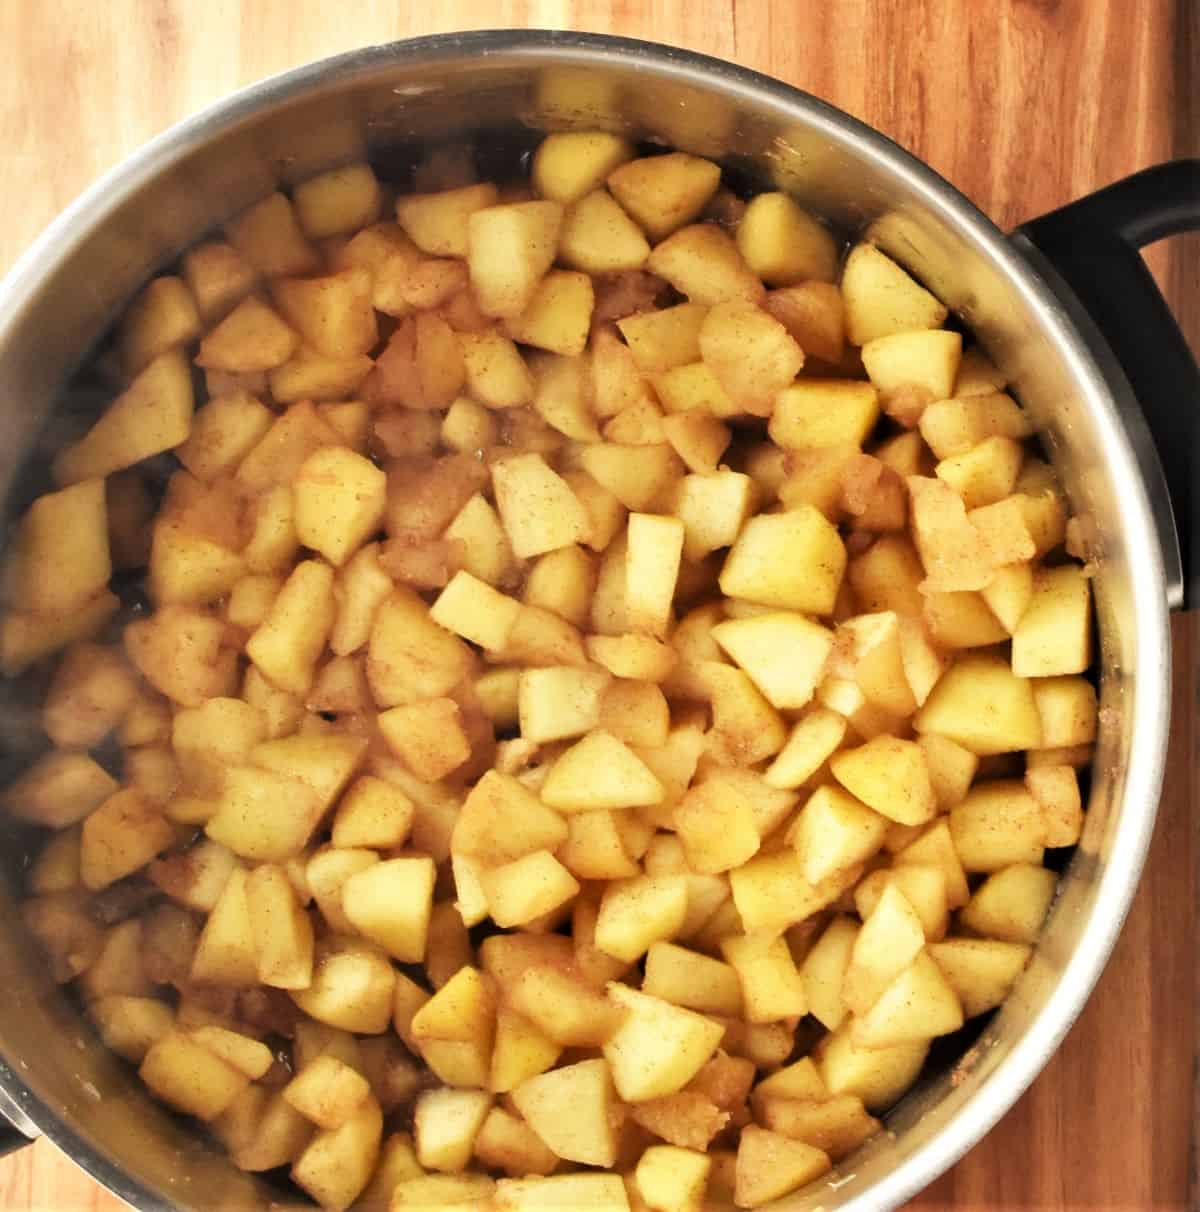
2. Remove the lid and continue cooking for 3-4 more minutes stirring gently. Remove from the heat and set aside to cool completely stirring once in a while (the apples will absorb excess moisture as they cool).
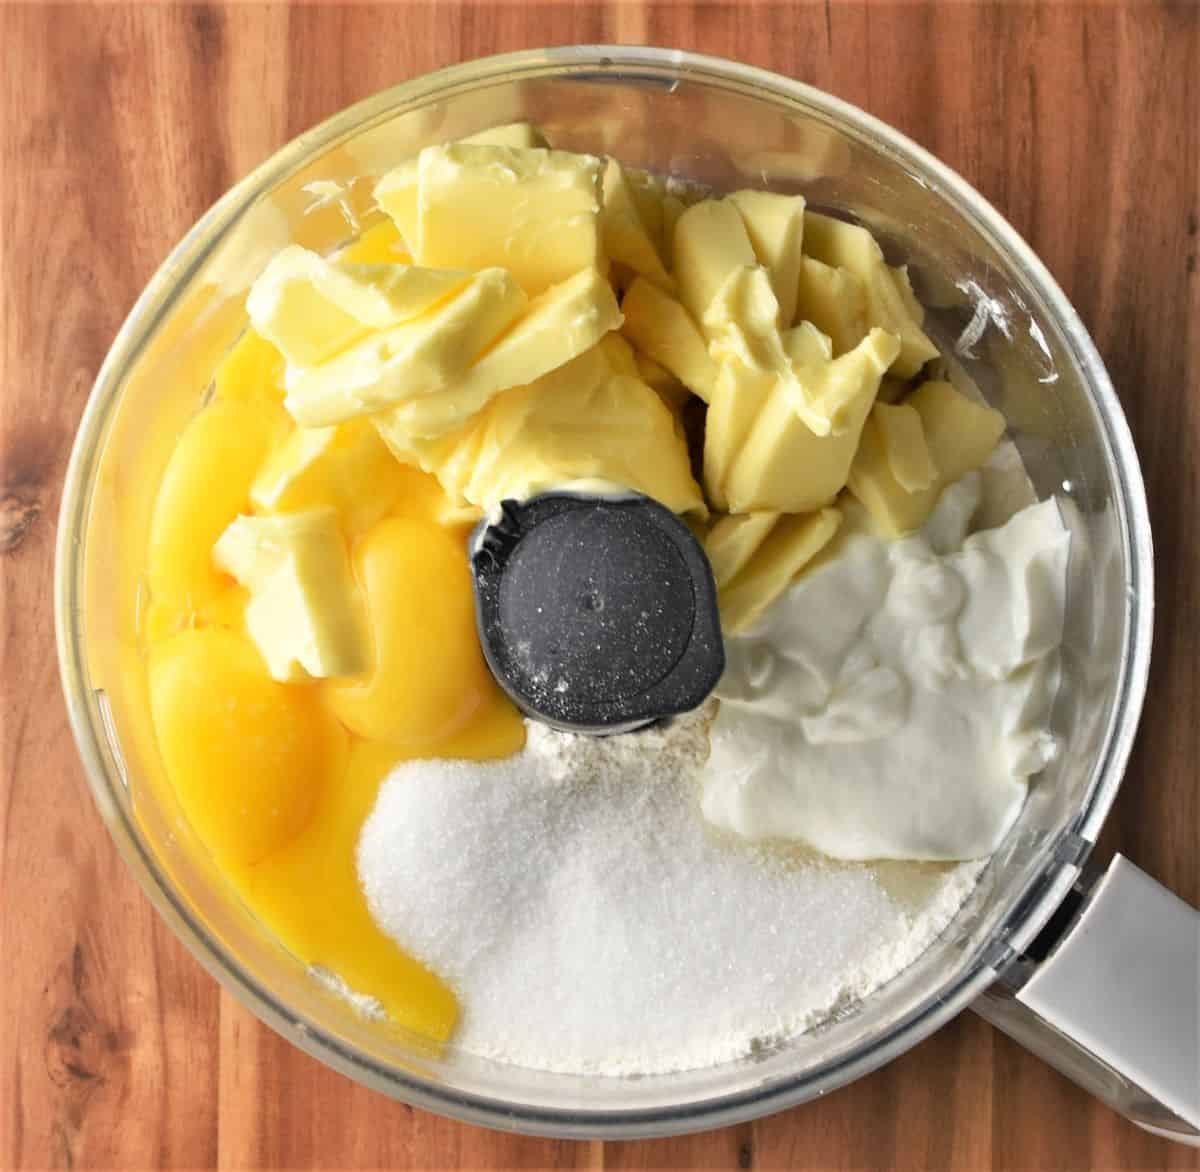
3. While your apples are cooling prepare the dough. Place the flour, baking powder, salt, sugar, 4 egg yolks, butter, vanilla extract and yogurt in a food processor.
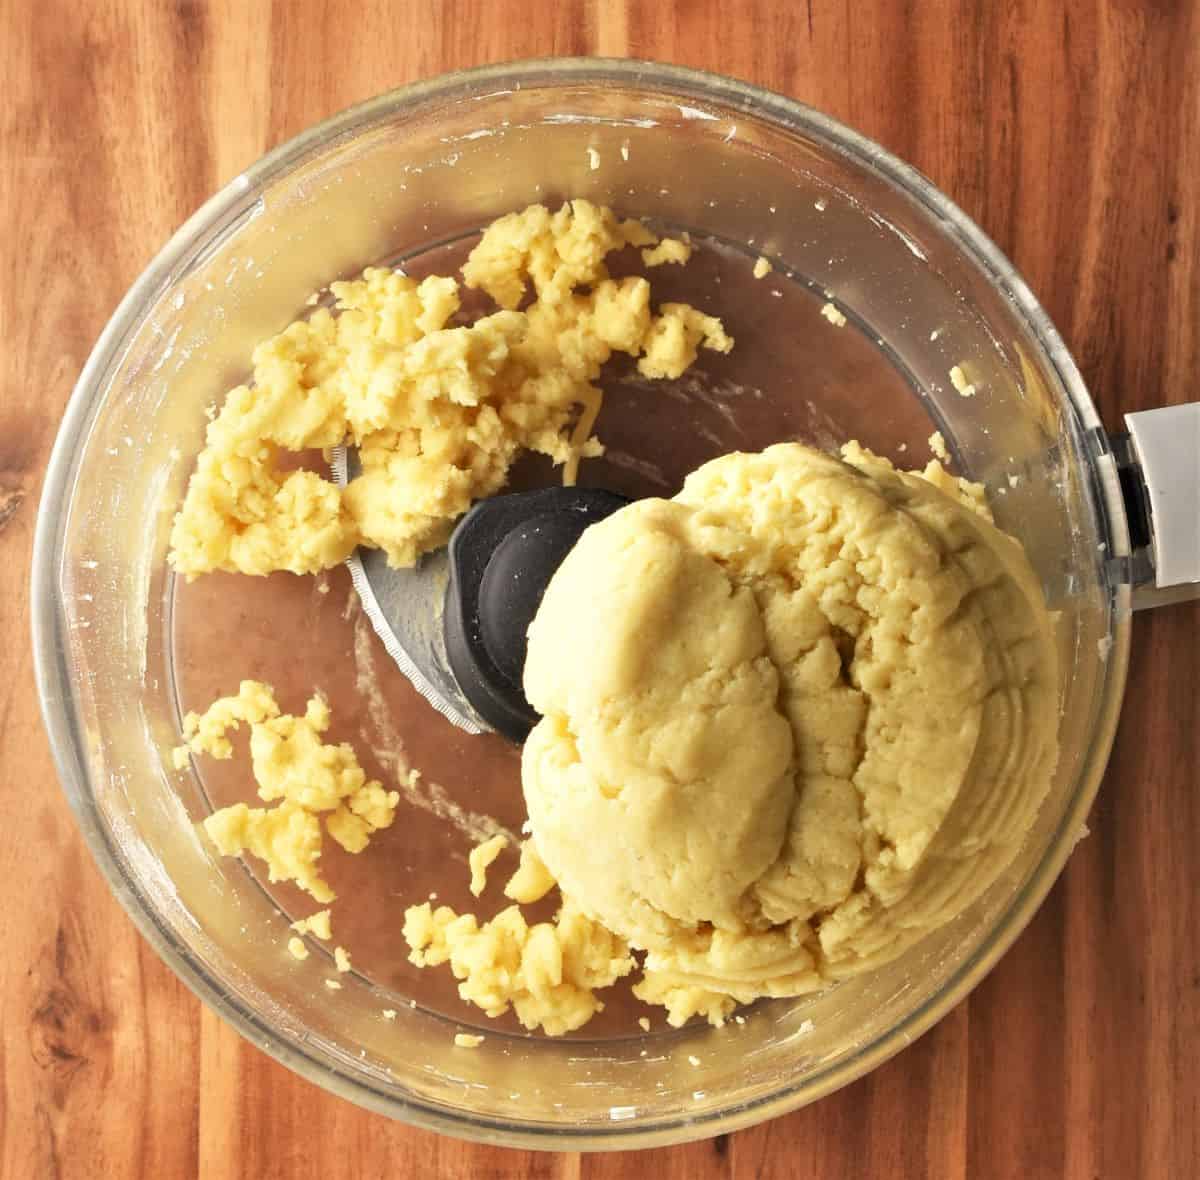
4. Pulse until the ingredients come together in a dough.
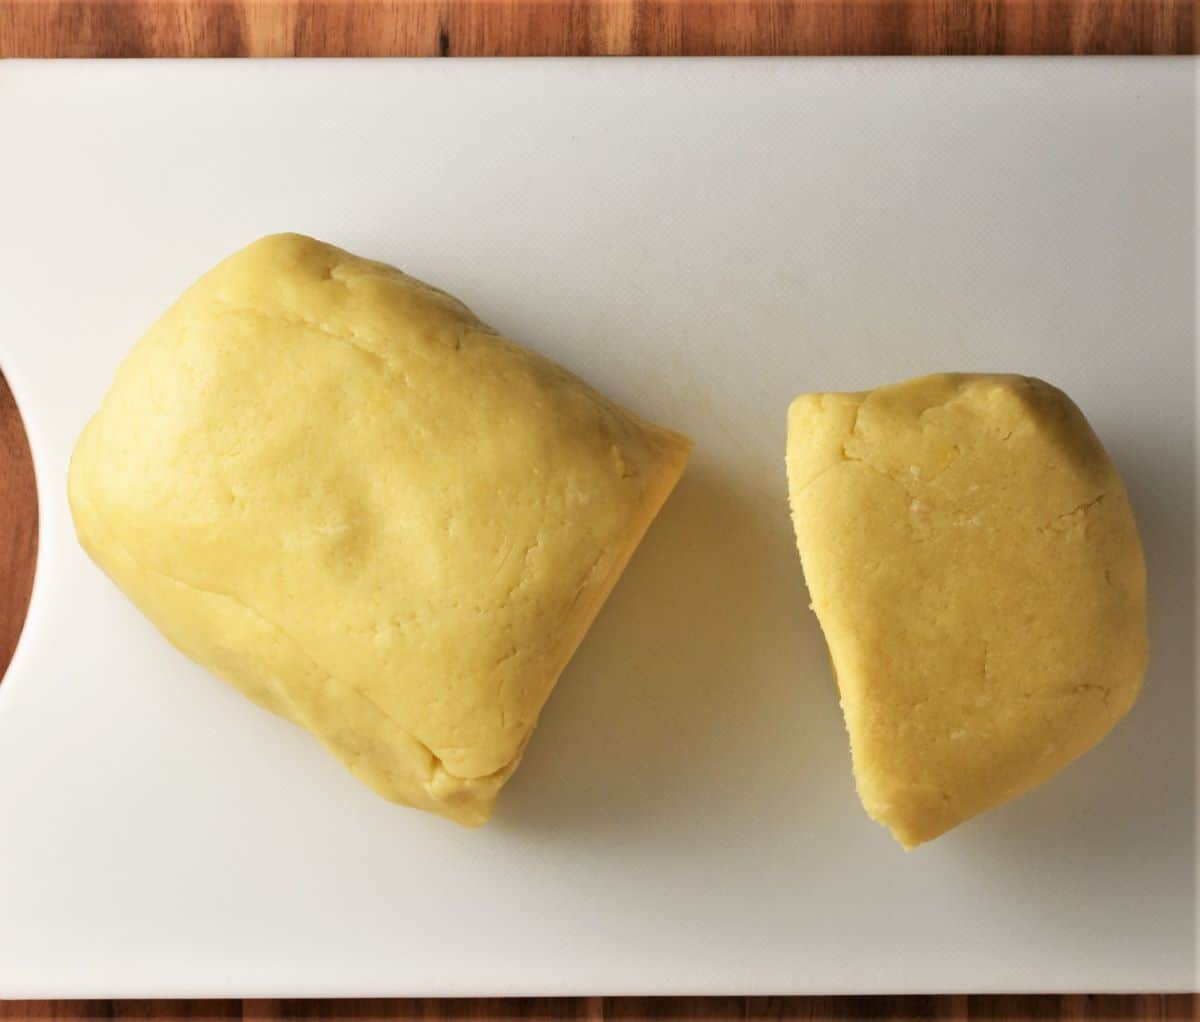
5. Place the dough on top of a flat surface and form a log. Cut it into 2 parts (⅔ and ⅓). Place both on a plate/cutting board and freeze for 30 minutes.
After about 20 minutes preheat the oven to 375 F/ 190 C/ gas mark 5. Lightly grease a 23/33 cm (9''/13'') pan and dust with flour (or line with parchment) and set aside.
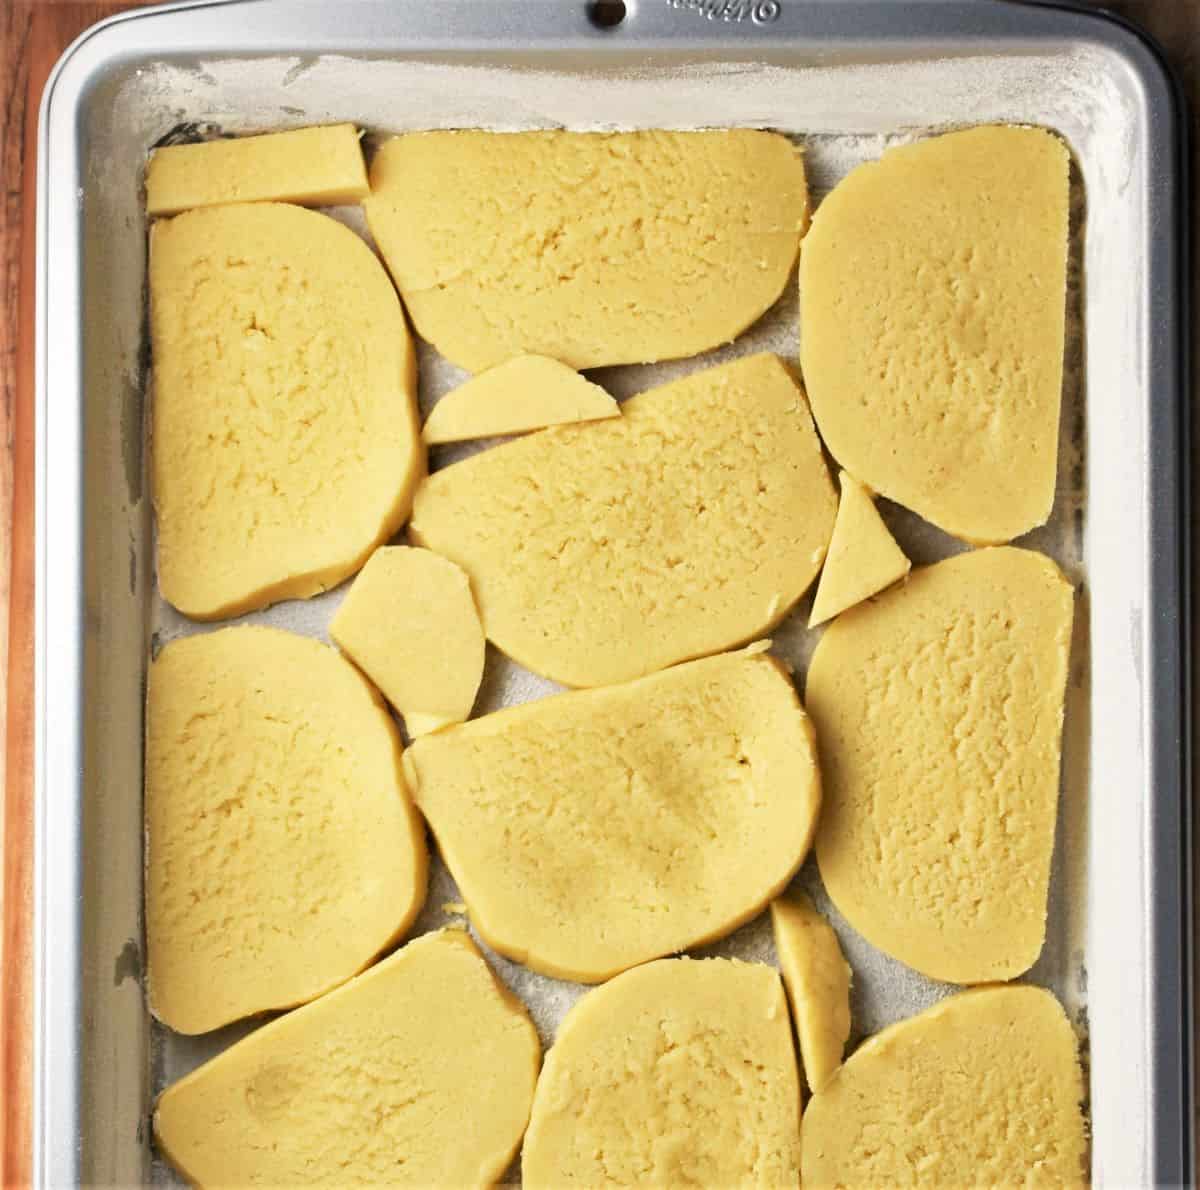
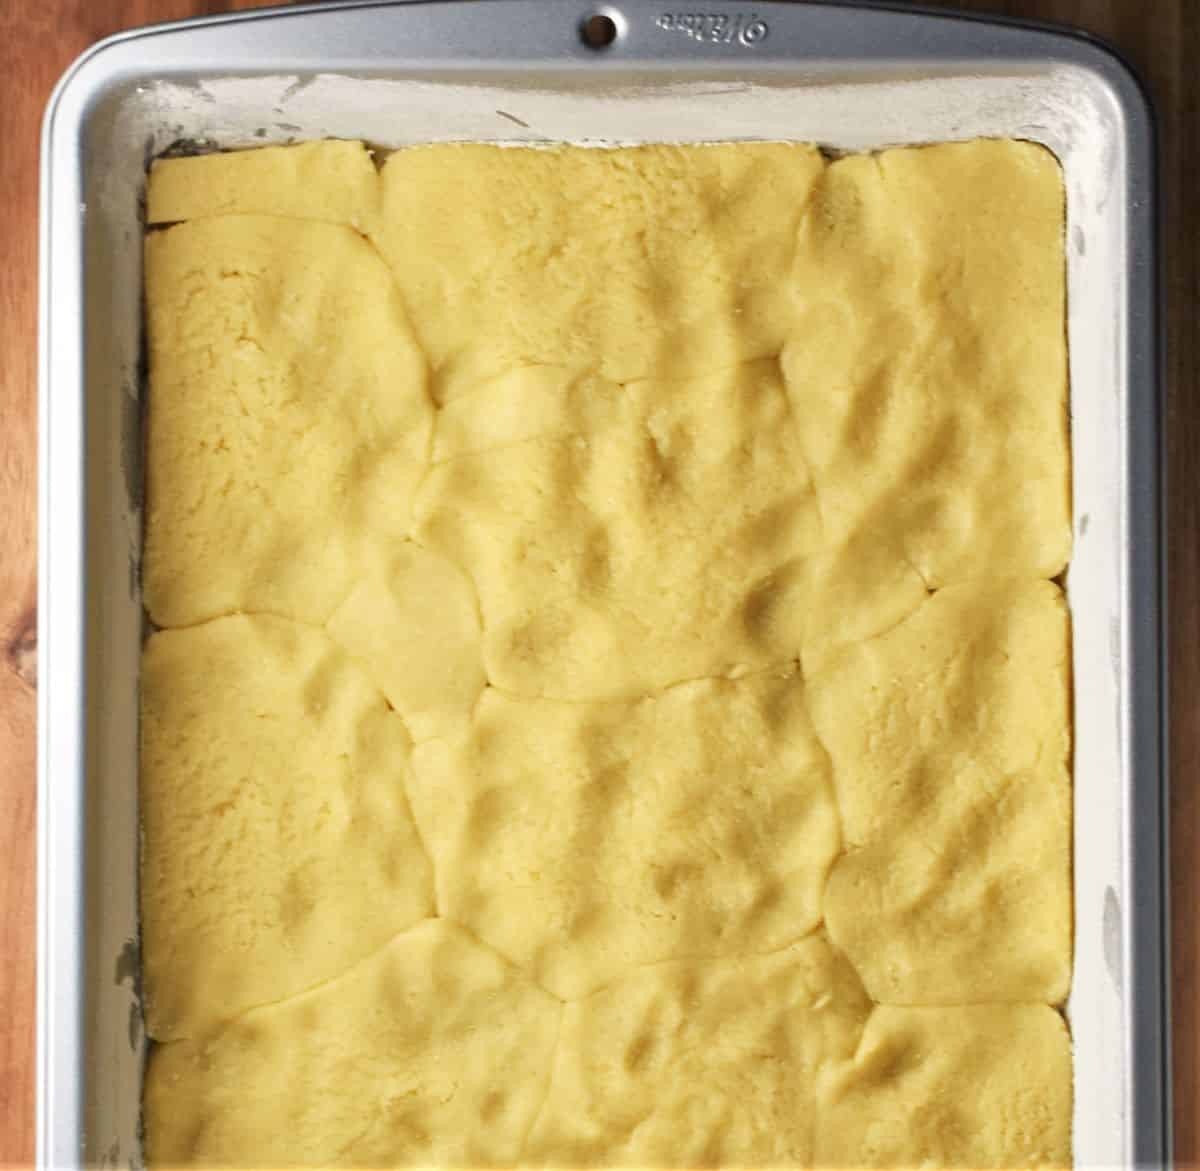
6. Remove the dough from the freezer (place the smaller piece in the fridge for now). Cut the larger dough into thin slices (approx. 5mm thick) and arrange in a single layer in the bottom of the pan. If you don't have enough slices you can cut a little off the smaller dough and use that.
7. Press down with your knuckles to spread the dough evenly over the bottom of the baking pan. Place the pan in the fridge while you prepare the egg whites.
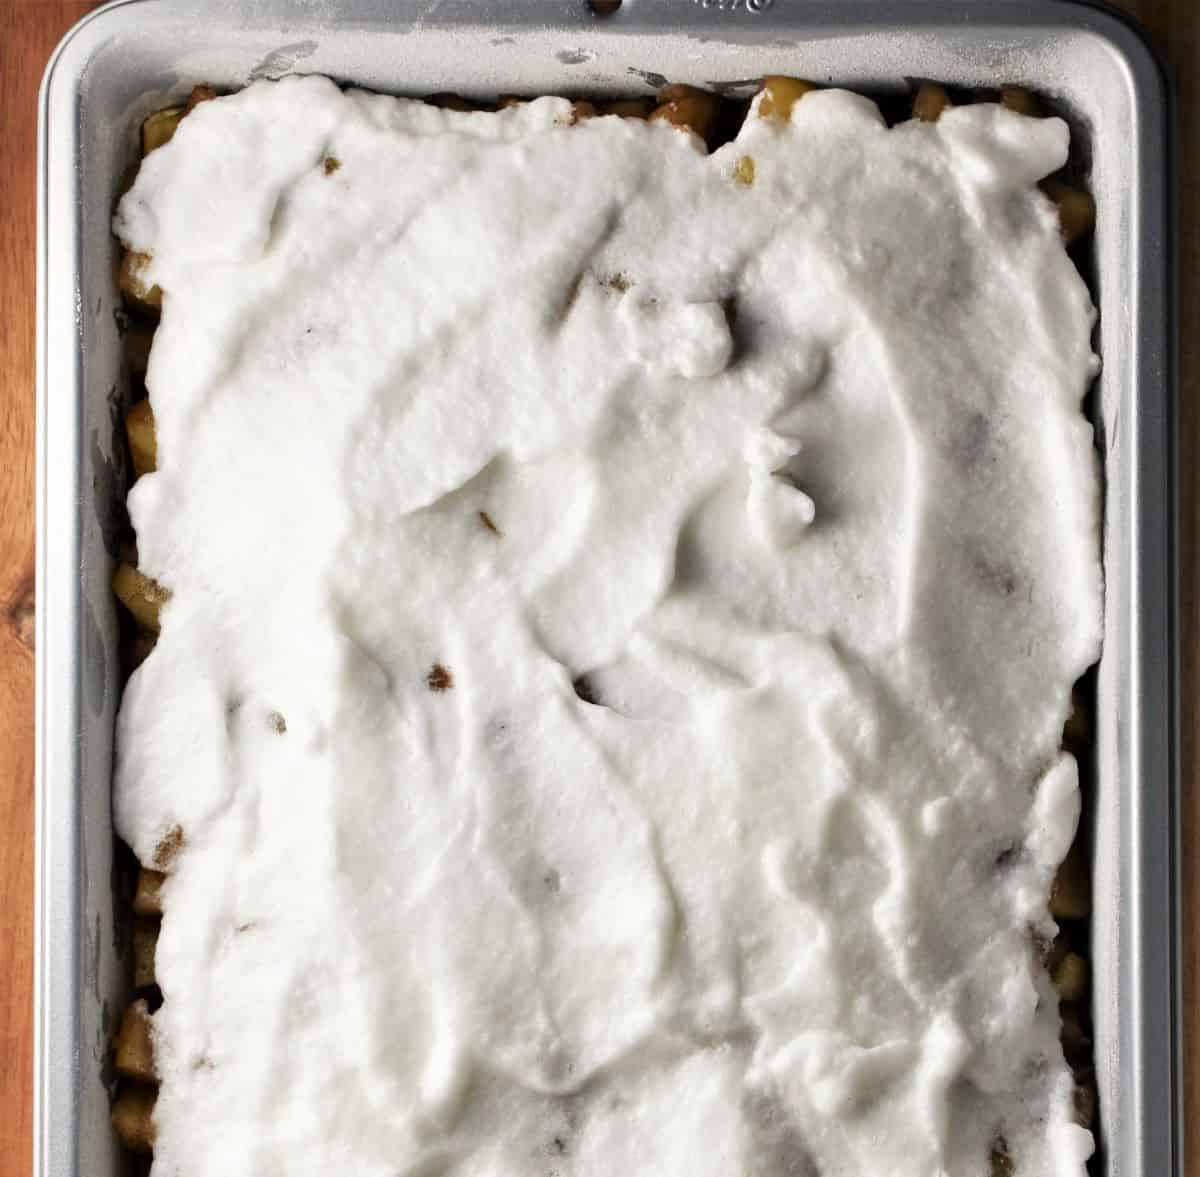
Beat the egg whites with a pinch of salt until soft peaks appear then gradually add 2.5 tablespoons of sugar beating all the time until the mixture is thick and firm. Set aside.
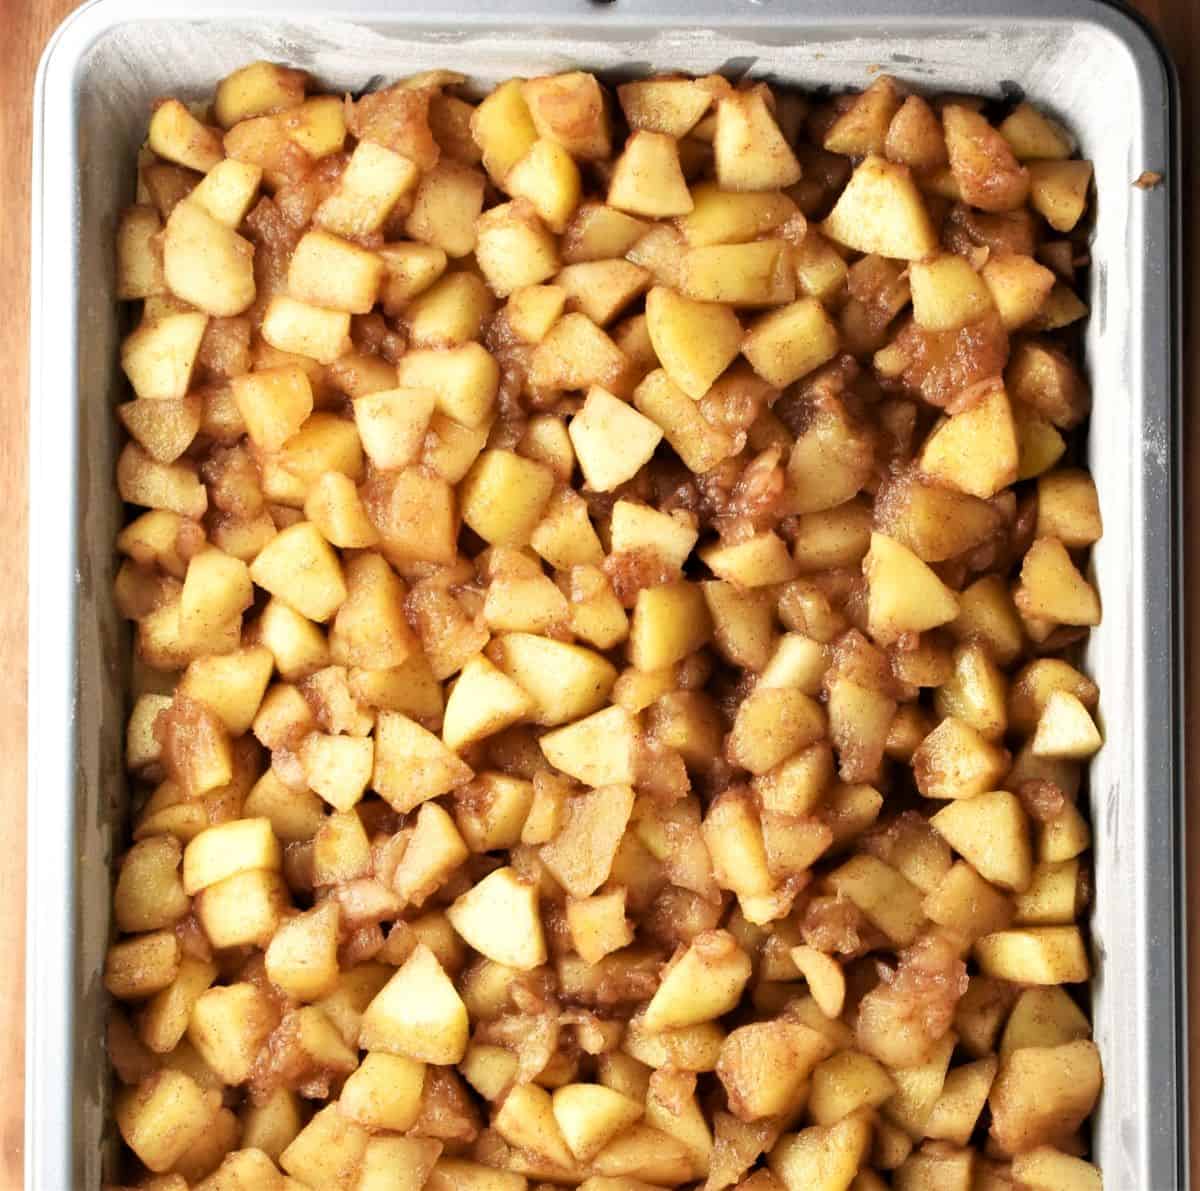
8. Remove the pan as well as the remaining dough from the fridge. Spread the apple filling (it should be completely cooled by now) over the layer of dough and even out without pressing down too much.
9. Spread the egg white mixture over the top.
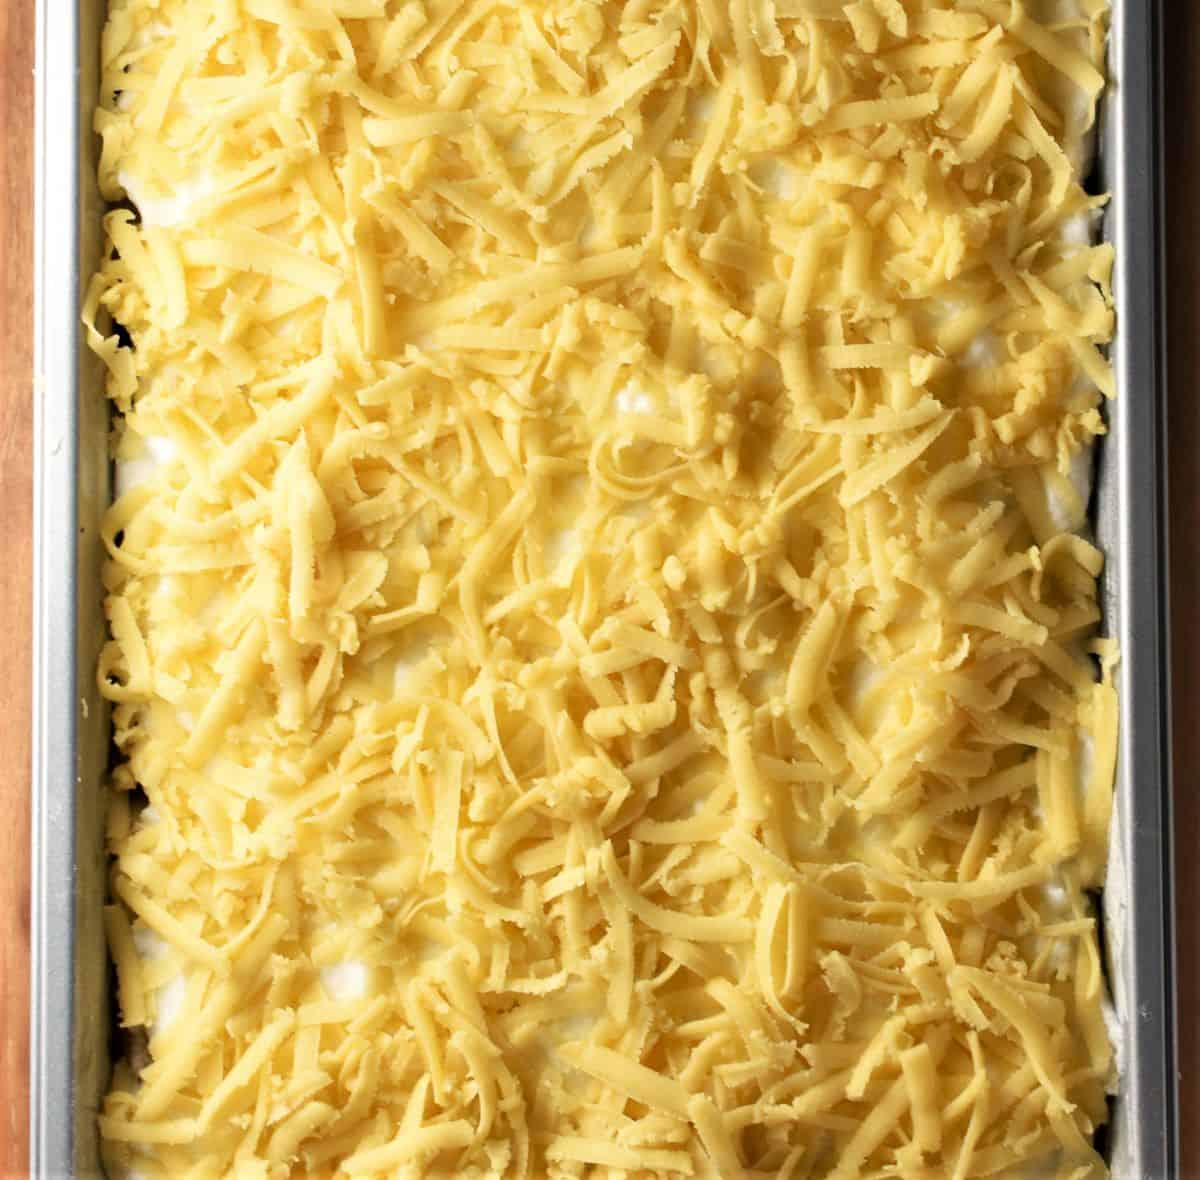
10. Coarsely grate the remaining dough over the whole thing without pressing down.
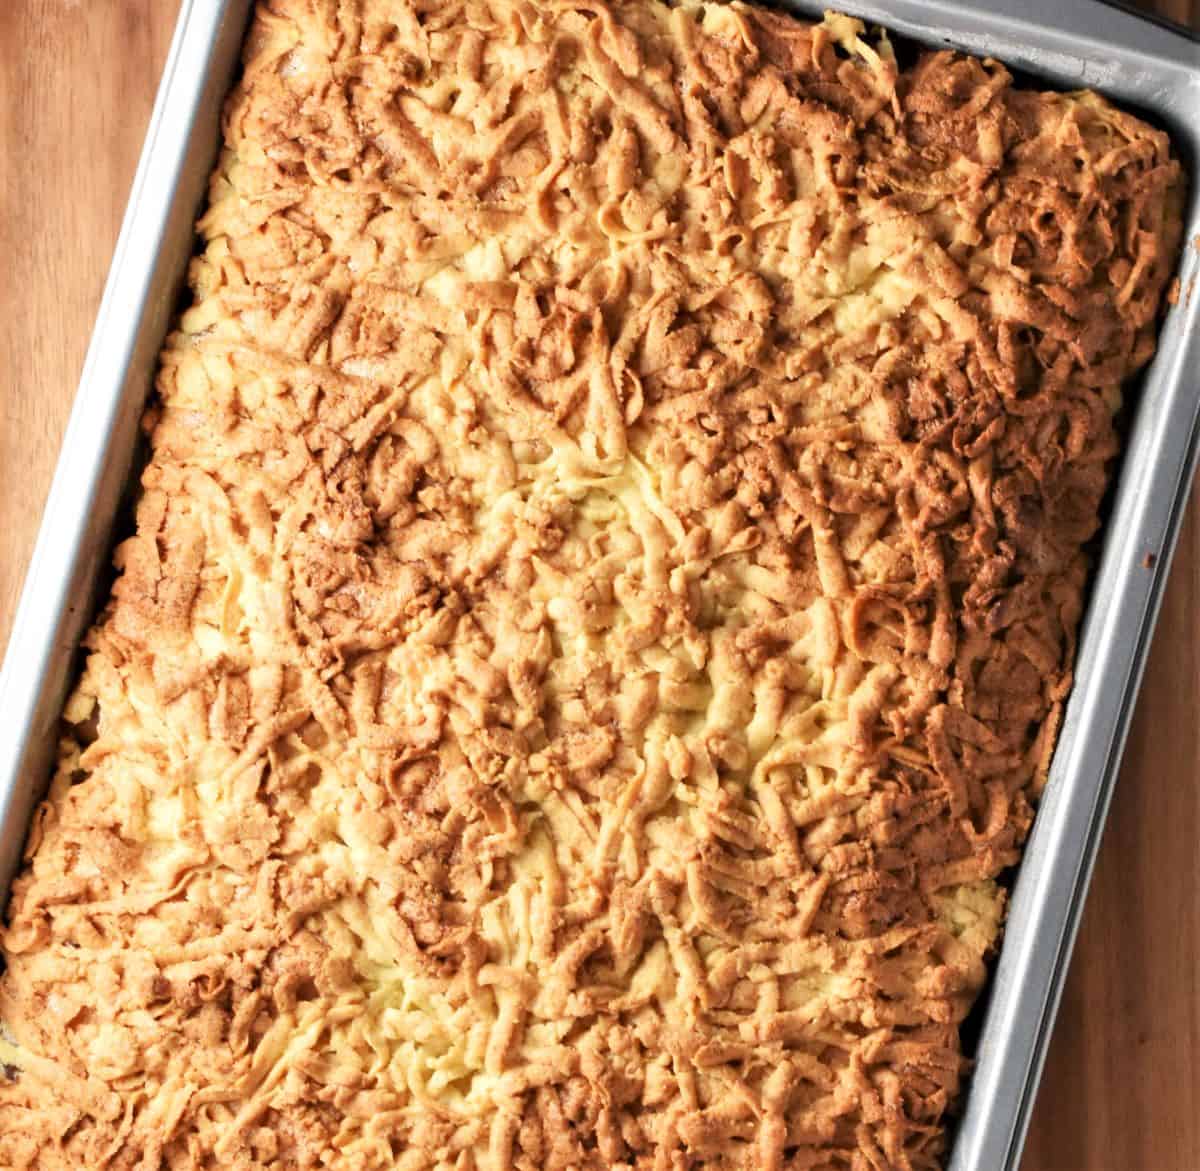
11. Bake in the centre of the oven for 40 minutes then cover loosely, if necessary (to prevent the top becoming too dark) and continue baking for another 25 minutes (to ensure the bottom of the cake is fully cooked).
Remove from the oven and set aside to cool before cutting. Dust your apple cake with a little icing/powdered sugar before serving.
Serving suggestions
Polish apple cake has traditionally been served with only a dusting of icing/powdered sugar (as in the photos), but, just like apple pie, it is also delicious with a scoop of vanilla ice cream or dollop of whipping cream.
Do I have to use a food processor
No, you don't, but I prefer it as it's quick and easy to do (the food processor method takes only about 30 seconds!). If, however, you prefer to make the dough by hand place the flour, baking powder, salt, sugar and butter in a large bowl and using your fingertips make a crumbly mixture. Then add the egg yolks, vanilla extract and yogurt and knead in to form a dough.
Top tips
- Cook the apples as soon as you've peeled and chopped them (peeled apples brown quickly).
- Cool the apple mixture before assembling the cake.
- Grate the dough topping directly over the layer of egg whites and do NOT press down.
- Preheated the oven before placing the cake inside.
- I recommend cooling the cake completely before cutting (it will be crumbly if you cut it while still hot).
- Best served on the day it's made, but will still be delicious for the next 2-3 days. Just keep it covered so it retains its moisture.
- Freeze for up to 3 months.
Can I prepare Polish apple cake ahead
You can prepare parts of szarlotka cake ahead, but I do not recommend assembling the entire recipe ahead. This is because the apple filling mixture is quite moist and may start releasing juices if left unbaked. The egg white layer will also lose its shape under the layer of the crumb top.
You can, however, prepare the apple filling ahead! Simply cook and cool the apples as per Instructions then cover and refrigerate overnight. Stir gently before assembling the cake.
Related recipes
- Blackberry Crumb Coffee Cake (Polish Plesniak)
- Almond Redcurrant Cake
- Polish Rogaliki (Rugelach) Crescent Cookies
- Traditional Baked Polish Cheesecake (Sernik)
- Polish Rice with Apples (Ryz z Jablkami)
Keep in touch!
If you make this Polish apple cake I'd love to know how it turned out for you. Let me know in the comments below, thanks!
Follow me on Facebook, Instagram and Twitter for regular recipe updates! Or you could subscribe to this blog and receive all my latest recipes right into your mailbox!
Recipe

Traditional Polish Apple Cake
Equipment
- Large pot
- Food processor
- Box grater
- 23/33 cm (9/13 inch) baking pan
Ingredients
For the filling
- 3.3 pounds (1½ kg) apples unpeeled weight, Braeburn, Granny Smith, see the post for more detail
- 2½ tablespoons sugar
- 1½ teaspoons cinnamon
- 3 tablespoons lemon juice
For the dough
- 3 cups+2tbsp (400 g) all-purpose/plain flour (14.11 oz)
- 1 teaspoon baking powder
- ¼ teaspoon fine sea salt
- ½ cup (100 g) sugar plus 2½ tablespoons for the egg whites layer
- 1⅔ sticks (190 g) butter (6.7 oz) chilled, chopped
- 4 large eggs separated, room temperature
- 3 tablespoons thick yogurt or sour cream
- 2 teaspoons vanilla extract
Instructions
- Start by preparing the apples. Core, peel and cube the apples and place in a large pot along with the lemon juice, cinnamon and 2.5 tablespoons of sugar. Stir thoroughly, cover and cook the apples over a medium heat for about 10 minutes or until they have released their juices and softened. Stir the mixture gently occasionally.Remove the lid and continue cooking for 3-4 more minutes stirring gently. Remove from the heat and set aside to cool completely stirring once in a while (the apples will absorb excess moisture as they cool).
- While your apples are cooling prepare the dough. Place the flour, baking powder, salt, sugar, 4 egg yolks, butter, vanilla extract and yogurt in a food processor. Pulse until the ingredients come together in a dough.
- Place the dough on top of a flat surface and form a log. Cut it into 2 parts (⅔ and ⅓). Place both on a plate/cutting board and freeze for 30 minutes.After about 20 minutes preheat the oven to 375 F/ 190 C/ gas mark 5. Lightly grease a 23/33 cm (9/13'') pan and dust with flour (or line with parchment) and set aside.
- Remove the dough from the freezer (place the smaller piece in the fridge for now). Cut the larger dough into thin slices (approx. 5mm thick) and arrange in a single layer in the bottom of the baking pan. If you don't have enough slices you can cut a little off the smaller dough and use that.
- Press down with your knuckles to spread the dough evenly over the bottom of the pan. Place the pan in the fridge while you prepare the egg whites.
- Beat the egg whites with a pinch of salt until soft peaks appear then gradually add 2.5 tablespoons of sugar beating all the time until the mixture is thick and firm. Set aside.
- Remove the pan as well as the remaining dough from the fridge. Spread the apple filling (it should be completely cooled by now) over the layer of dough and even out without pressing down too much.
- Spread the egg white mixture over the top.
- Coarsely grate the remaining dough over the whole thing without pressing down.
- Bake in the centre of the oven for 40 minutes then cover loosely, if necessary (to prevent the top becoming too dark) and continue baking for another 25 minutes (to ensure the bottom of the cake is fully cooked).
- Remove from the oven and set aside to cool before cutting. Dust your apple cake with a little icing/powdered sugar before serving.
Notes
- Cook the apples as soon as you've peeled and chopped them (peeled apples brown quickly).
- Cool the apple mixture before assembling the cake.
- Grate the dough topping directly over the layer of egg whites and do NOT press down.
- Preheat the oven before placing the cake inside.
- I recommend cooling the cake completely before cutting (it will be crumbly if you cut it while still hot).
- Best served on the day it's made, but will still be delicious for the next 2-3 days. Just keep it covered so it retains its moisture.
- Freeze for up to 3 months.
Nutrition
*Nutritional information is automatically generated and should be considered as an estimate.
**A note about baking: If using a fan-assisted oven refer to your appliance's instructions and adjust the temperature accordingly.


Alexander Pruss says
From the photos, there should be a lot more apple if one wants to match the szarlotki I've seen in Poland (e.g., in the Tatra National Park shelters, or in Krakow). Apple should be about 80% of the height, I think.
Monika says
I don't think there is a definition of the ideal szarlotka. Homemade Polish cakes, and this is one of them, are always different from cake shop (cukiernia) offerings. So you are correct, this cake is not the same as cake shop apple cake.
Ryan Kilgallon says
Made this and it came out perfect, very good instructions & easy to make. Tasted amazing.
Monika says
Fantastic! Thank you for your feedback:)
Teresa Chrobak-Prince says
This recipe is easy to follow and the cake turned out spectacular!! This was my first attempt at a Szarlotka. I have an electric oven and I baked the first 40mins at 375 as instructed, but then covered the cake with foil and reduced the temperature to 350 for the remaining time. It was perfectly baked after 55mins total. I used granny smith apples and absolutely love the tartness. This cake is the genuine deal as far as Polish Szarlotka goes. The fact that it is not overly sweet really makes the apple filling shine!! Thanks for the awesome recipe!
Monika says
You are welcome! I am glad you enjoyed it and thank you for your feedback:)
Ally & Kato says
My son made this (8 y.o.). He found it not sweet enough, too bready, and not enough apples. Also, the dough didnt come together easily. However, we enjoyed the process and thought that the way of making slices from the dough and then pushing them down into the pan was interesting. We also like shredding the dough on top.
Monika says
Sounds like there was either too much flour or not enough 'wet' ingredients. The dough should come together easily and quickly.
Andrzej says
Love this recipe also identical to my pra bapcias (great grandma's) but we use whole sour cream instead of yogurt and European vanilla sugar and vanilla paste; crumble butter in the dry with hands🙏🏼 and then yolks and sour cream with "cripple fingers" lol 🖐🏼 and always grate top layer. ❤️😊
Monika says
Thank you, your prababcia's recipe does sound very similar to mine:)
Tim says
Thank you for the recipe, it was delicious. I'm wondering what I did wrong though. Mine came out very much like a pie. The bottom crust was thin and very much like a pie crust. I'm not sure what the meringue does, it totally disappeared and the top also turned out like a pie crust. Any suggestions?
It still tasted amazing but I'm just trying to understand why my results look so different from your photos.
Monika says
Perhaps your baking powder was out of date? Or was the dough too wet? Did it look like mine? Or perhaps your oven wasn't hot enough. There might have been other reasons. I am glad you enjoyed it despite it not being perfect:)
Pam says
Delicious cake. Thank you for publishing 5 *
Monika says
You are welcome:)
Sabina says
Bake it every chance a get, which is very often, love this delicious easy recipe!
My aunt used to bake a similar cake, but when she passed away, her recipe went with her, so this recipe is so very close to hers, thank you for sharing it.
Monika says
You are very welcome! Thank you for letting me know:)
Lynn says
So may of your recipes take me back to my childhood in Chicago and the recipes my Ukrainian grandmother and her Polish friends made. My grandmother passed before anyone thought to write down recipes she only knew how to cook by memory and experience.
This cake was delicious!
Monika says
Thank you for letting me know! I am glad my recipes help bring back good memories:) Making traditional Polish food does the same for me.
Olena Linfante says
My family in love with this pie❤️
Monika says
Glad to know it:)
Jelena Malski says
Instead of grating the top portion of the dough, could I not freeze that portion and just roll it, so that I have a flat top instead of the crumbly dough on top?
Monika says
I haven't made it like that but you can try it if you like. One potential problem might be that there won't be enough dough to cover the entire top. Another issue might be with being able to roll it out quite thinly (the dough will be tough from the freezer but also sticky). If you try it and it doesn't work you can always bring the dough together again and grate it!
Visnja Mioc says
Hello! Could I use my stand mixer with the dough hook attachment?
Monika says
I haven't tried it, but I suspect it should be ok. You can also do it by hand - just bring all the ingredients together into a dough.
Visnja Mioc says
Ended up making this for Easter. Turned out amazing!
Monika says
Glad to hear it:)
Lucy says
Made this yesterday and is absolutely amazingly good. Will be making another one today to take to a dinner party 🥰. Thankyou for sharing .
Monika says
You are welcome, glad you enjoyed it:)
Paula says
Amazing recipe, reminds me of the cake my Polish granny used to make! It was so easy to follow! Tha k you for sharing!
Monika says
You are welcome:)
Teresa Clarke says
This recipe was so easy to follow, the results delicious 😋
Monika says
Thank you for your feedback:)
Eugeniusz says
What a well-detailed recipe! My szarlotka came out just like the photo and tasted even better! My mother made this recipe when I was a boy and it brought back so many nice memories to make it for my family. I will be making it regularly now that I am retired.
Monika says
I am thrilled that you enjoyed the recipe but also that it brought back good memories. Thanks for letting me know:)
Eva says
Can I make it without egg whites
Monika says
Yes, you can. See also my apple crumble tart I made recently which is similar to this cake and does not contain egg whites.
Darya says
Just made it so good
Monika says
Thanks for letting me know:)
Marta says
I so very much would like to bake your Polish apple cake. What attracts me to it is that it is not as heavy in butter as the other three traditional apple cakes that I have. I noticed in your beautiful and very professional display that you are using a metal pan and that you bake it at 375 for about 65 minutes. I bake mine in a glass pan at 350 and it is always ready in about 55 minutes. My other two recipes (also very similar to yours) recommend 356 Fahrenheit (180 Celsius).
Do you think I should reduce the temperature of your recipe by 25 degrees (to 350) since I am using a glass pan?
I will bake your cake as soon as you reply since I already purchased apples. Once again, thank you for your beautiful photo presentation.
Monika says
Hi Marta! I have no experience with using glass pans for baking so unfortunately can't answer your question. If, however, you are worried the temperature might be too high for your dish you can try covering the cake loosely sooner than I have done, especially if it's browning too quickly, and perhaps remove it from the oven a little earlier than the recommended time. Good luck:)
Rachelle says
Hi Monika!
I just wanted to let you know, I made this for my boyfriend who is Polish (it’s one of his favorite desserts). He loved it! He also took some to his parents and they were super impressed! Also, after that, he went back to Poland to visit family and during his time there, he said he tried many szarlotka and they did not compare to this recipe. I’ve made it twice already and for the summer I’m thinking about switching the filling to plums. My mom who is British also loved it and keeps requesting it. Thank you for this!
Monika says
Thank you for letting me know, I am so happy you and your family enjoyed this recipe! There are many versions of this cake so it's likely your boyfriend tried different szarlotkas while in Poland, I am just happy he still liked mine afterwards! Hope this cake works with plums too:)
Debbie says
What can you use instead of yogurt?
Monika says
Sour cream.
Mickey says
Delicious recipe. I used spartan apples and it was perfect. Thank you for posting the recipe.
Monika says
You are welcome! Glad you enjoyed it:)
lm says
Thank you for the recipe. I was looking for a recipe to a polish apple cake my grandma used to make and I'm so happy I found your recipe. It turned out great almost exactly like I remember it and the family loved it. The egg white layer in my grandma recipe used to "sweat" between the pastry crumbs so I will try to use slightly less crumb as the top layer to get that effect.
Monika says
You are welcome! I am glad it turned out well:)
Letty says
Great recipe! I followed this exactly as is and it turned out great. It is not too sweet which is nice but I also used more Granny Smith apples than Honeycrisp so that may be the reason. Thank you and it was really fun to learn how to make a Polish Szarlotka!
Monika says
You are welcome! Glad you gave this a go and enjoyed it:)
Letty says
Hi- planning on surprising a Polish friend with this cake. Do I use salted or unsalted butter in the dough? Thank you- looking forward to making it!
Monika says
Use unsalted butter as you'll be adding salt into the dough anyway. Hope your friend likes this cake!
Letty says
thanks for the reply!
Carolyn says
Made this recipe yesterday for the first time and tasted it today. I used a mix of honey crisp and granny Smith as I think one or the other would be too sweet or too sour. Nice mix. However the consistency of the dough I got from this recipe wasn't as dense loooking as your picture so I added a little more flour, but I guess I shouldn't have. It's a little dry in the bottom for my taste (I'm a very amateur baker so probably my doing) but the moist filling saves it. I made it so late I covered it too soon and the top isn't crispy anymore (I also ripped the dough into small pieces abd flattened them and place on top because grating wasnt working for me. Going to cut, plate and top eith icing sugar. Hopefully NY polish friends I am sharing this with enjoy it. In my defense I am only half polish 😉 . I will make again and follow recipe perfectly next time but I am pleased with my first attempt.
Question... how long can this stay on counter or should I refrigerate it ? I know it freezes well.
Monika says
Hi Carolyn, regarding the bottom of the cake being a little dry - perhaps there was too much flour, as you say, but maybe you baked it a little too long (not all appliances are the same), which might be the case if the top got too brown or dry. You can leave it on top of the counter for a couple of days but refrigerate it after that. If the cake is too cold for your liking you can always microwave individual slices for a few seconds before serving. Hope this helps:)
La Tun says
I made this recipe and it's really delicious! I'm making it for the second time today because my family asked for it again.
The only addition I made to the recipe is adding walnuts to the top layer.
Thank you for the recipe and for the detailed instructions! Keep it up!
Monika says
Great to know! Adding walnuts to the crumble top sounds like a really idea, must try that next time I make this cake. Thanks so much for the feedback:)
Norma says
HI Monika,
This looks yummy and I will make it for my Polish husband!!!
Could you just roll the dough rather than cut it into portions?
Love your recipes
Monika says
Hi Norma! Yes, you could roll it but it's more difficult to do as the dough will be quite hard straight from the freezer. Slicing it thinly is really easy and remember you are not aiming for perfection. The bottom line is you need to spread the dough over the bottom of the pan as best you can and it doesn't really matter what method you use. Choose one you are comfortable with. Hope this helps:)
Yvette Boleslav says
Hi Monika,
I love how easy you make it to use the dough without rolling it out. Do you think this would work in a 10" pie/quiche pan, with ingredient quantity adjustments?
Thank you.
Yvette
Monika says
Hi Yvette, I am not sure it would work. If you have a ridged fluted pan there might be a problem getting the cake out in one piece (it's crumbly). Plus there is the question of depth as well as accurately recalculating ingredient quantities. Not worth it. Perhaps consider making this apple crumble tart, instead - it's similar to the apple cake but made in a tart pan: https://www.everydayhealthyrecipes.com/easy-apple-crumble-tart/
Yvette Boleslav says
Thank you for your reply Monika, and for offering an alternative!
I made this in a 9 x 13 pan after all, and brought it to an Oscar party to honor the film Zone of Interest. It turned out very nicely. The only disappointment was that the meringue kind of disappeared.
Monika says
Glad you enjoyed it! The meringue layer is not meant to be very thick, it's there to give the top crumble layer a little lift, plus it's a way of using up the egg whites.