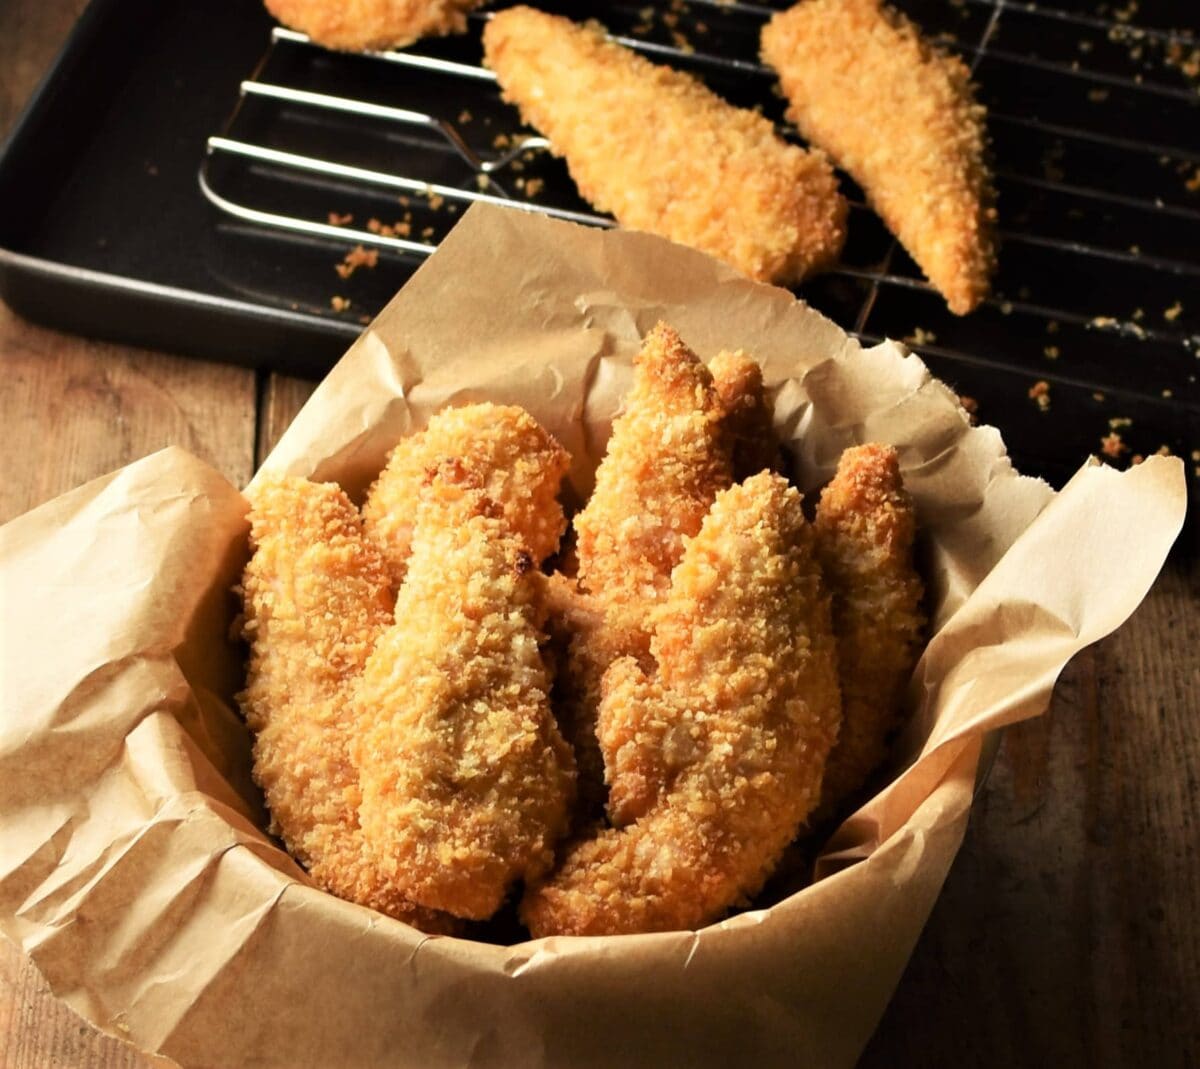
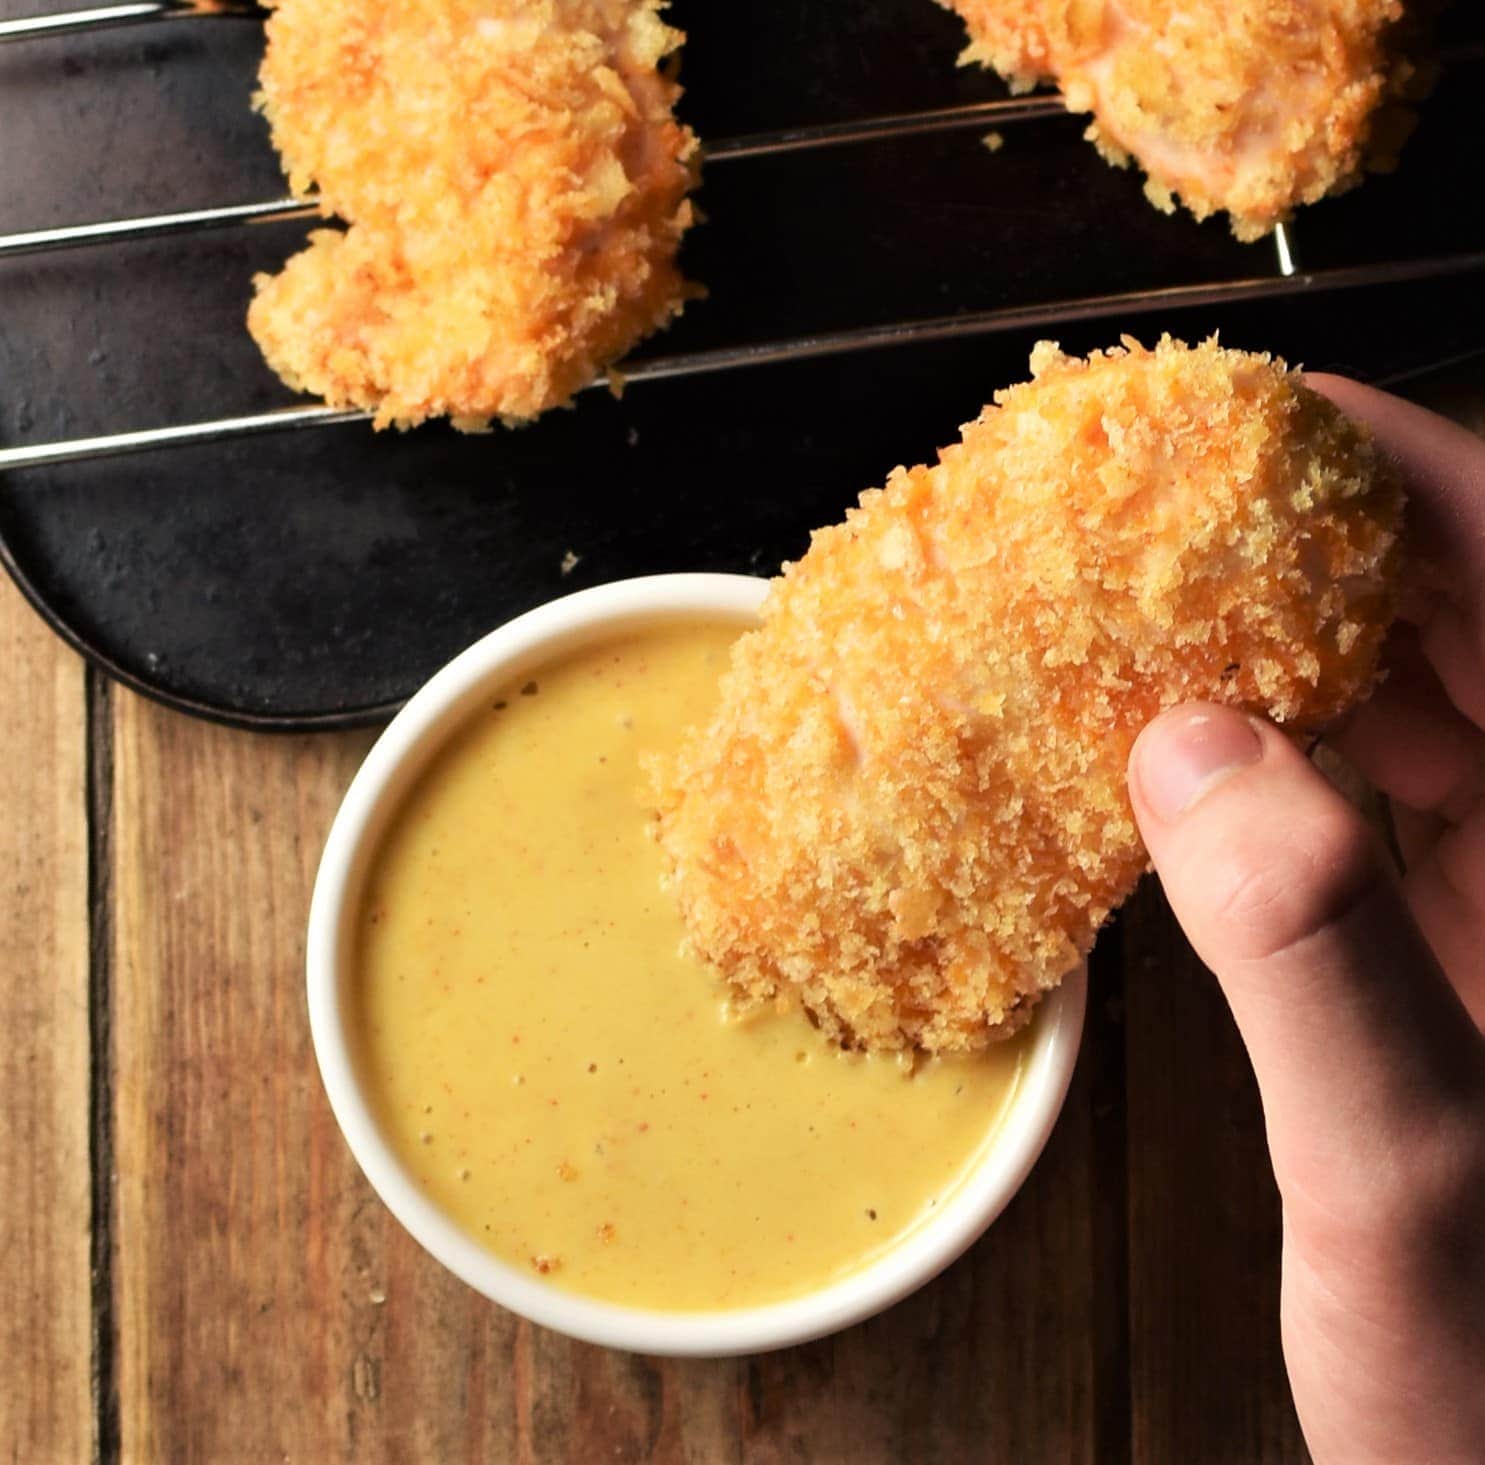
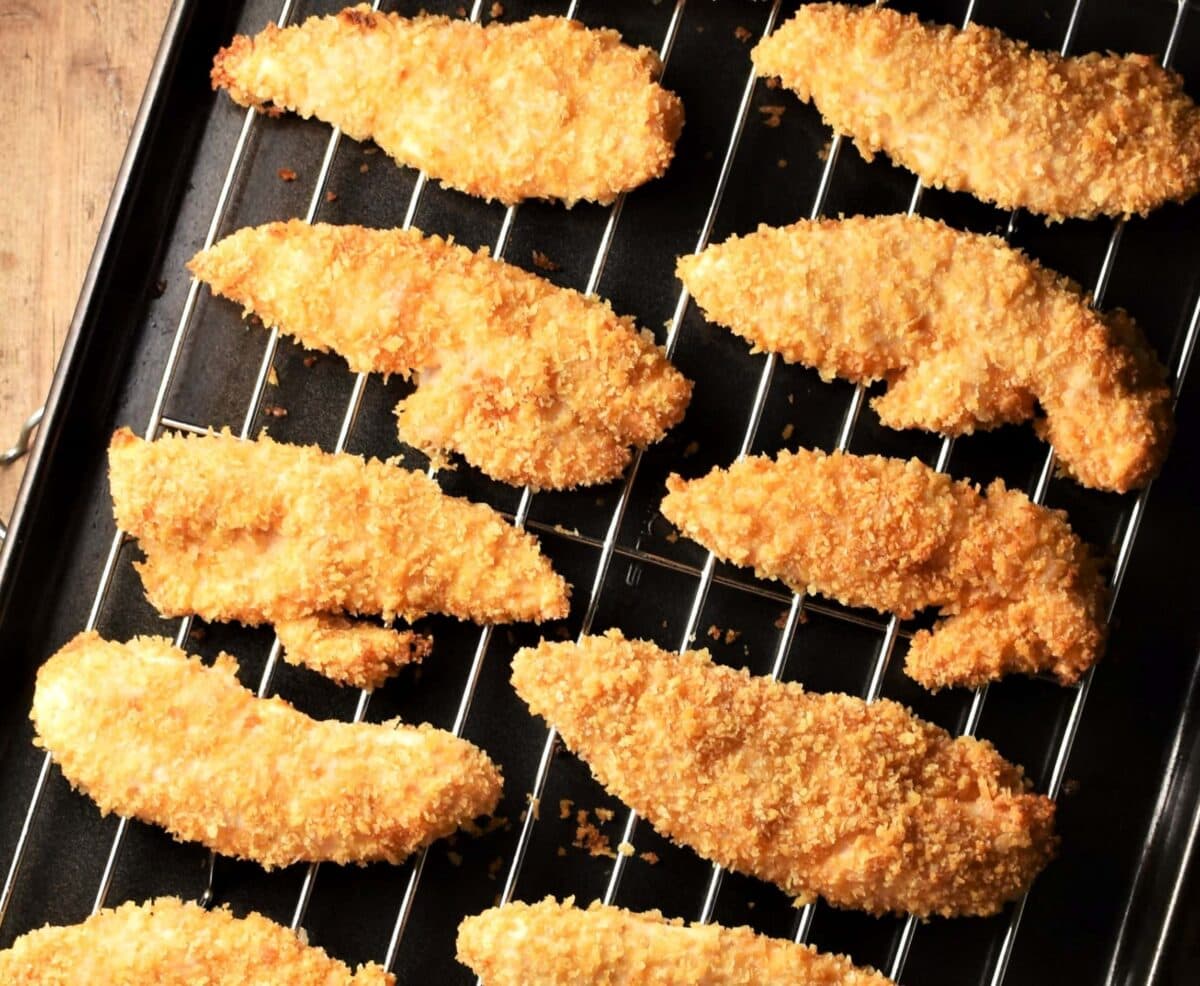
These oven baked chicken fingers are juicy and tender on the inside and super crispy on the outside. Made using panko breadcrumbs they contain a handful of spices, a little oil and come together in under 30 minutes - including preparation! Delicious served with homemade dill mayo!
See also crispy salmon fish fingers.
Oven baked chicken fingers (or tenders) are made using chicken tenderloins, which are strips of white meat located under breast meat. Baking chicken tenders in the oven is easy and produces a deliciously crispy finish despite adding a moderate amount of fat.
The classic method of making breaded chicken involves dipping the chicken in flour, then egg wash then breadcrumbs. I have shortened preparation time by combining the egg with the flour along with a few spices (for flavour) to create a 'glue' for the breadcrumbs. Simply immerse the tenderloins in the egg mixture then coat in the breadcrumbs and bake!
Why you will love this recipe
- Oven baking chicken fingers produces a super crispy finish.
- It's quick and easy to make and there is no need to turn the chicken tenders over.
- It's healthier than deep frying or even shallow frying.
- It guarantees great results every time!
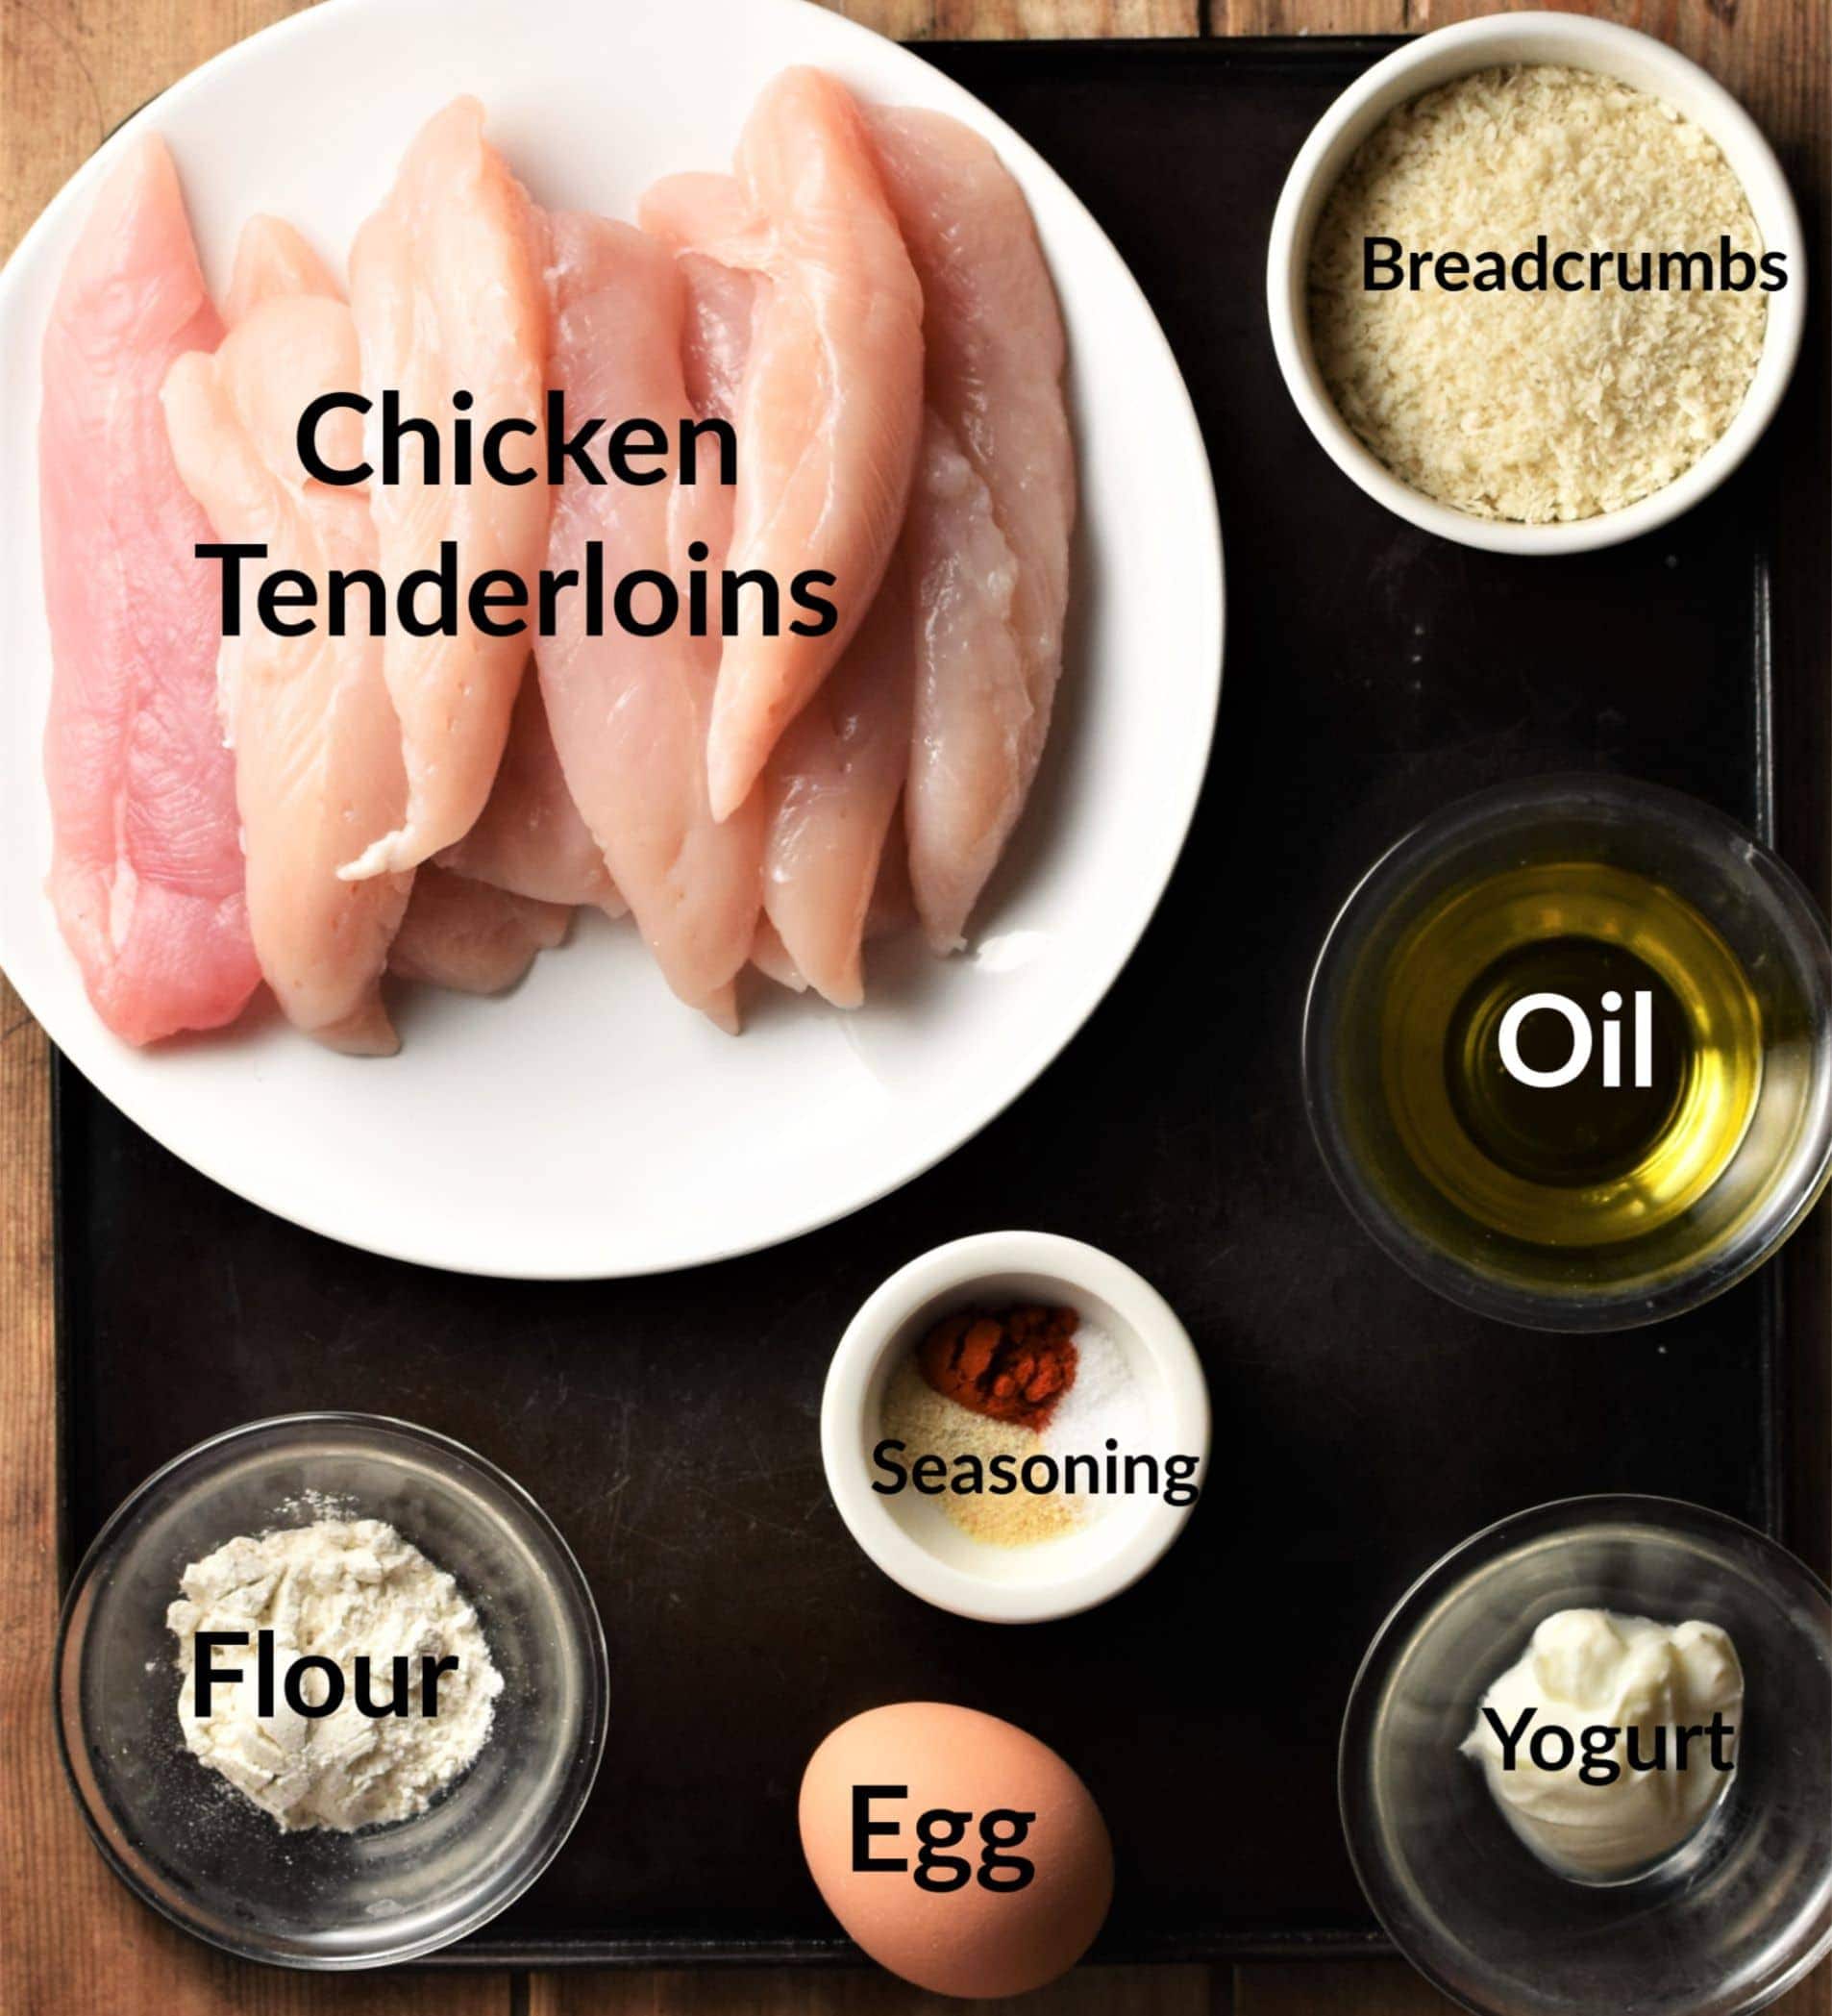
Oven baked chicken fingers ingredients and substitutions
- Chicken tenderloins:
I strongly recommend using tenderloins as they are similar in size and will, therefore, cook evenly. However, if you prefer to use chicken breast make sure you cut it into similar size strips.
You can often buy chicken breasts with the tenderloins attached to them though tenderloin strips are also sold separately.
- Breadcrumbs:
It is important to use panko breadcrumbs for making breaded chicken tenders in the oven. These breadcrumbs can be a little pricey but there is an easy way to avoid this - simply make your own! I actually made these chicken tenders using store bought as well as homemade panko and the results were identical!
- Oil: Used for infusing the breadcrumbs so the chicken fingers crisp up and brown nicely in the oven.
- Flour: Thickens the dredging mixture.
- Yogurt and egg.
- Seasoning: Salt, pepper, paprika, garlic and onion granules. You can also add a little thyme or Italian herbs if desired.
Step-by-step recipe instructions
1.Preheat the oven to 450 F/ 230 C/ gas mark 8. Place a rack on top of a large baking sheet and set aside.
2. Toast panko: In a large pan heat the oil, add the breadcrumbs, season lightly and toast over a medium heat for 3-4 minutes or until golden stirring all the time. Remove from the heat and place in a bowl to cool (for about 5 minutes).
3. Make egg wash: In a mixing bowl whisk together the egg, onion and garlic granules, cayenne, salt, yogurt and flour until smooth.

4. Coat in egg wash: Place the chicken tenders in the mixture and stir until thoroughly combined.

5. Coat in breadcrumbs: Gently wipe each strip against the side of the bowl as you take it out (to remove excess moisture) and coat in the breadcrumbs. Press the chicken gently into the mixture to ensure it's thoroughly covered shaking off excess crumbs.

6. Bake: Arrange the strips on top of a rack on a baking sheet not too close together (so they crisp up evenly) and bake in the upper part of the oven for 11 minutes (no need to turn them over).

7. Serve: Remove from the oven and serve immediately.
Serving suggestions
These homemade oven baked chicken tenders are versatile and can be served:
- As a snack/appetizer: delicious with dips and sauces including creamy dill and mustard sauce, avocado mayo, roasted tomato dip, homemade ranch dip or healthy bbq sauce.
- As a meal: with your favourite side, such as rice or quinoa, as well as salads, such as refreshing sauerkraut salad, crunchy coleslaw or pasta salads, including raw broccoli and pesto pasta salad.
Top tips for making oven baked chicken tenders
- Ensure the oven is very hot.
- Arrange the chicken pieces on top of a rack with spaces in between so they crisp up evenly.
- Do NOT place the chicken tenders directly on top of a baking sheet - they may not crisp up evenly.
- It is essential to use panko or panko style breadcrumbs for maximum crispiness. It is also essential to toast them with a little oil before coating the chicken (toasting ensures the oil is evenly distributed, the crumbs are crispy and will crisp up further in the oven).
- When you remove the chicken tenders out of the egg mixture gently wipe against the side of the bowl to get rid of excess moisture.
- Make ahead: You can place the chicken in the egg mixture several hours in advance. You can also toast the breadcrumbs ahead and keep in a bowl (not covered) for up to a day.
- Best served immediately.
- Not suitable for freezing.

More crispy chicken recipes to try next
See also these other easy meal ideas including more chicken recipes!
Recipe

Oven Baked Super Crispy Chicken Fingers
Ingredients
- 1.1 pounds (500 g) chicken tenderloins
- 1 small egg
- 1 tablespoon flour
- 1 tablespoon thick yogurt
- ⅓ teaspoon garlic granules, onion granules, cayenne pepper each
- ½ teaspoon fine sea salt
- 1½ cups panko breadcrumbs
- 2 tablespoons olive oil
Instructions
- Preheat the oven to 450 F/ 230 C/ gas mark 8. Place a rack on top of a large baking sheet and set aside.Start by toasting the panko. In a large pan heat up the oil, add the breadcrumbs, season lightly and toast over a medium heat for 3-4 minutes or until golden stirring all the time. Remove from the heat and place in a shallow bowl to cool (for about 5 minutes).
- In a mixing bowl whisk together the egg, onion and garlic granules, cayenne, salt, yogurt and flour until smooth. Place the chicken strips in the mixture and stir until thoroughly combined.
- Gently wipe each strip against the side of the bowl as you take it out (to remove excess moisture) and coat in the breadcrumbs. Press the chicken gently into the mixture to ensure it's thoroughly covered shaking off excess crumbs.
- Arrange the strips on top of a rack on a baking sheet not too close together (so they crisp up evenly) and bake in the upper part of the oven for 11 minutes (no need to turn them over).Remove from the oven and serve immediately.
Notes
- Ensure the oven is very hot.
- Arrange the chicken pieces on top of a rack with spaces in between so they crisp up evenly.
- Do NOT place the chicken tenders directly on top of a baking sheet - they may not crisp up evenly.
- It is essential to use panko or panko style breadcrumbs for maximum crispiness. It is also essential to toast them with a little oil before coating the chicken (toasting ensures the oil is evenly distributed, the crumbs are crispy and will crisp up further in the oven).
- When you remove the chicken strips out of the egg mixture gently wipe against the side of the bowl to get rid of excess moisture.
- Make ahead: You can place the chicken in the egg mixture several hours in advance. You can also toast the breadcrumbs ahead and keep in a bowl (not covered) for up to a day.
- Best served immediately.
- Not suitable for freezing.
- Preparation time includes the time needed to cool the toasted breadcrumbs.
Nutrition
*Nutritional information is automatically generated and should be considered as an estimate.
**A note about baking: If using a fan-assisted oven refer to your appliance's instructions and adjust the temperature accordingly.
Keep in touch!
If you make these breaded baked chicken tenders I'd love to know how they turned out for you. Let me know in the comments below, thanks:)
Follow me on Facebook, Instagram and Twitter for regular recipe updates! Or you could subscribe to this blog and receive all my latest recipes right into your mailbox!

Karly says
My name is Karly, and I am an adult chicken finger addict. Okay there, I said it. These look absolutely off the charts!
Monika says
I don't think there is any shame in being partial to chicken fingers, whatever age you are:)